In this article, we’ll be setting up a basic TypeORM started. I want this starter in my toolkit to showcase a conversion to Prisma later.
Note: You can use this article to set up a node application powered by TypeORM.
For those who don’t know TypeORM yet, it is an ORM that can run very widely because they support any JavaScript version.
In non-technical terms, it is a way to interact with and manage your database. TypeORM takes care of the migrations and structure of your database. And on the other side, it can execute queries on the database.
TypeORM is a super popular system with a massive user base.
The end goal for today is to have a primary database managed by TypeORM. We also want to have some framework to interact with this database.
Setting up a TypeORM project
Luckily, TypeORM provides a super powerful CLI that can generate a starter project for us.
To install the CLI, you can run the following command.
npm install typeorm -g
To generate the boilerplate, we can run the following command:
typeorm init --name typeorm-starter --database postgres
As you can see, we can specify the name of this project and which database we want to use.
I’ve chosen Postgres for this one as we are doing some more things around Postgres.
You can choose any of the following:
mysql,mariadb,postgres,cockroachdb,sqlite,mssql,oracle,mongodb,cordova,react-native,expo,nativescript.
Once it’s set up, you can navigate the project and install all the dependencies.
cd typeorm-starter
npm i
Open your project and edit the ormconfig.json file.
This file should reflect your database settings. Generally, you’ll only have to modify the following fields.
- username
- password
- database
Setting up the entities
In the project, you should see a User entity.
We want to showcase some relation, so taken from the TypeORM docs, let’s add a Photo entity.
You can create the Photo.ts file in the entity directory.
import { Entity, Column, PrimaryGeneratedColumn, ManyToOne } from 'typeorm';
import { User } from './User';

@Entity()
export class Photo {
  @PrimaryGeneratedColumn()
  id: number;

  @Column({
    length: 100,
  })
  name: string;

  @Column('text')
  description: string;

  @Column()
  filename: string;

  @Column('integer')
  views: number;

  @Column()
  isPublished: boolean;

  @ManyToOne((type) => User, (author) => author.photos)
  user: User;
}
Since we are mapping these photos to the user, we should add the other side of the relation in the user model.
@OneToMany((type) => Photo, (photo) => photo.user)
photos: Photo[];
If you are keen to discover all the possible types, you can use the TypeORM docs on this are excellent.
Once this is set up, we will have our entities done. However, they do not exist in the database as of yet. And no worries, TypeORM will manage all of this for us.
Connecting with the database
We don’t have any way to connect with these models. And our database doesn’t even have the tables yet.
Let’s add Fastify as our routing framework because it’s super easy to set up.
npm i fastify
Next, open the index.ts in the src directory.
Let’s import all the modules we need.
import 'reflect-metadata';
import { createConnection } from 'typeorm';
import { Photo } from './entity/Photo';
import { User } from './entity/User';
const fastify = require('fastify')({ logger: true });
Then we can use the createConnection function to establish a connection for TypeORM.
createConnection()
  .then(async (connection) => {
    // Connection available here
  })
  .catch((error) => console.log(error));
Where this connection is available, we’ll use our code. We’ll use Fastify as our framework, so let’s set up a boilerplate with two routes.
- Post route to seed the database
- Get a route to retrieve all users with their photos
Follow this guide for a Fastify introduction
fastify.post('/seed', async (request, reply) => {
  // Todo
});

fastify.get('/', async (request, reply) => {
  // Todo
});

const start = async () => {
  try {
    await fastify.listen(3000);
  } catch (err) {
    fastify.log.error(err);
    process.exit(1);
  }
};
start();
Let’s look at what the post-action will look like.
I want to create one user that has two photos.
const user = new User();
user.firstName = 'Timber';
user.lastName = 'Saw';
user.age = 25;
await connection.manager.save(user);

const photo = new Photo();
photo.name = 'Me and Bears';
photo.description = 'I am near polar bears';
photo.filename = 'photo-with-bears.jpg';
photo.views = 1;
photo.isPublished = true;
photo.user = user;
await connection.manager.save(photo);

const photo2 = new Photo();
photo2.name = 'Me on a fishing trip';
photo2.description = 'I caught a massive fish';
photo2.filename = 'photo-with-fish.jpg';
photo2.views = 5;
photo2.isPublished = true;
photo2.user = user;
await connection.manager.save(photo2);
return 'database seeded';
The significant part about TypeORM is that we can directly use the entities as models.
As you can see, we use connection.manager.save to insert these models into the database.
If we now make a post request to our /seed endpoint, we should receive one user and two photos.
As for the get request, we can again leverage the manager but user the find method and search for our User entity.
We can pass an optional parameter to include the photo relation.
const users = await connection.manager.find(User, {
  relations: ['photos'],
});
return { users };
And that’s it.
If we run our code:
npm run start
By running the code and establishing the connection, we automatically create the tables in our database (if they don’t exist yet).
Let’s try and run the seed route we created.
You can perform a POST request to http://localhost:3000/seed.

And let’s see what happened in our database.
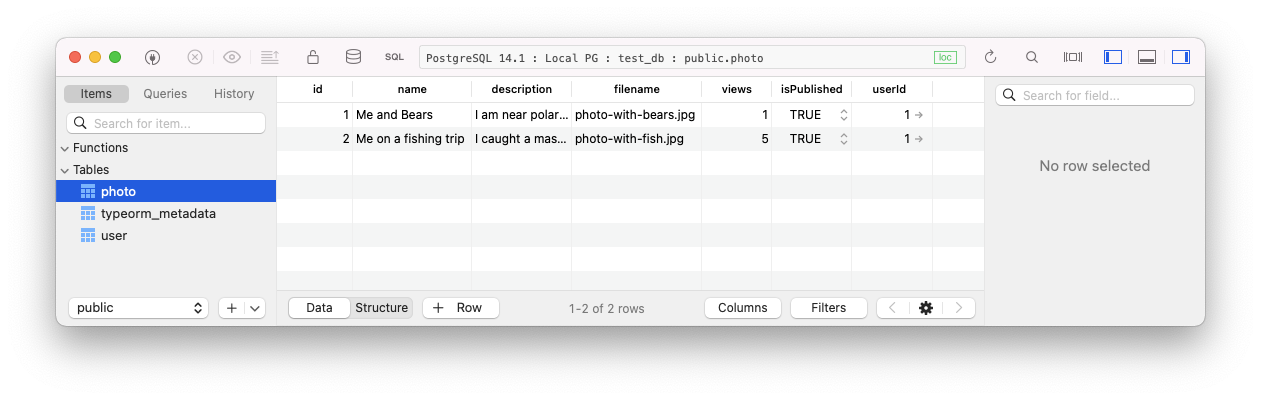
Yes, we have some data!
We can now try and query our webpage to see if it will return the data.
Open up the following webpage: http://localhost:3000/.
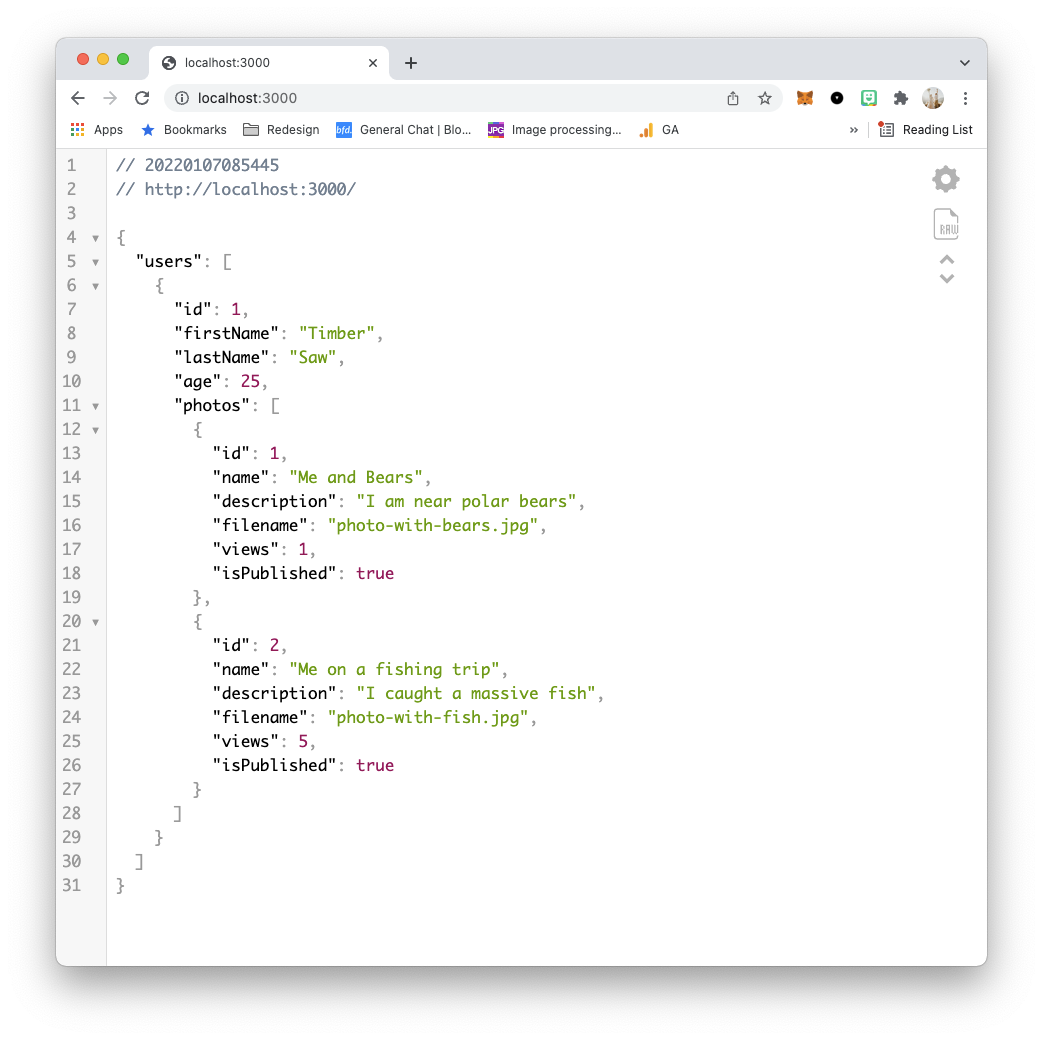
Pretty cool if you ask me!
I’ve uploaded the complete code to GitHub.
Thank you for reading, and let’s connect!
Thank you for reading my blog. Feel free to subscribe to my email newsletter and connect on Facebook or Twitter