So far, we setup an API in Laravel, and a great way to explore your API is making use of API Clients.
Some clients you can consider:
It all does the same, depending on whichever you like best. I recently moved from Postman to Insomnia.
So I’ll be showing you how to use Insomnia.
Authentication with our API
The first step is to authenticate with our API.
As you may have seen in our API documentation article, we need to make a post to the login endpoint.
Let’s open up Insomnia and add a new request.
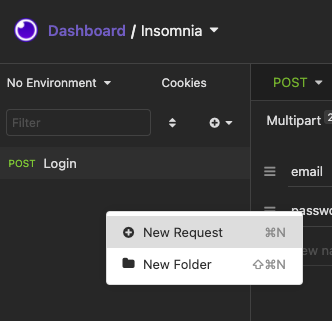
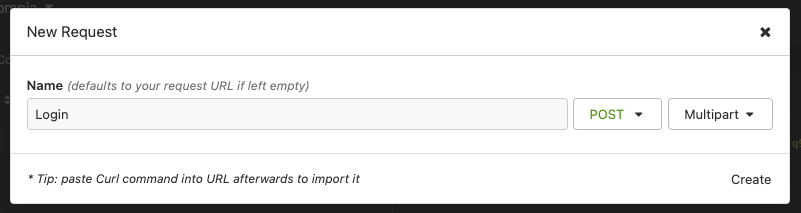
Give the request a good name, let’s say Login. On the right side, change the method to POST and the type to Multipart.
Once you’ve added the request, it appears in the detail view. Fill out the endpoint you want to test.
In our case: http://localhost:8084/api/login.
In the form section, add two fields: email and password.
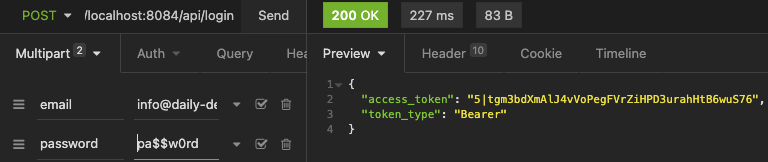
As you can see on the right-hand side, we get our response. This gives us an access_token we can use for further calls.
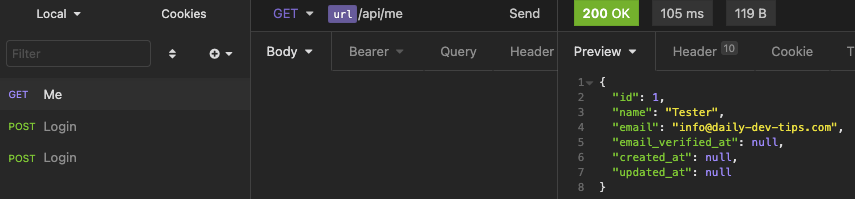
Let’s add the me request next. This will be a GET request to the /me endpoint.
Only now do we have to open up the Bearer section and add the token we just received on the login call.
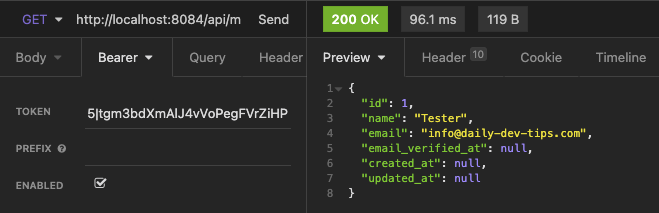
And this way, we can make authenticated requests to our API.
Managing environments
A cool thing most API clients can do is manage the environment. You often have your local environment, a staging/testing, and a production environment.
In Insomnia, it’s super easy to add these different variables so we can easily switch between them.
Click the No Environment button on the top left corner and click manage environments.
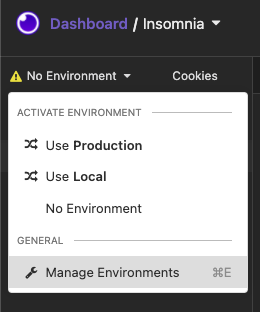
Here you will find a Base environment with variables that will work for every single one.
But we’ll add two new ones: a Production and a local one, which will only use a URL for now.
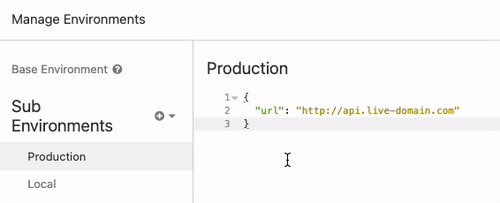
Now, if we go back to our request, we can change our URL to {{url}}; this will make it a dynamic variable.
This makes it super easy to switch between our environments without changing the URL all the time.
Automating our access token
Another thing we can automate is the access_token, it will expire, and we then manually need to do the login call again and re-set it.
But we can create another environment variable for this.
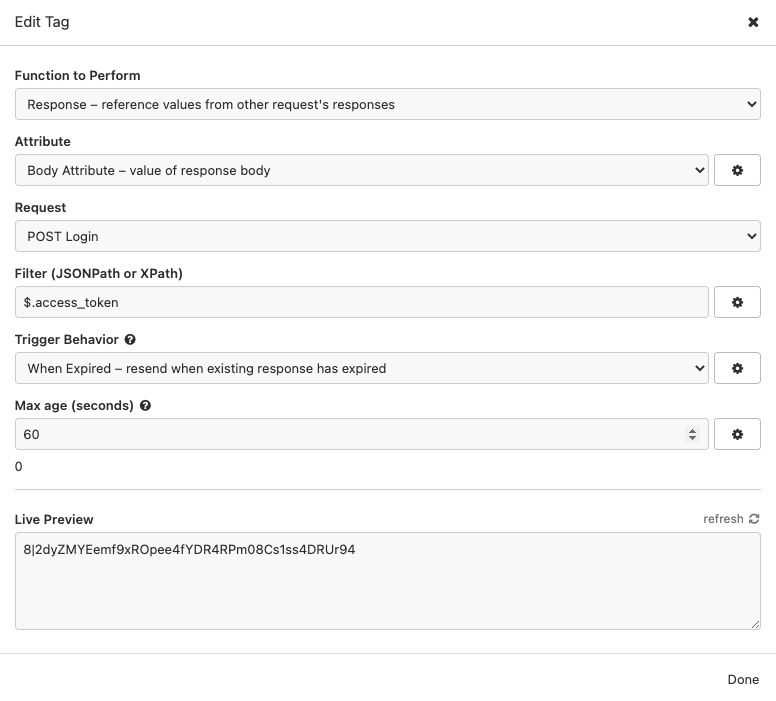
Go to the local environment, add an “access_token”, start typing response, and show Body Attributes.
You can then click this section and open up the tag details.
Since that is the variable name, we will set the tag to request the login call and filter the $.access_token. We can then set a trigger behavior to resend when it’s expired.
It will then automatically fetch a new token when needed.
This newly created access token we can then set on our other request in the token field.
Open the me call, and type _.access_token in the Token field.

And that’s it. We now have an easy way to switch environments and even automatically set the access_token!
Thank you for reading, and let’s connect!
Thank you for reading my blog. Feel free to subscribe to my email newsletter and connect on Facebook or Twitter