A big part of my MVP process is collecting all the data endpoints and testing them out. This will show signs of missing parts early on, and make sure you don’t hinder your development flow by awaiting API keys and so on.
As described in the previous article, we want to achieve a couple of different things split up between Revue and Sendy.
Revue:
- List all unsubscribed users
- List all subscribers
- Subscribe single user
- Unsubscribe single user
Sendy:
- Subscribe user(s)
- Unsubscribe user(s)
- Call webhook on subscribe
- Call webhook on unsubscribe
Knowing all these points, we will use this article to test if we have access to all this data and can get the information we need.
Revue API
The longest and most annoying part is getting access to the Revue API.
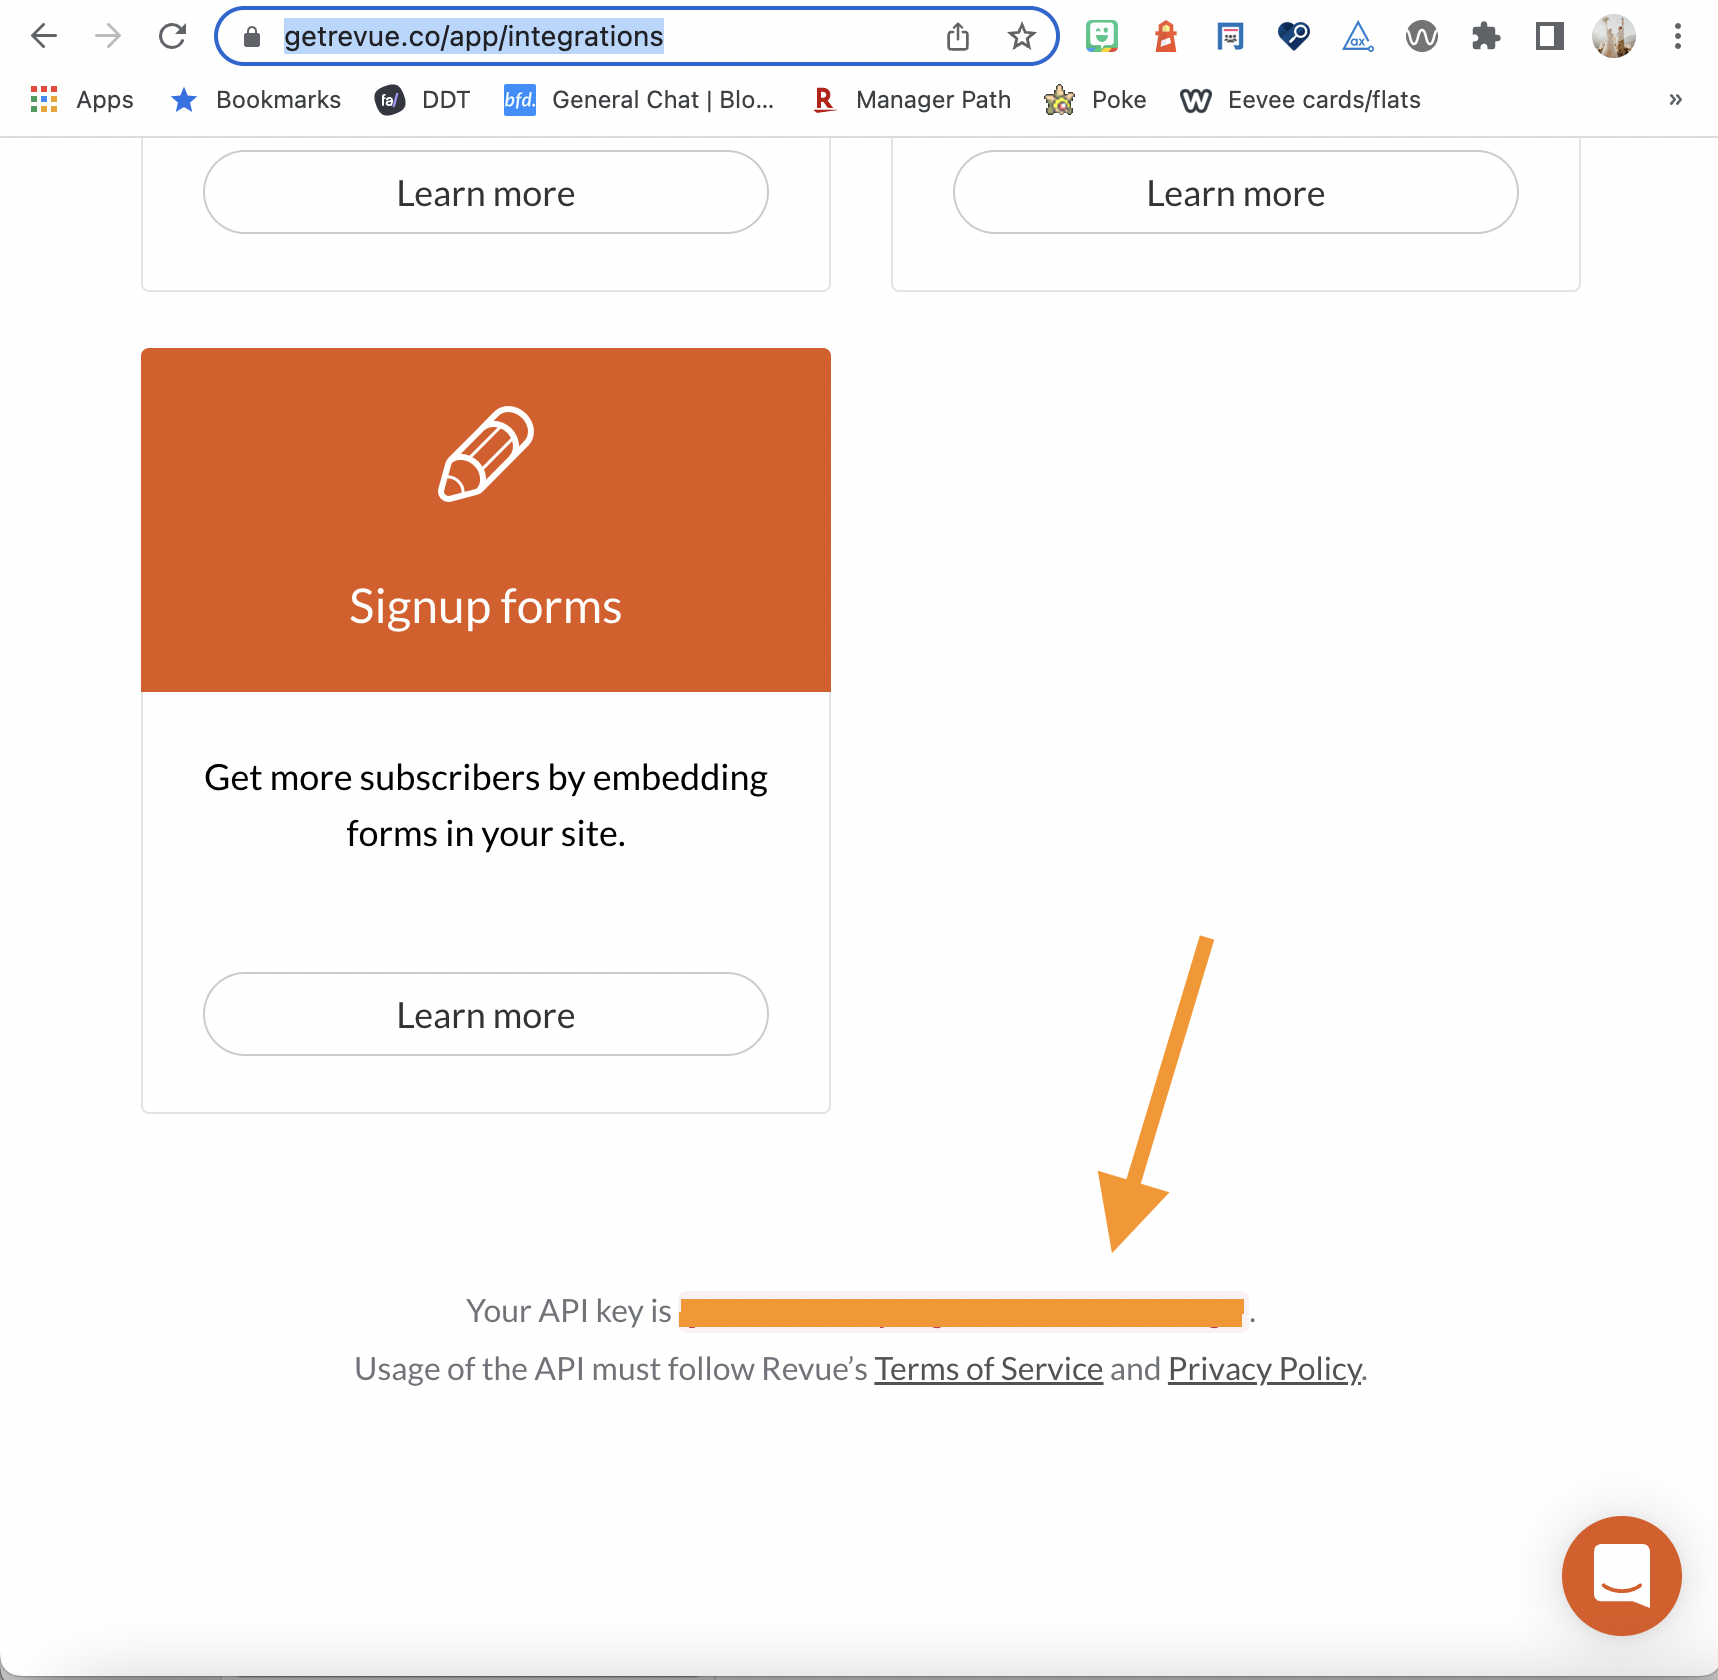
Once you’re signed in with Revue, you automatically get an API token. You can find this token on your settings page and click on integrations.

Then scroll down to the bottom to find your API key.
You might think, cool, let’s get started on the API.
And we can try that. Let’s open up Insomnia/Postman/whatever you use and try a call to: https://www.getrevue.co/api/v2/subscribers
You’ll need to set an Authorisation header with the value: Token {YOUR_API_TOKEN}.
Now try and request it.
Did it work? Suppose your answer is yes, great! You can go ahead and skip the following section.
However, if not, don’t worry. You might get a 401 unauthorized result like this.
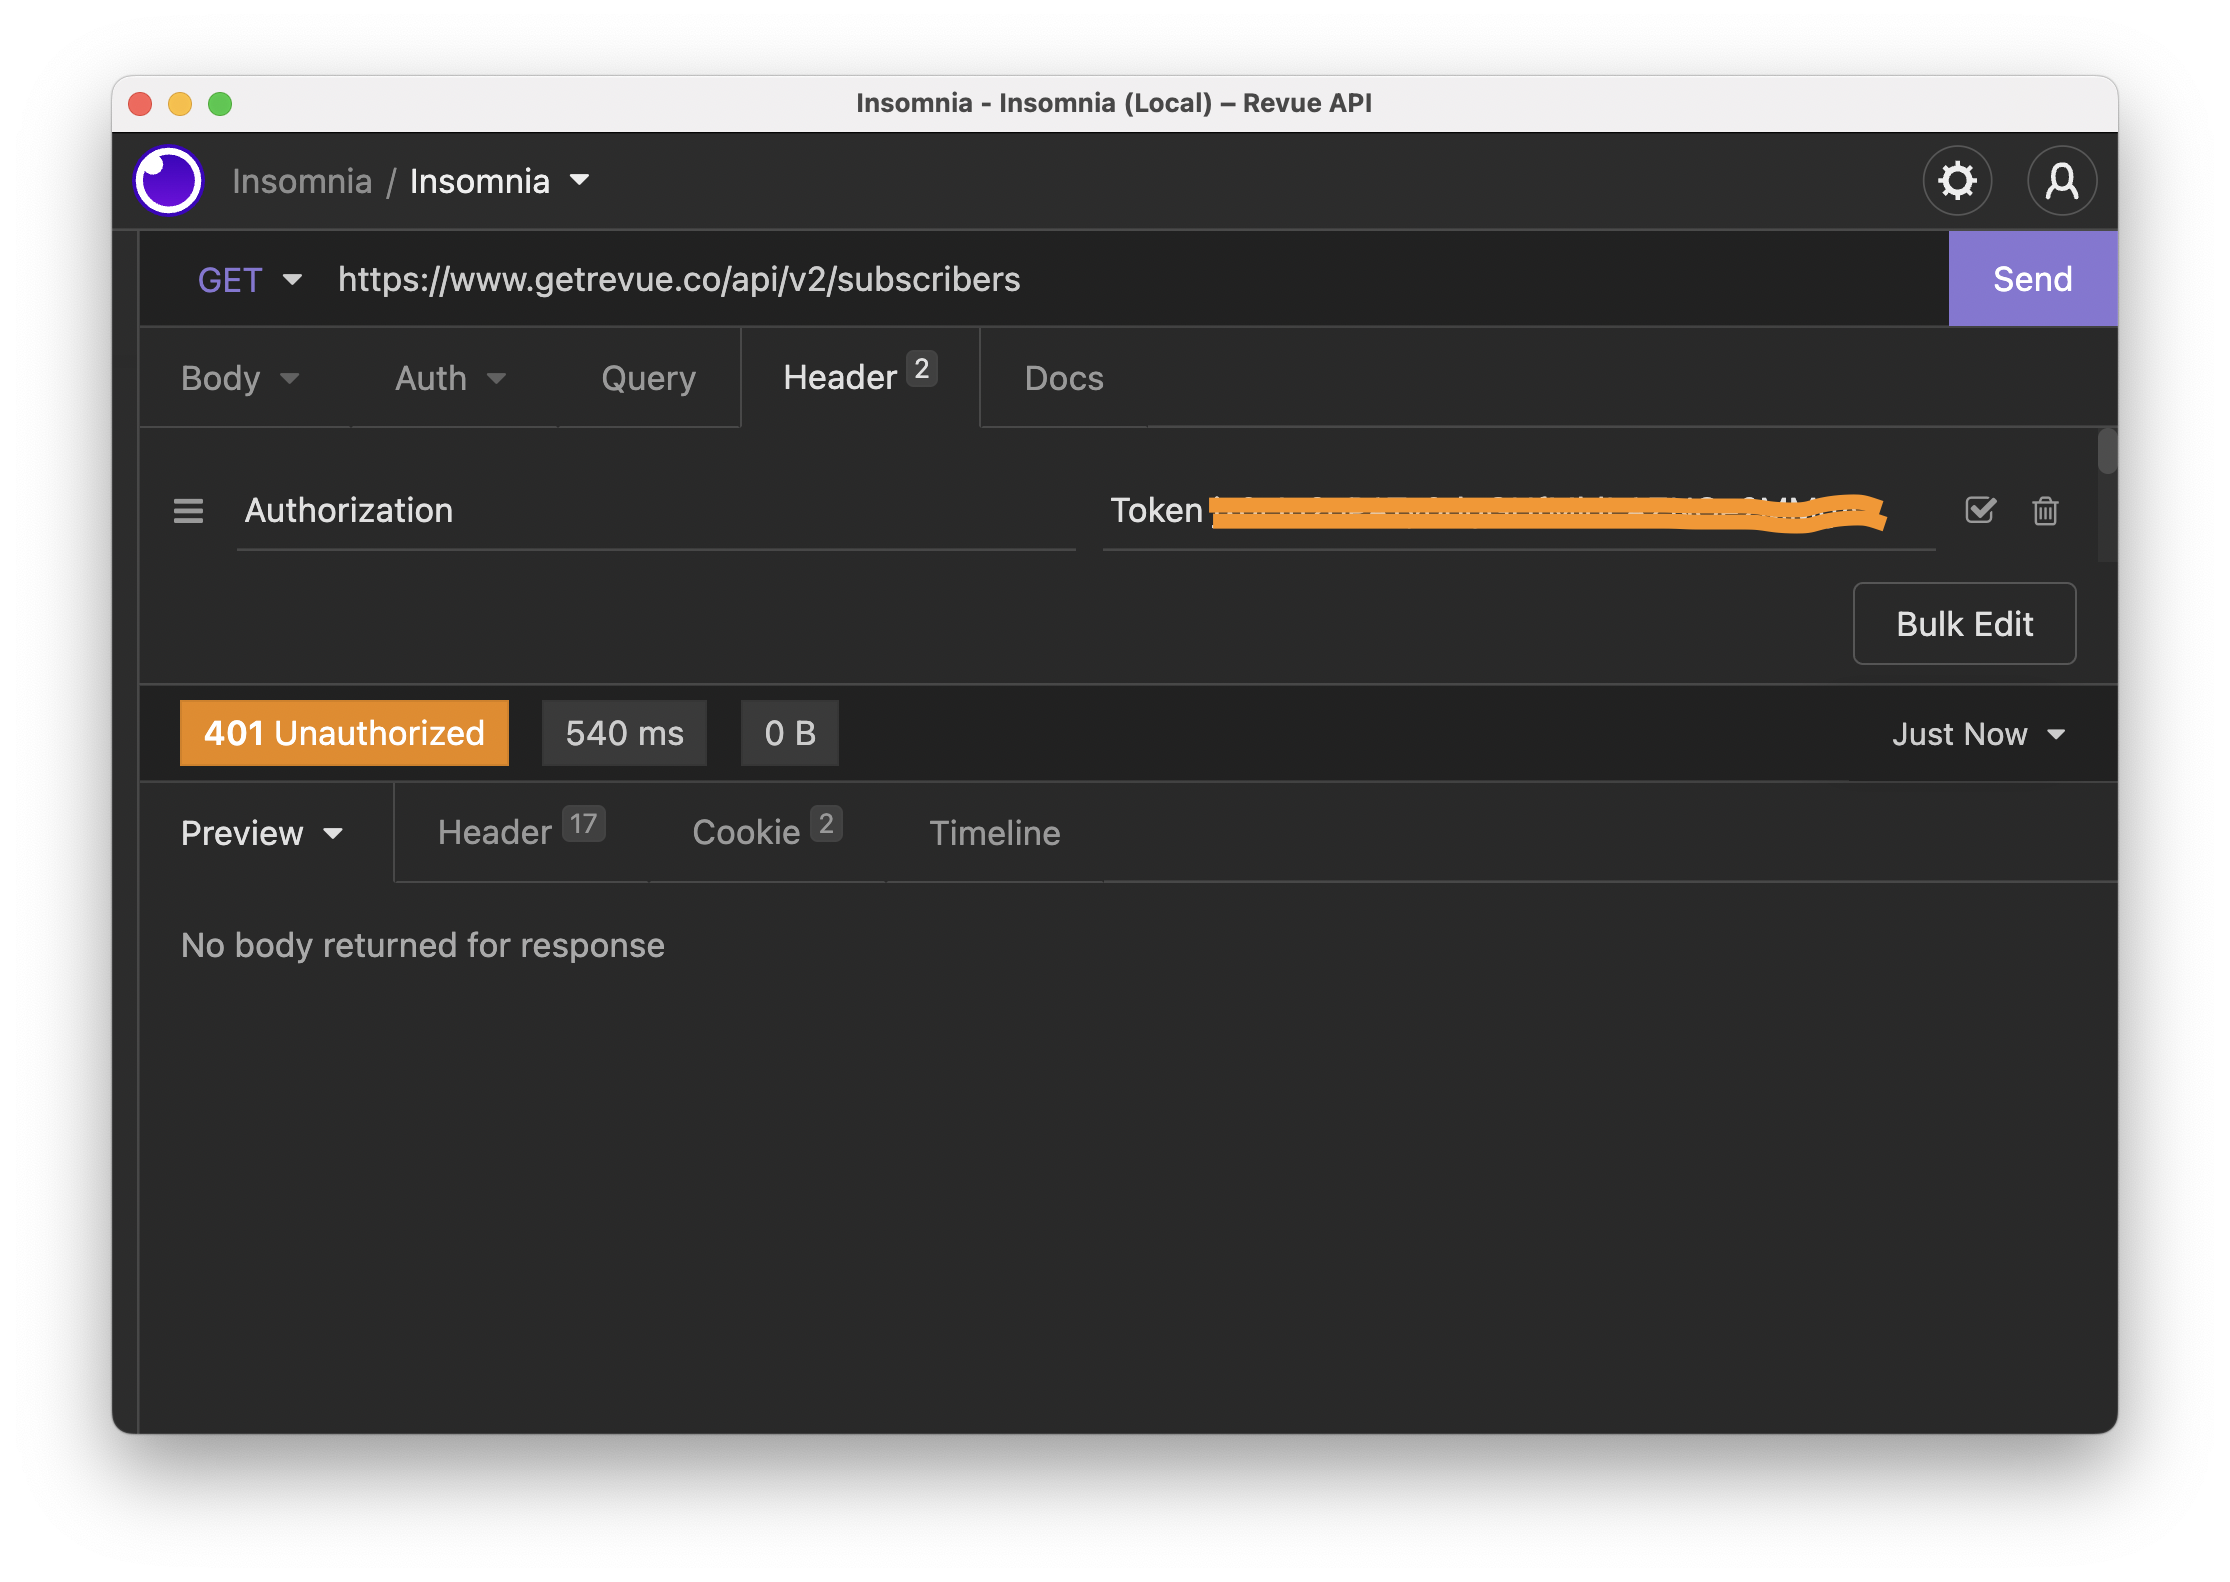
This is basically because your account needs verification. This is nowhere documented, and a lot of people struggled with this.
Verify your Revue account
At the time of writing, there is no clear documentation on how you get verified.
However, I followed these steps, and that worked for me.
Import a list of subscribers. (Note: Don’t use the manual function; import from a file!)
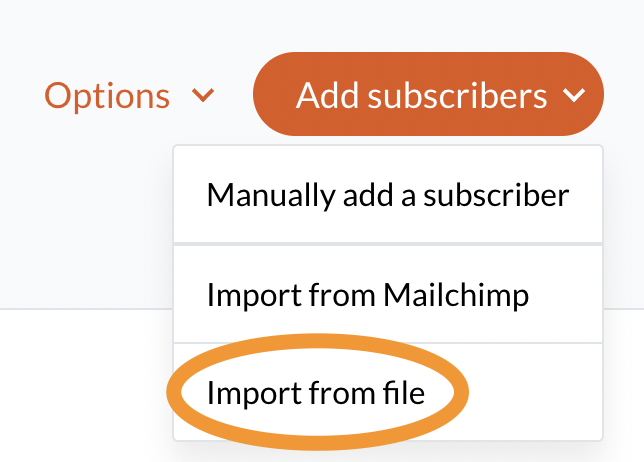
You can then enter your email and two commas like so:
[email protected],,
Note: The empty commas are for first and last names.
When completed, you should see a top ribbon appear that they are reviewing your account. This took up to a week for me.

Once the review is complete, you should be able to use the API.
Revue get all subscribers
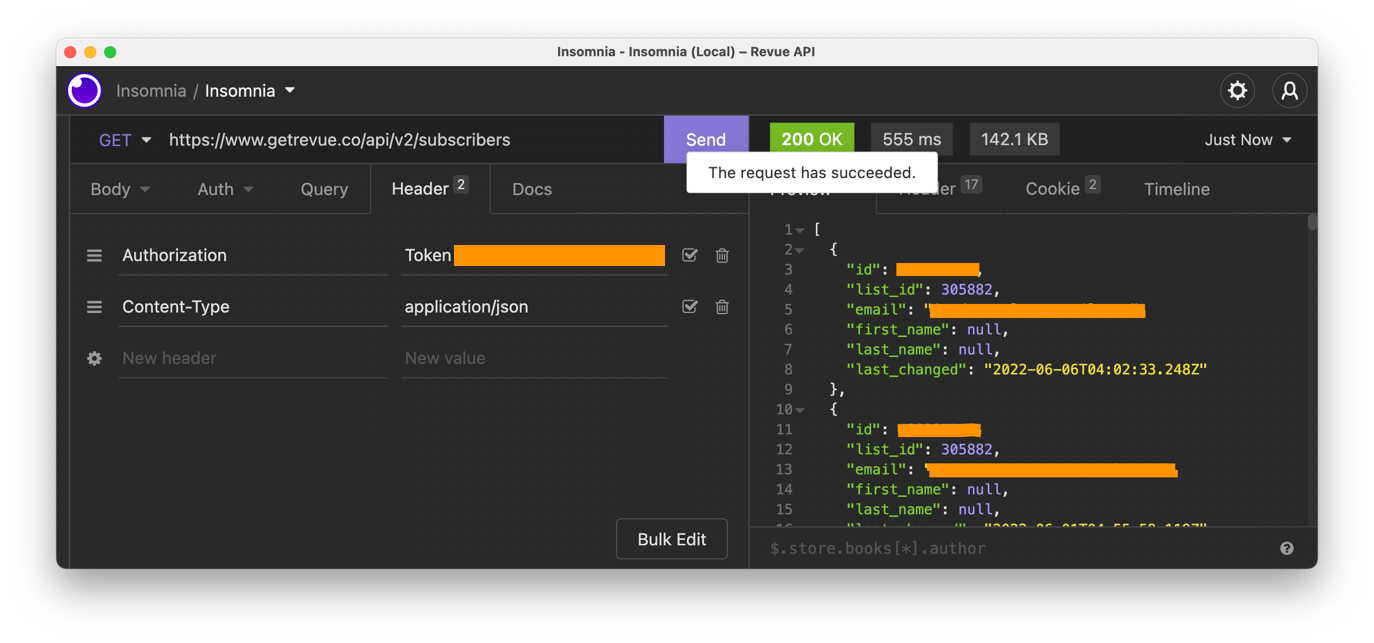
As you might have seen, we can query the following endpoint to get all subscribers.
GET: https://www.getrevue.co/api/v2/subscribers
For each call to the Revue API, you have to set the Authorization header to Token: {YOUR_API_KEY}.
You should get a response with a list of all the subscribers.
Revue get all unsubscribed users
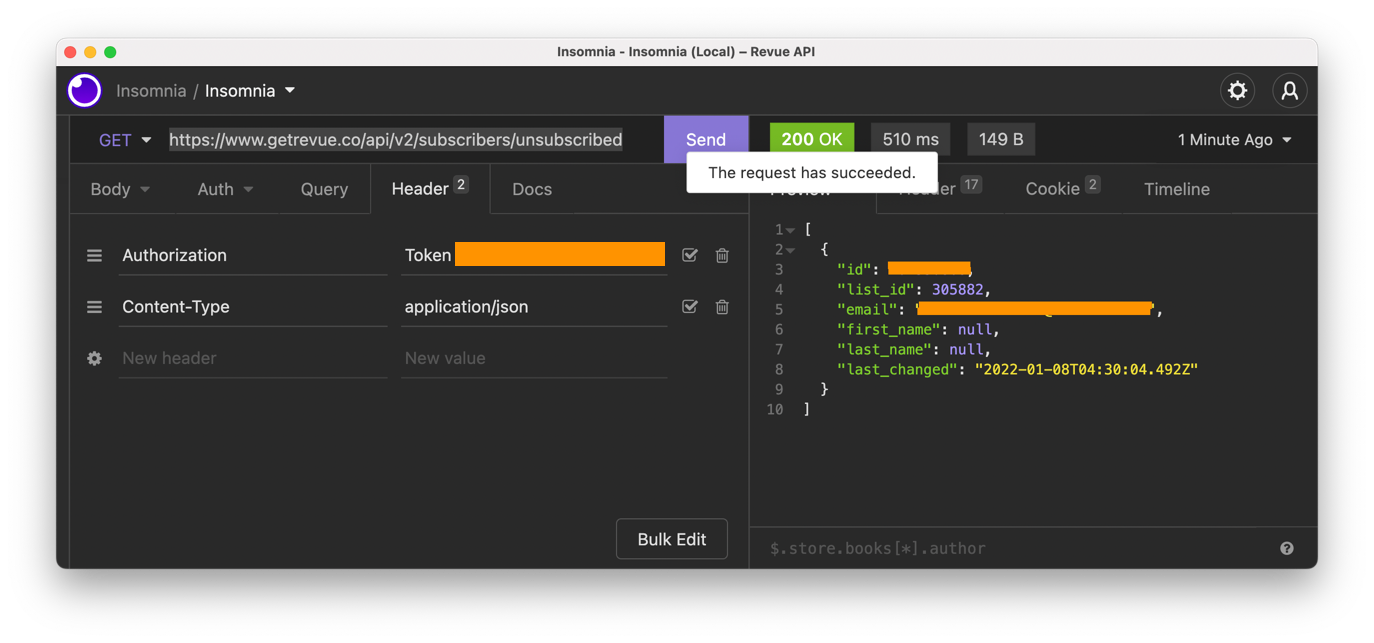
We can use the following endpoint to get everyone who unsubscribed on Revue.
GET: https://www.getrevue.co/api/v2/subscribers/unsubscribed
This should give you the same user list as the subscribes.
Revue subscribe a user
To ensure both lists are up to date, we will subscribe people to Revue if they subscribe in Sendy.
The endpoint for subscribing users to Revue is the following.
POST: https://www.getrevue.co/api/v2/subscribers
We can pass multipart form data as the body with the following objects.
- email (required)
- first_name
- last_name
- double_opt_in (default: true)
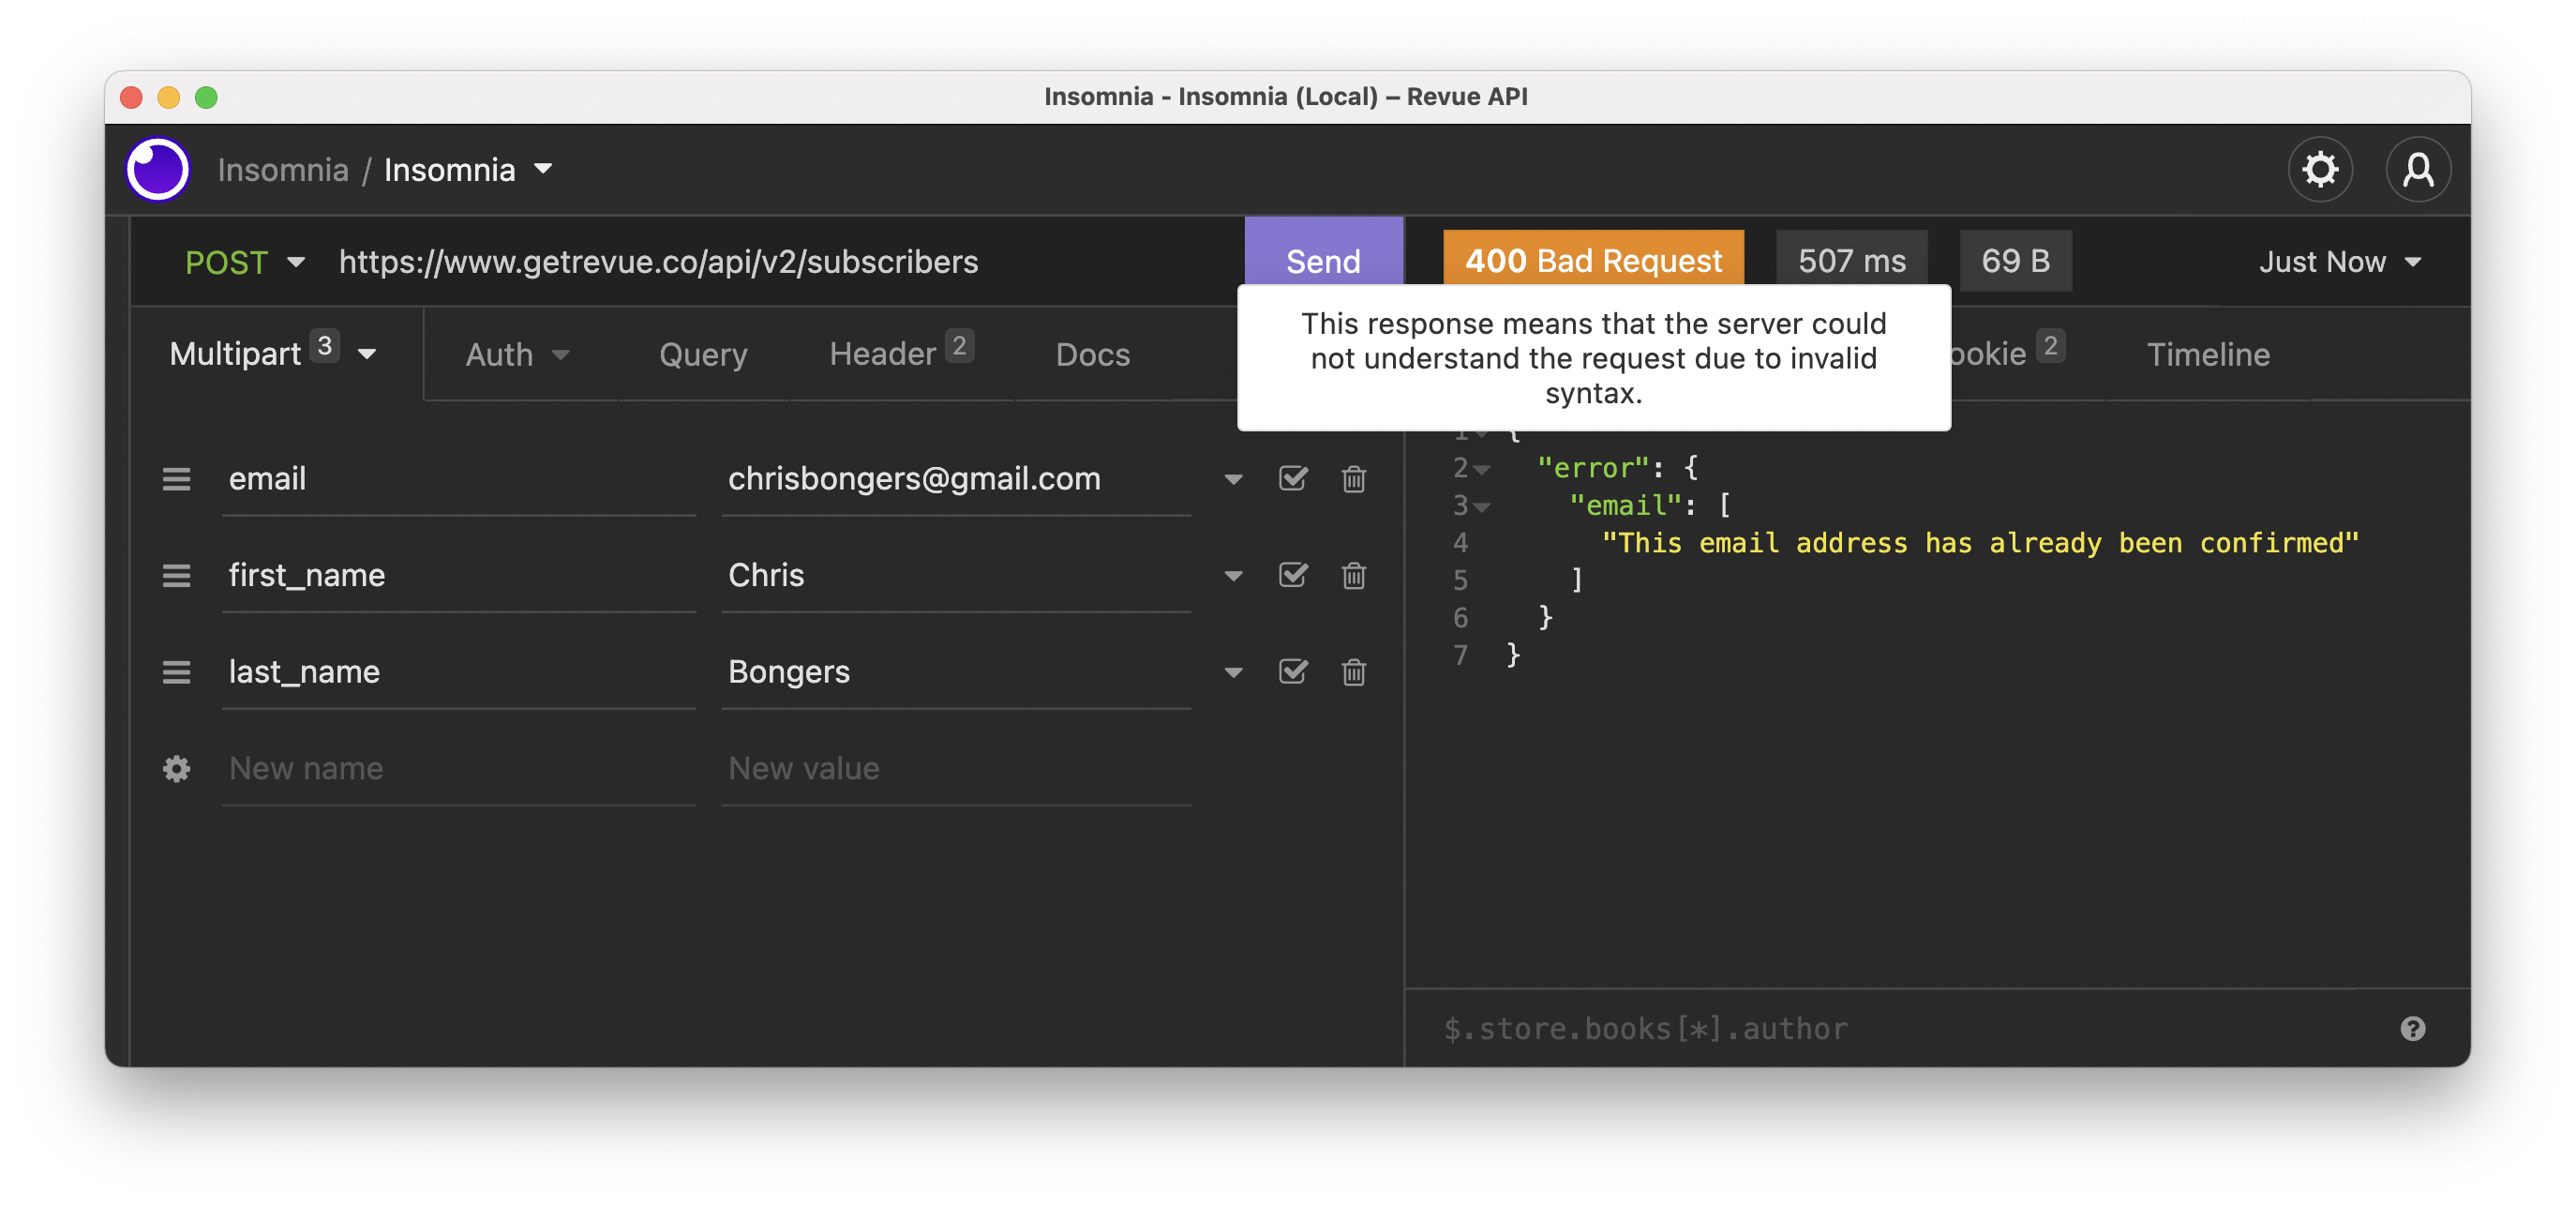
The image above shows that my user already exists in Revue. Otherwise, you’ll get a user object back if you want to use that.
Revue unsubscribe a user
Besides subscribing to users, we also want to unsubscribe them if they wish to.
This is the same process. The endpoint for that is:
POST: https://www.getrevue.co/api/v2/subscribers/unsubscribe
With the same objects as the subscribe multipart form data.
- email (required)
- first_name
- last_name
- double_opt_in (default: true)
After executing the command, the user will appear in your unsubscribed section of Revue.

Sendy API
We have used the Sendy API, and it’s super easy to work with.
To retrieve the API token, we have to visit our Sendy installation, click Settings, and then “Your API Token”.
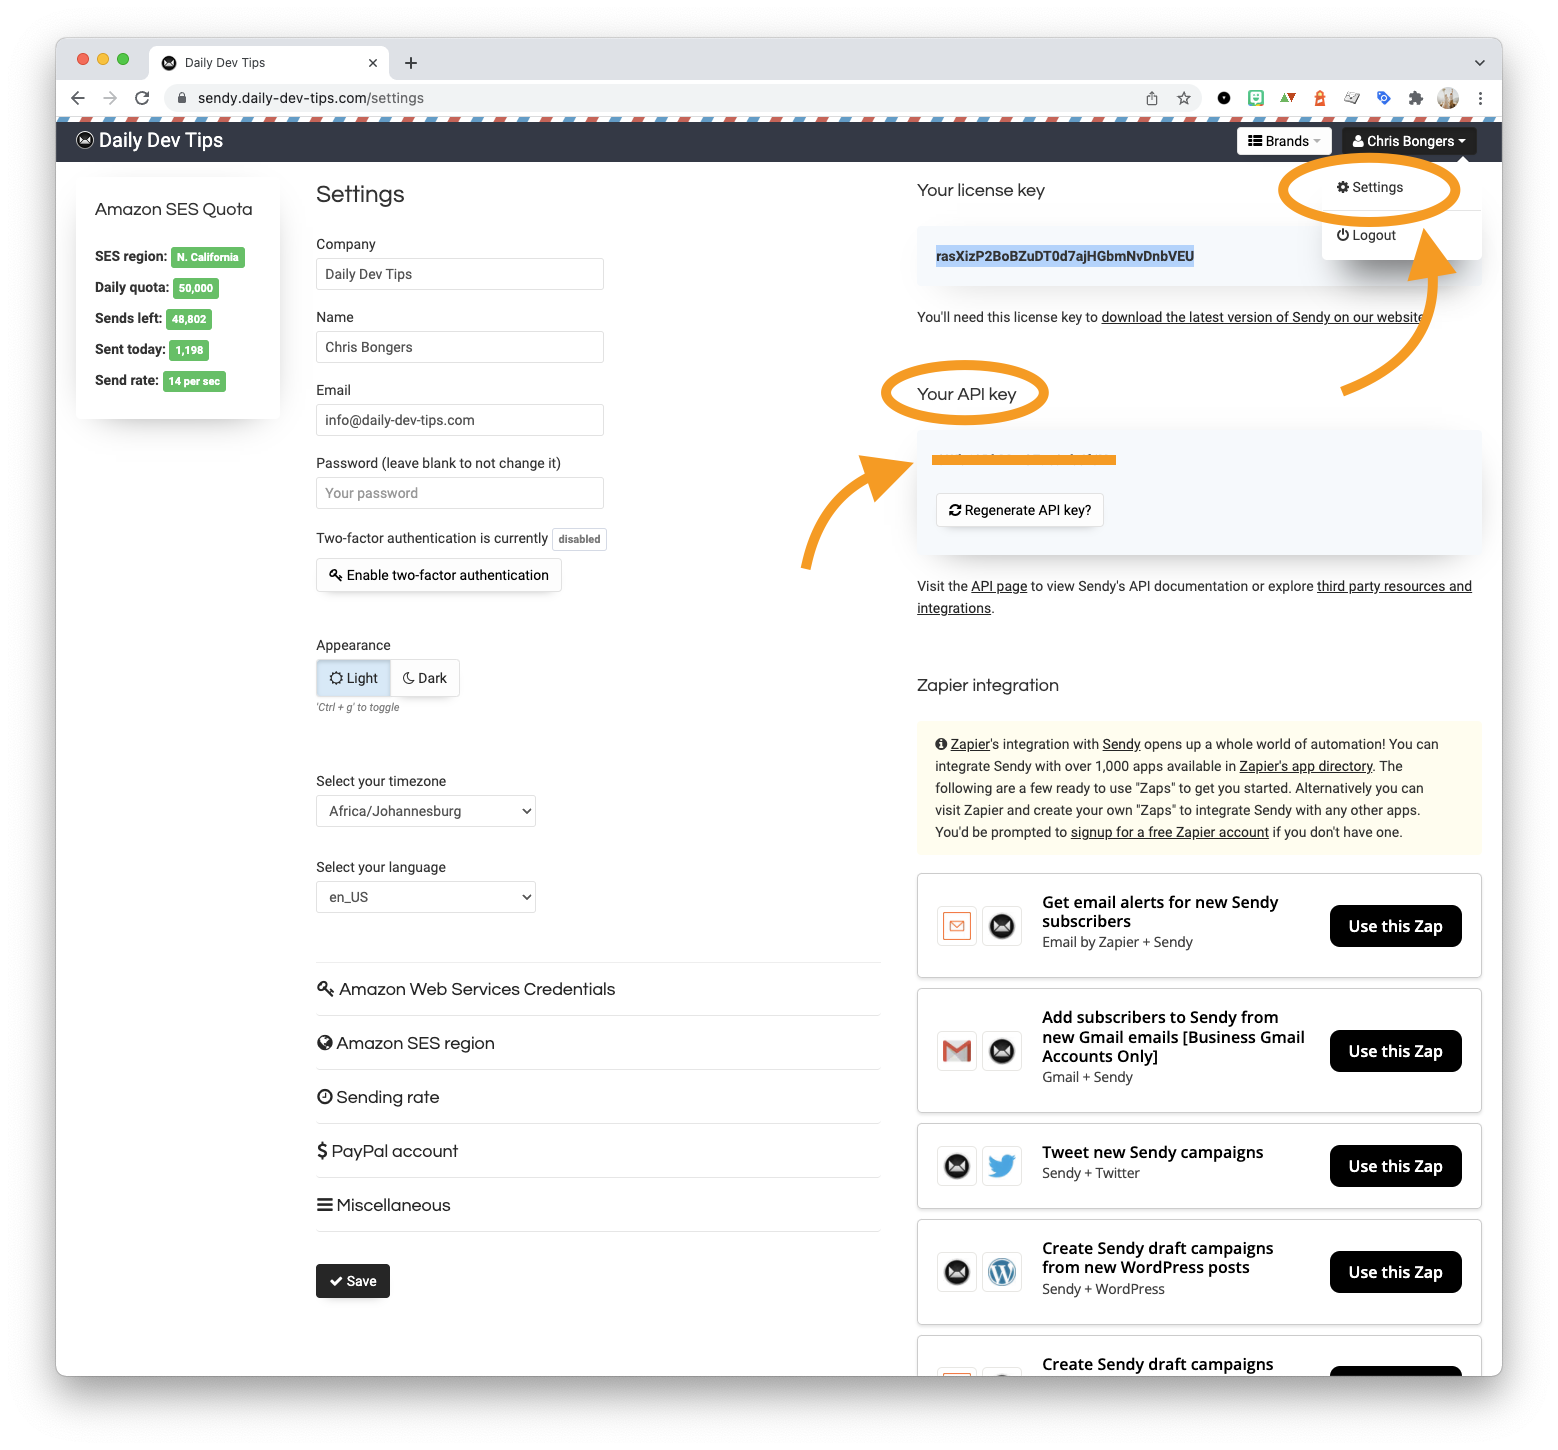
With this, we can start making requests to the API.
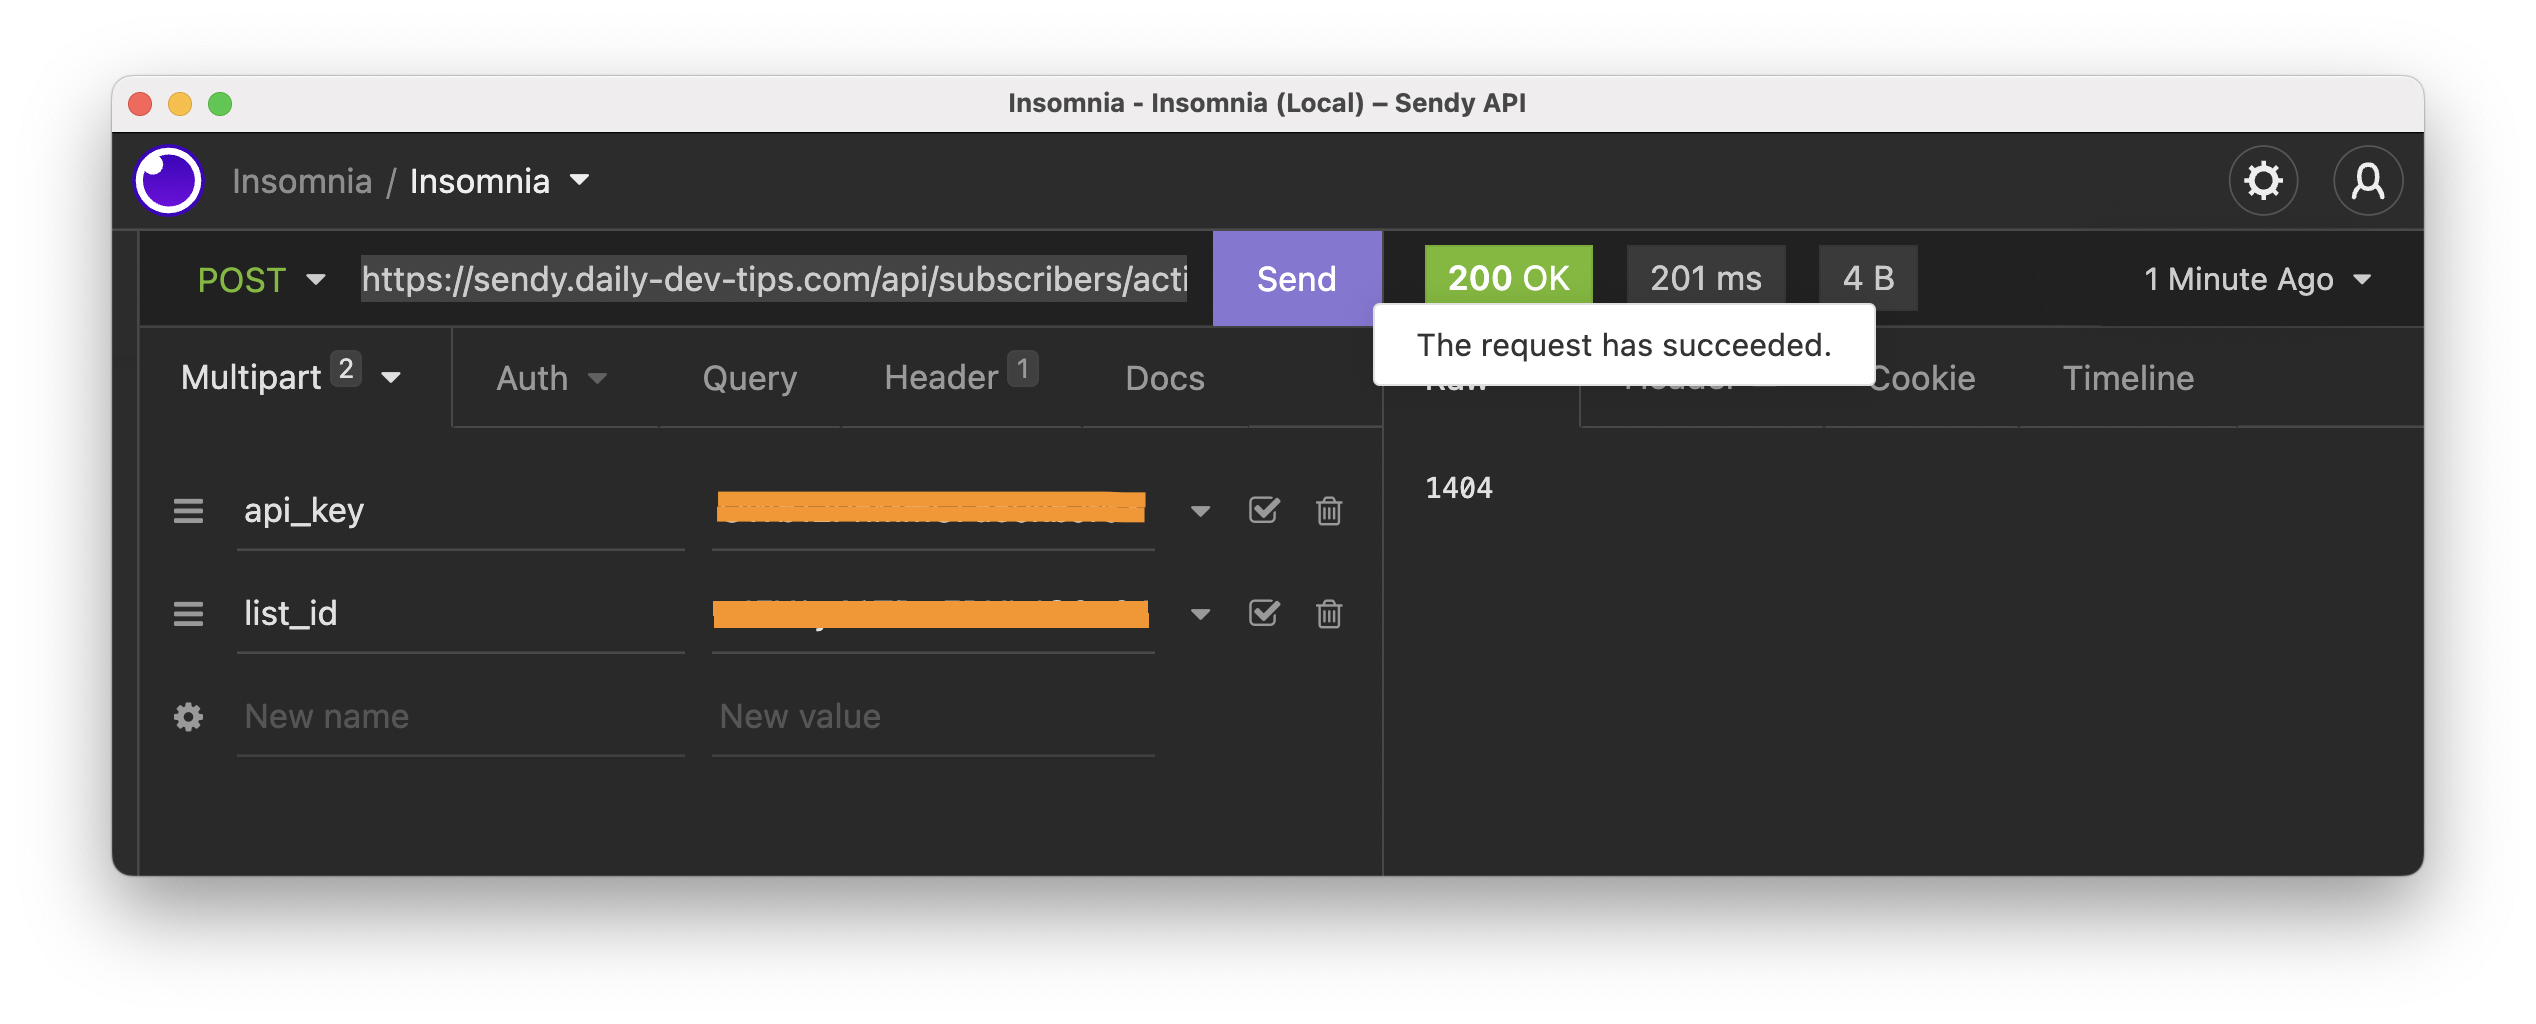
To query the API, you’ll always need to provide this API token as a form element with the key api_key.
For instance, retrieving the total number of subscribers can be achieved by querying the following endpoint.
POST: https://{yoursendy}.com/api/subscribers/active-subscriber-count.php
And I am passing the following multipart form data.
- api_key
- list_id
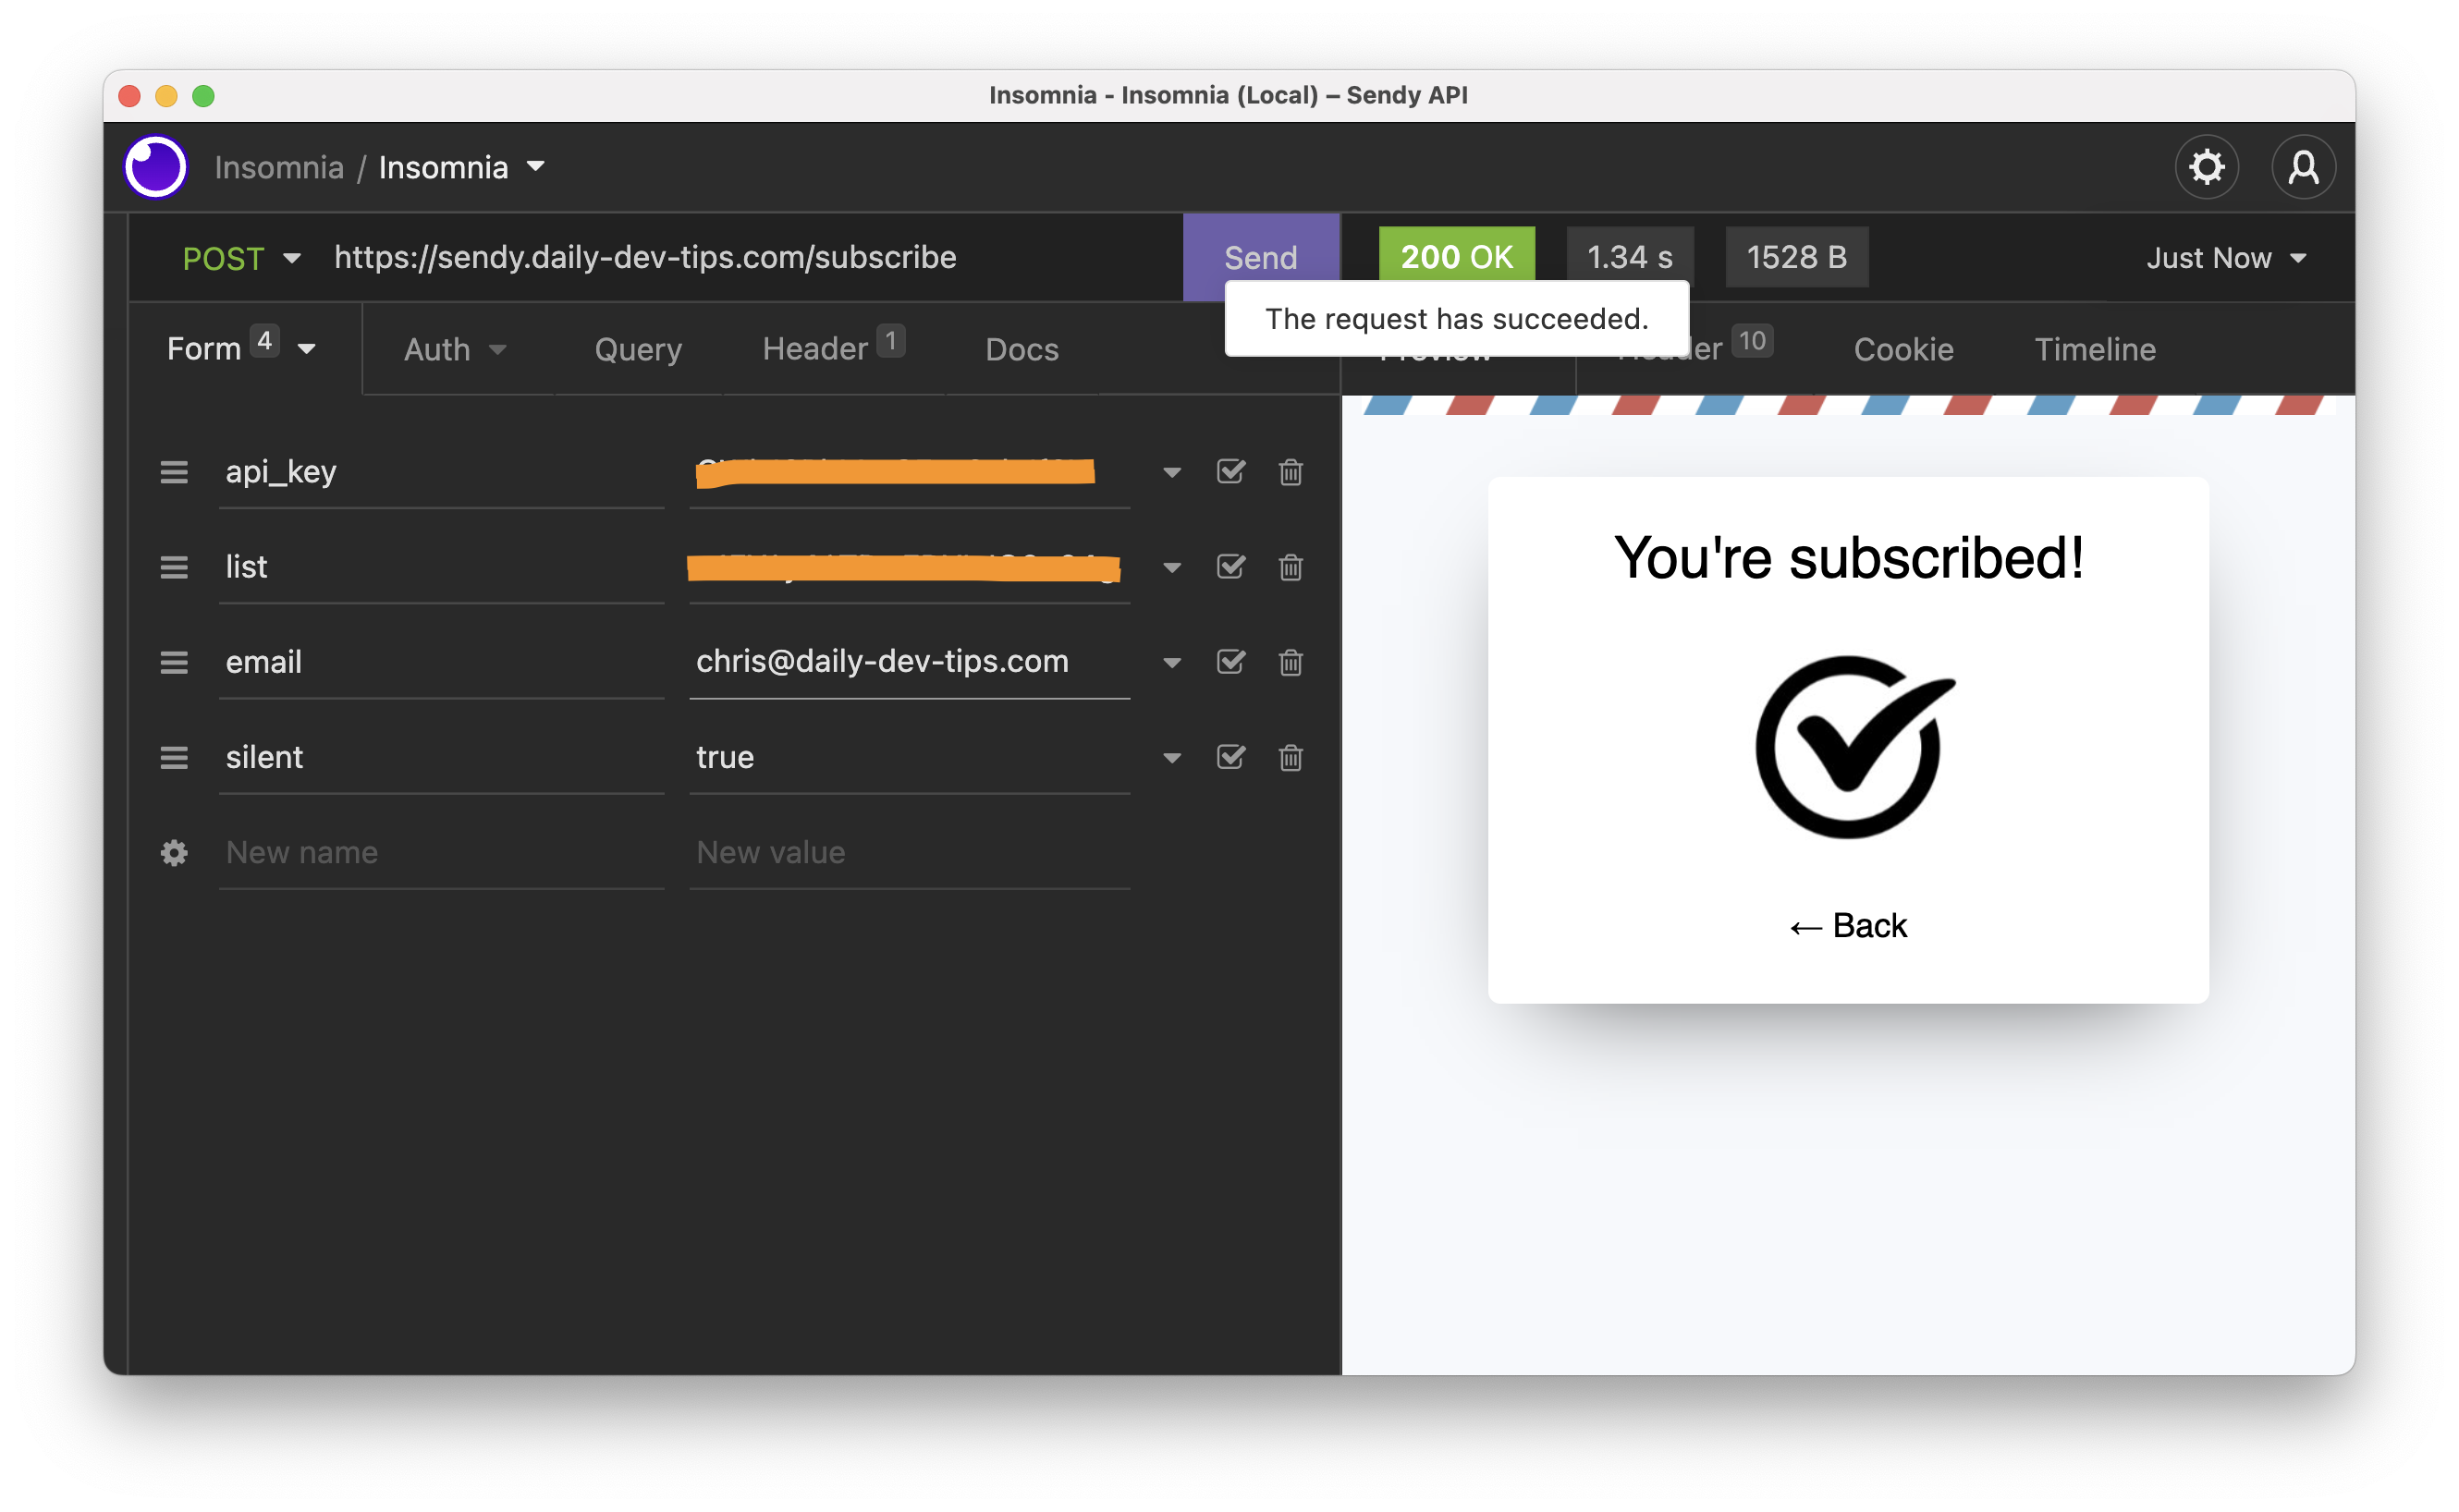
Sendy Subscribe users
The first action we want to do with Sendy is subscribing a user.
The endpoint for subscribing users is:
POST: https://{yoursendy}.com/subscribe
It takes the following form of data.
- api_key (required)
- list (required)
- email (required)
- name
- country (2 letter country code)
- ipaddress
- referrer
- gdpr (set to true if you are GDPR compliant)
- silent (if set to true, it will bypass double opt-in)
- hp (optional honeypot to prevent spambots)
- boolean (set to true for plain text response)
When we try it out, we should get the following response.
Sendy unsubscribe a user
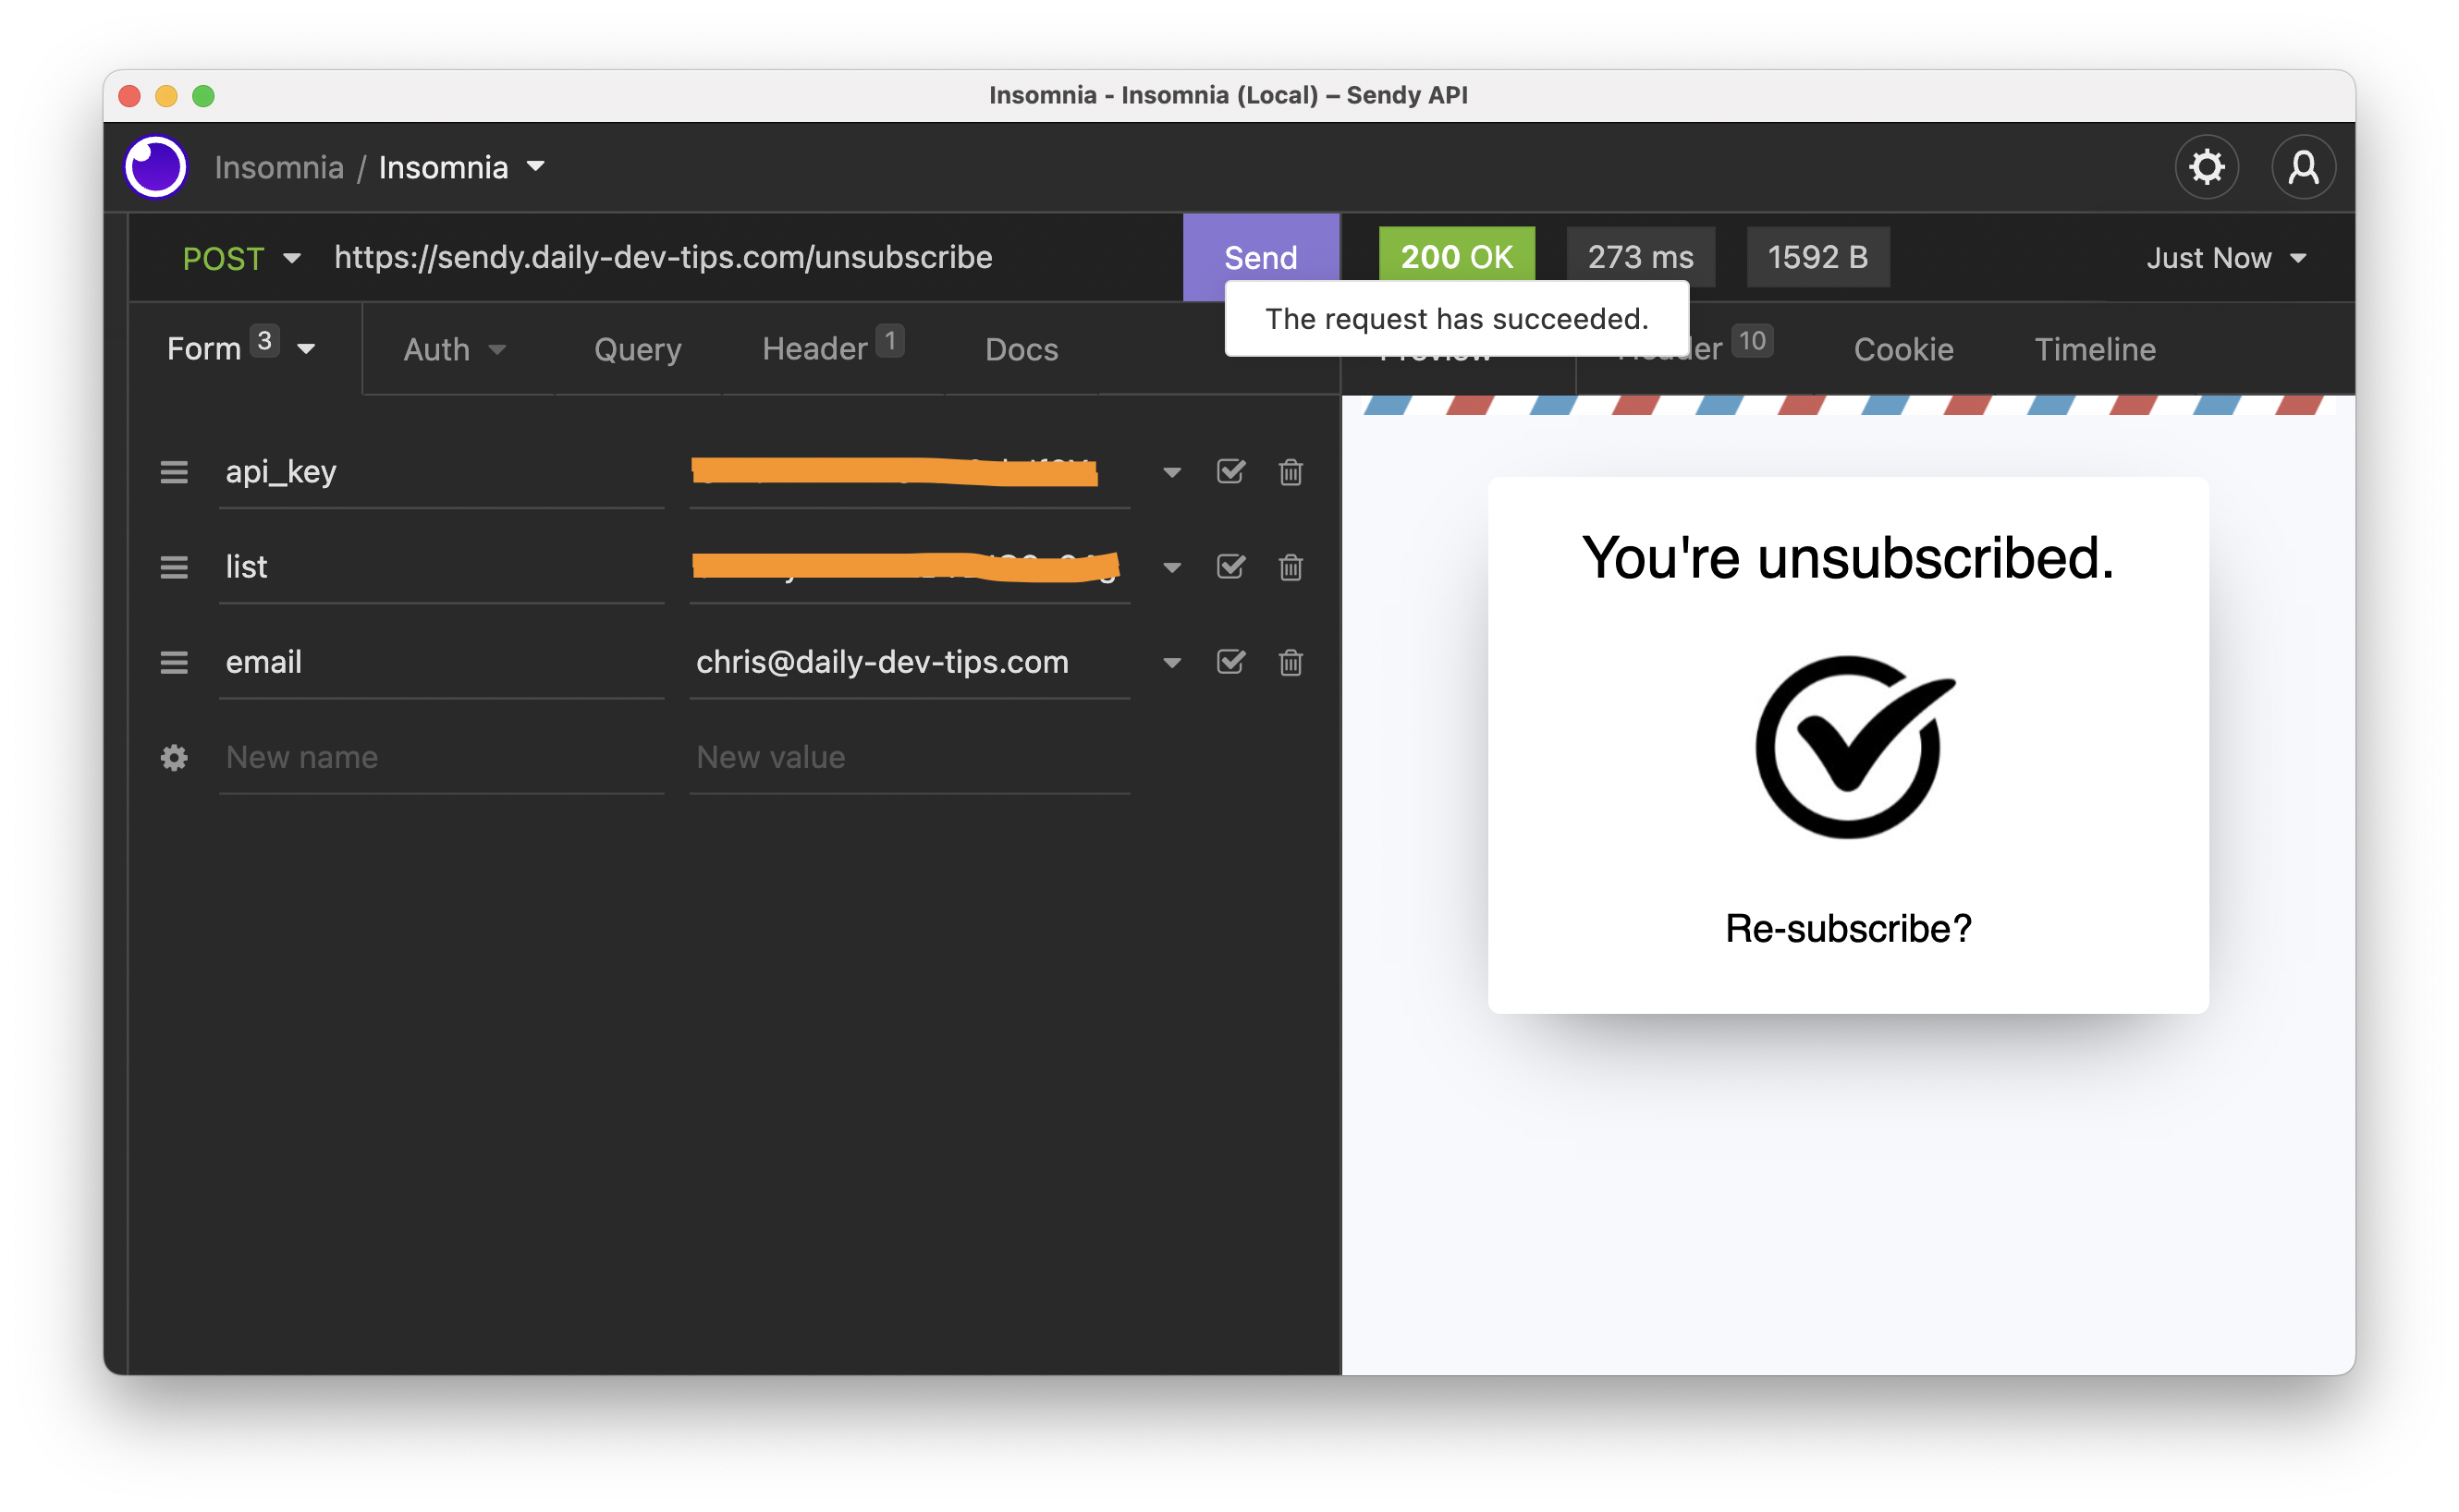
As we used the Revue unsubscribe, we also want to be able to unsubscribe users from Sendy.
The endpoint for this call is as follows.
POST: https://{yoursendy}.com/unsubscribe
It takes the following data as input.
- api_key
- list
- boolean (set to true for plain text response)
Sendy subscribe webhook
As mentioned, we want to sync people from Sendy to Revue, so we need to add a webhook that will act on each new subscriber.
To add these webhooks, we must visit our Sendy installation and navigate to the rules section.
We can add a new rule to act on Subscribe to a specific list and trigger a webhook within the rules page.
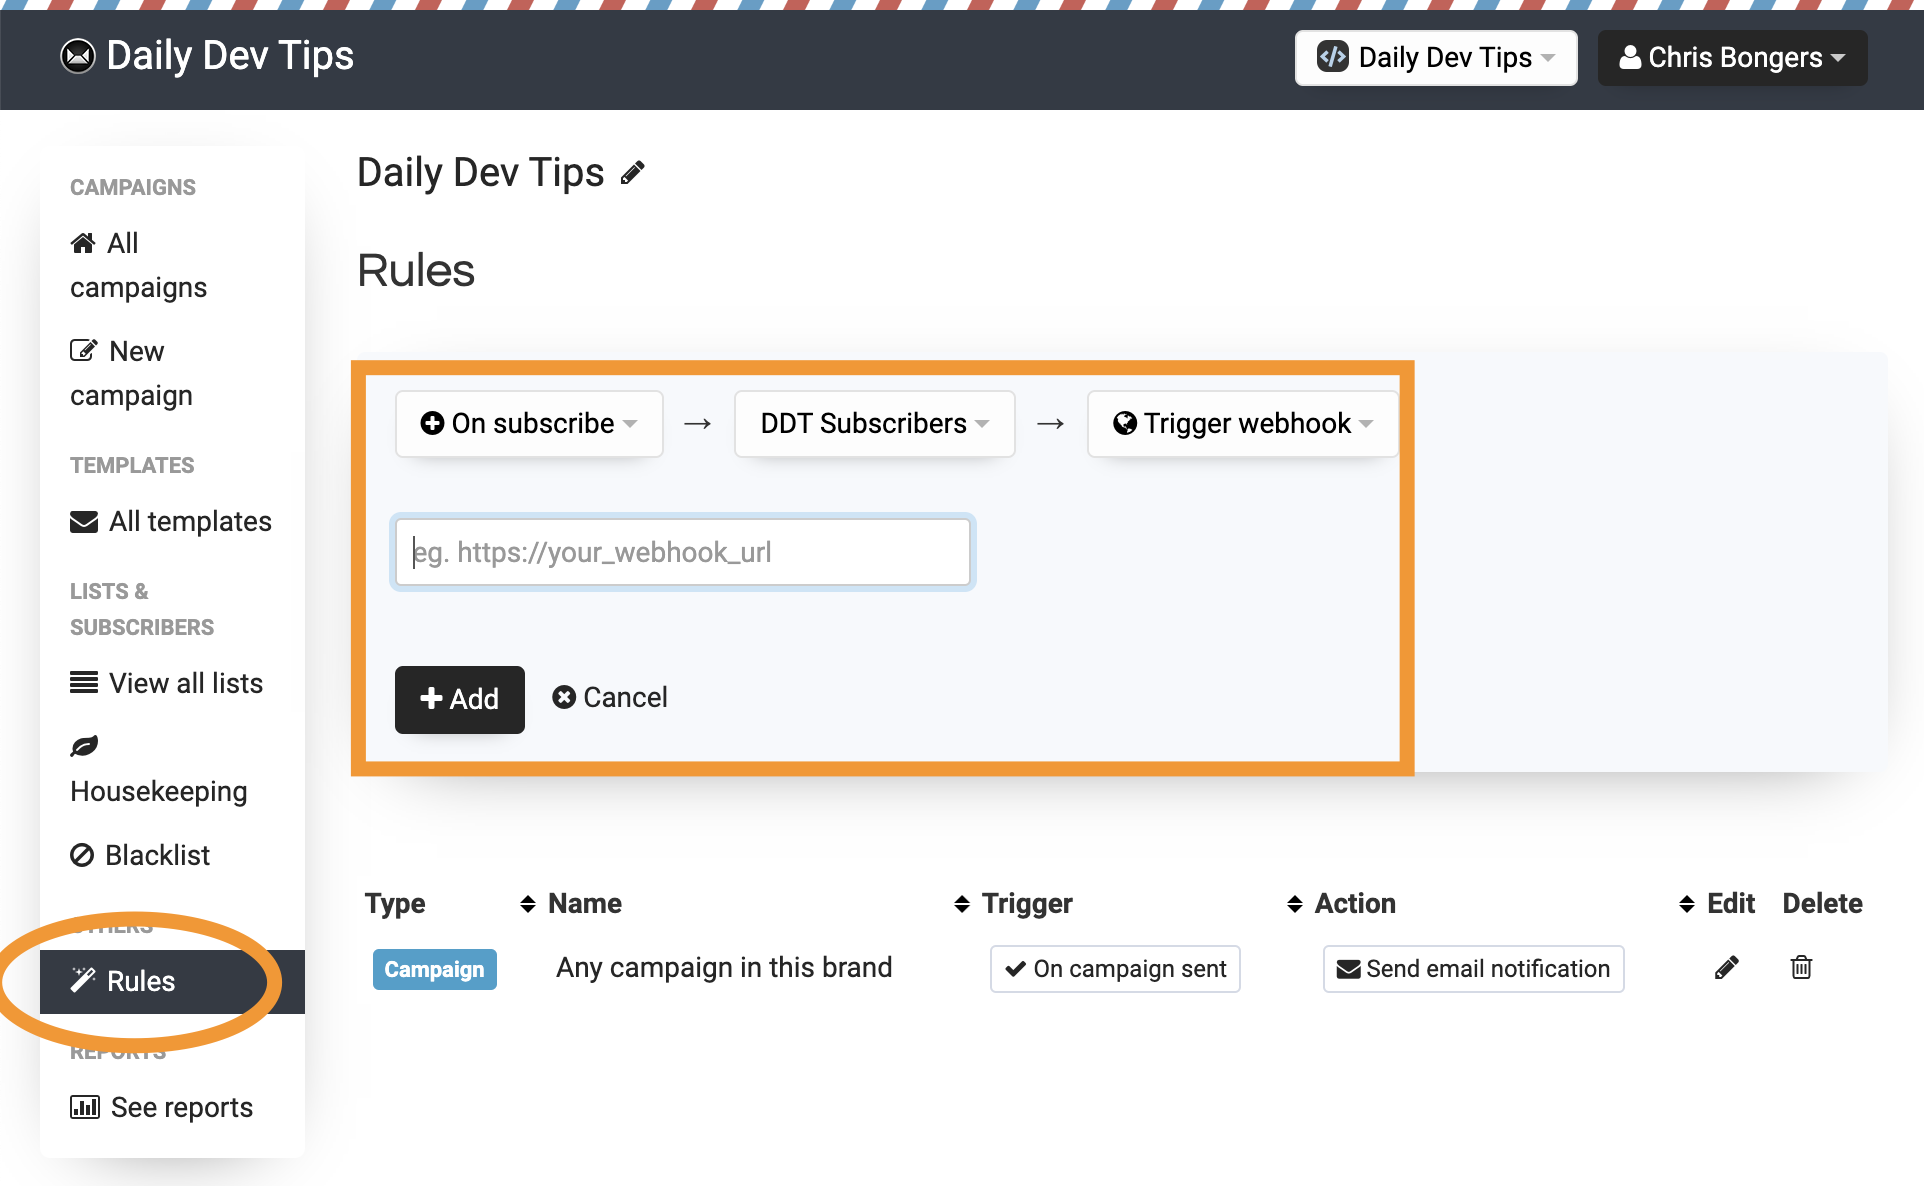
I don’t have this webhook yet, but we can use a request bin to see that it works.
Visit Request bin and create a new bin. Once created, copy the bin URL and paste it into the webhook field.
Once done, subscribe to the list and then visit the request bin page.
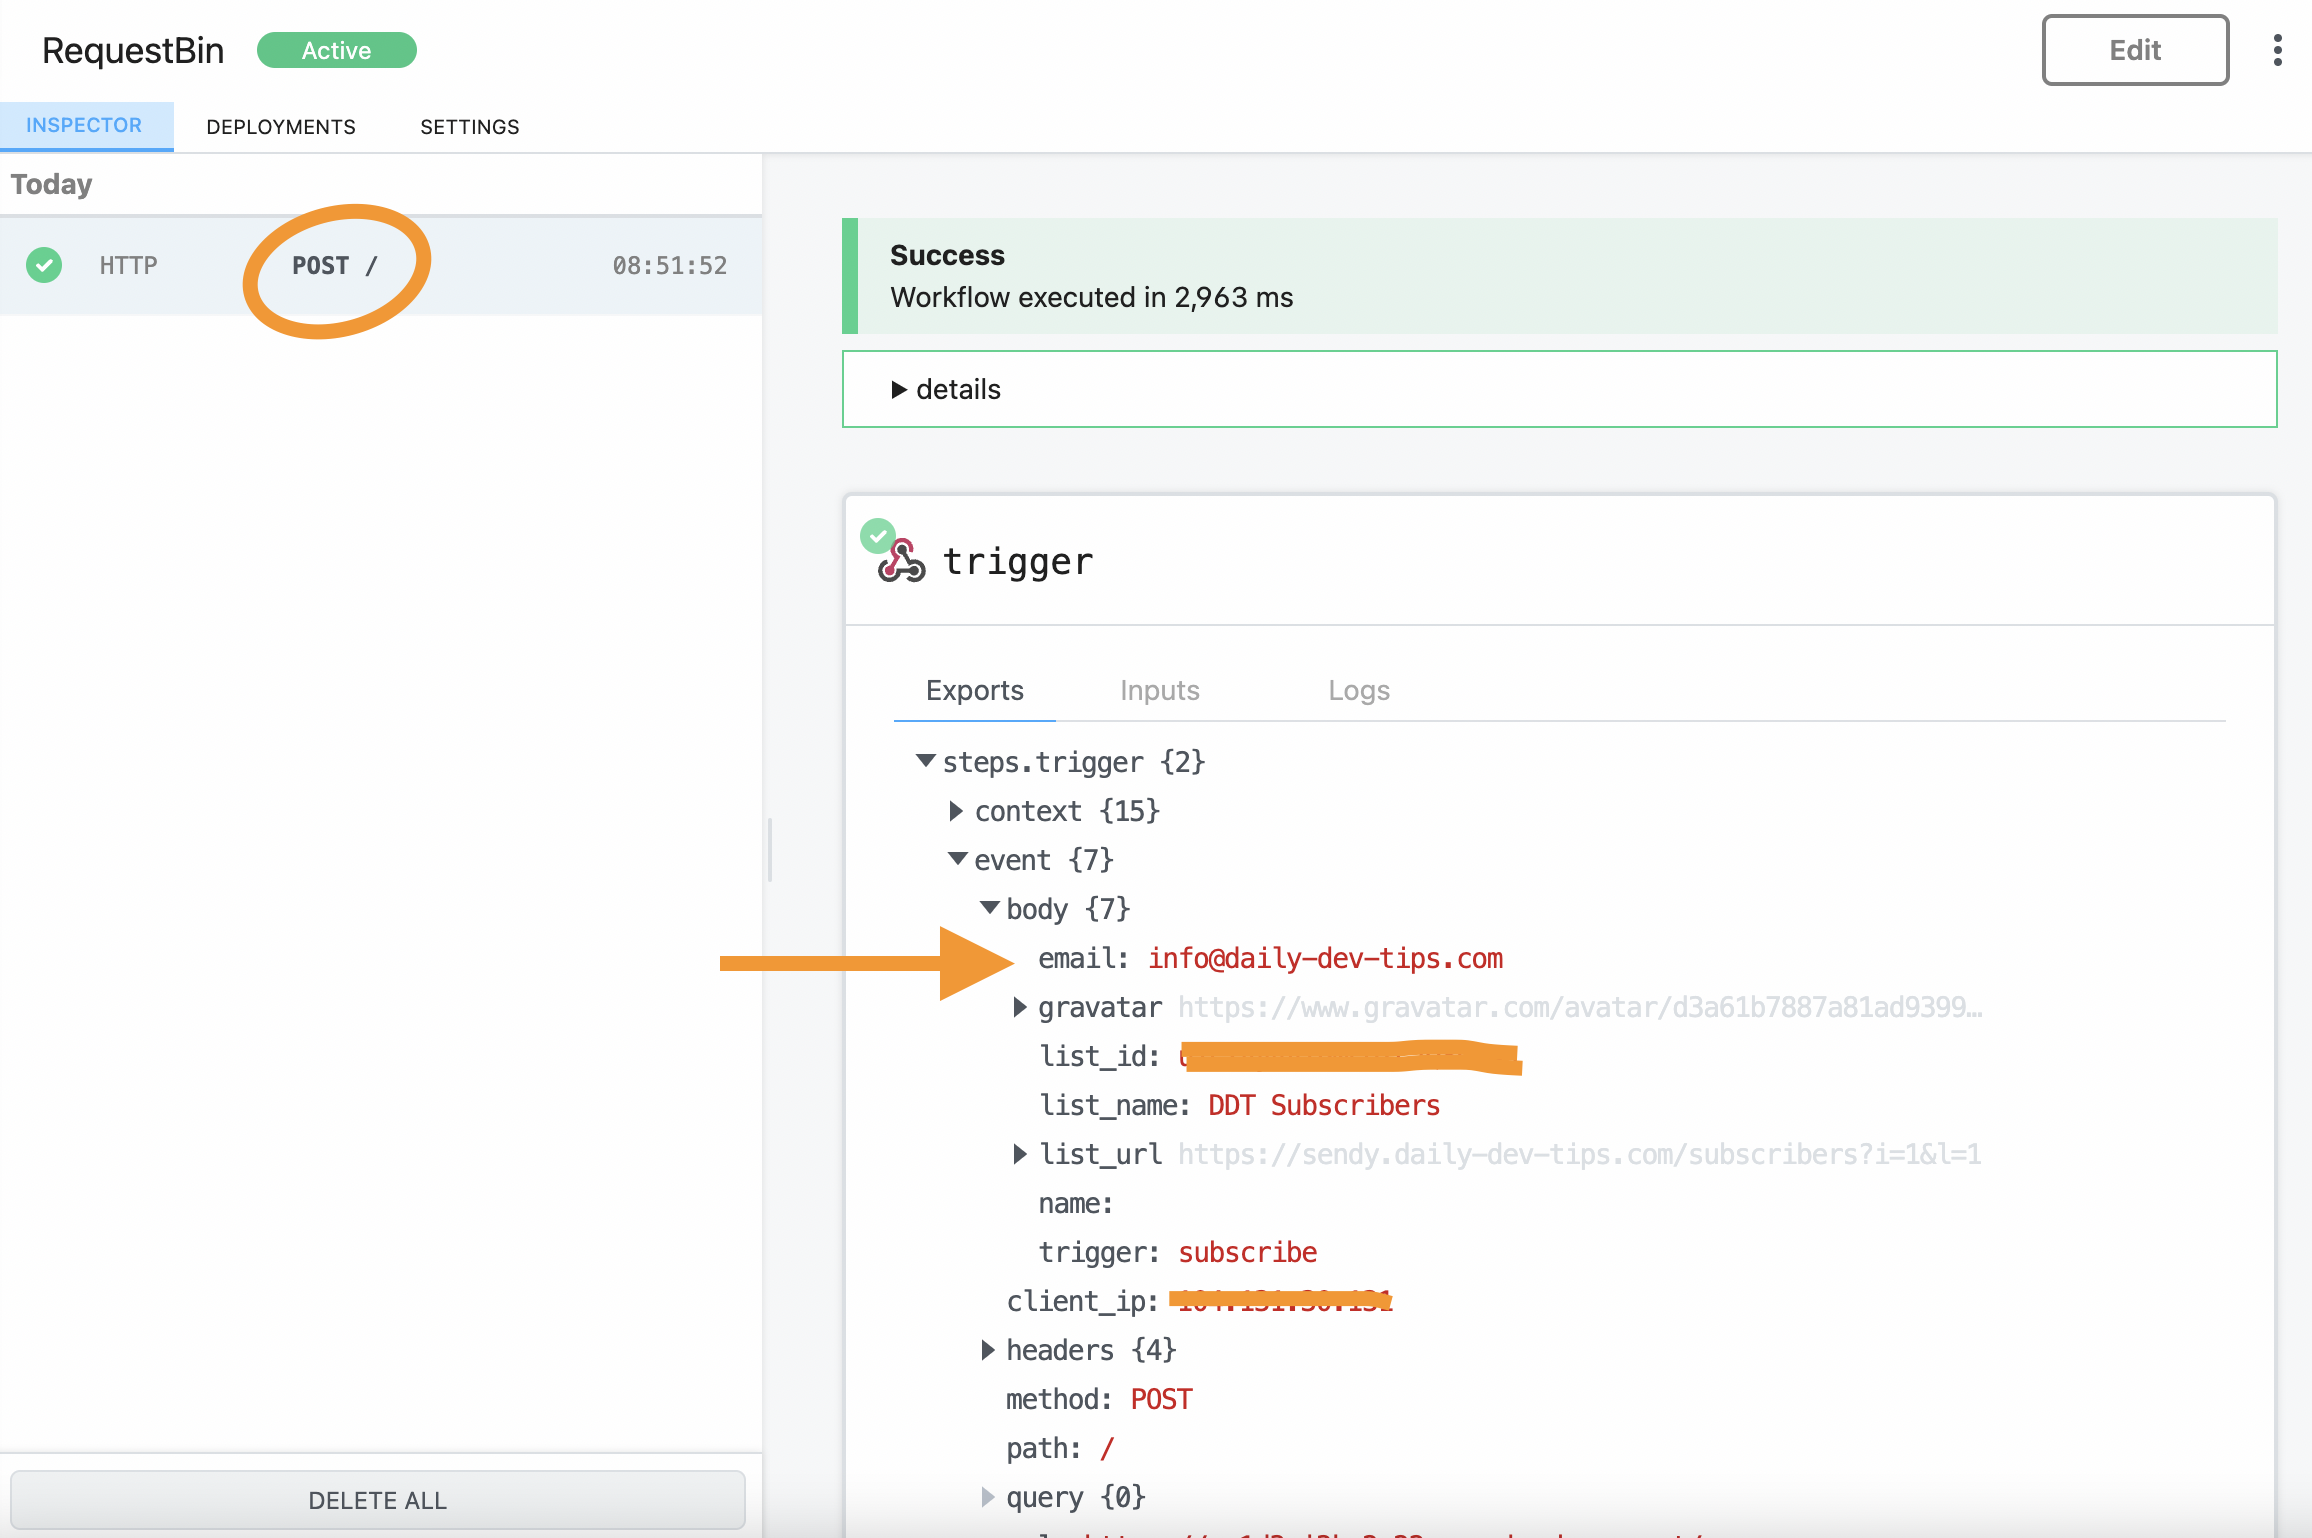
Nice! The webhook is triggered, and we get the email address we need.
Sendy unsubscribe webhook
The unsubscribe hook works in the same fashion. We can again create a new rule in Sendy and use the same request bin for now.

Now let’s unsubscribe from our newsletter and monitor the request bin to see what happens.
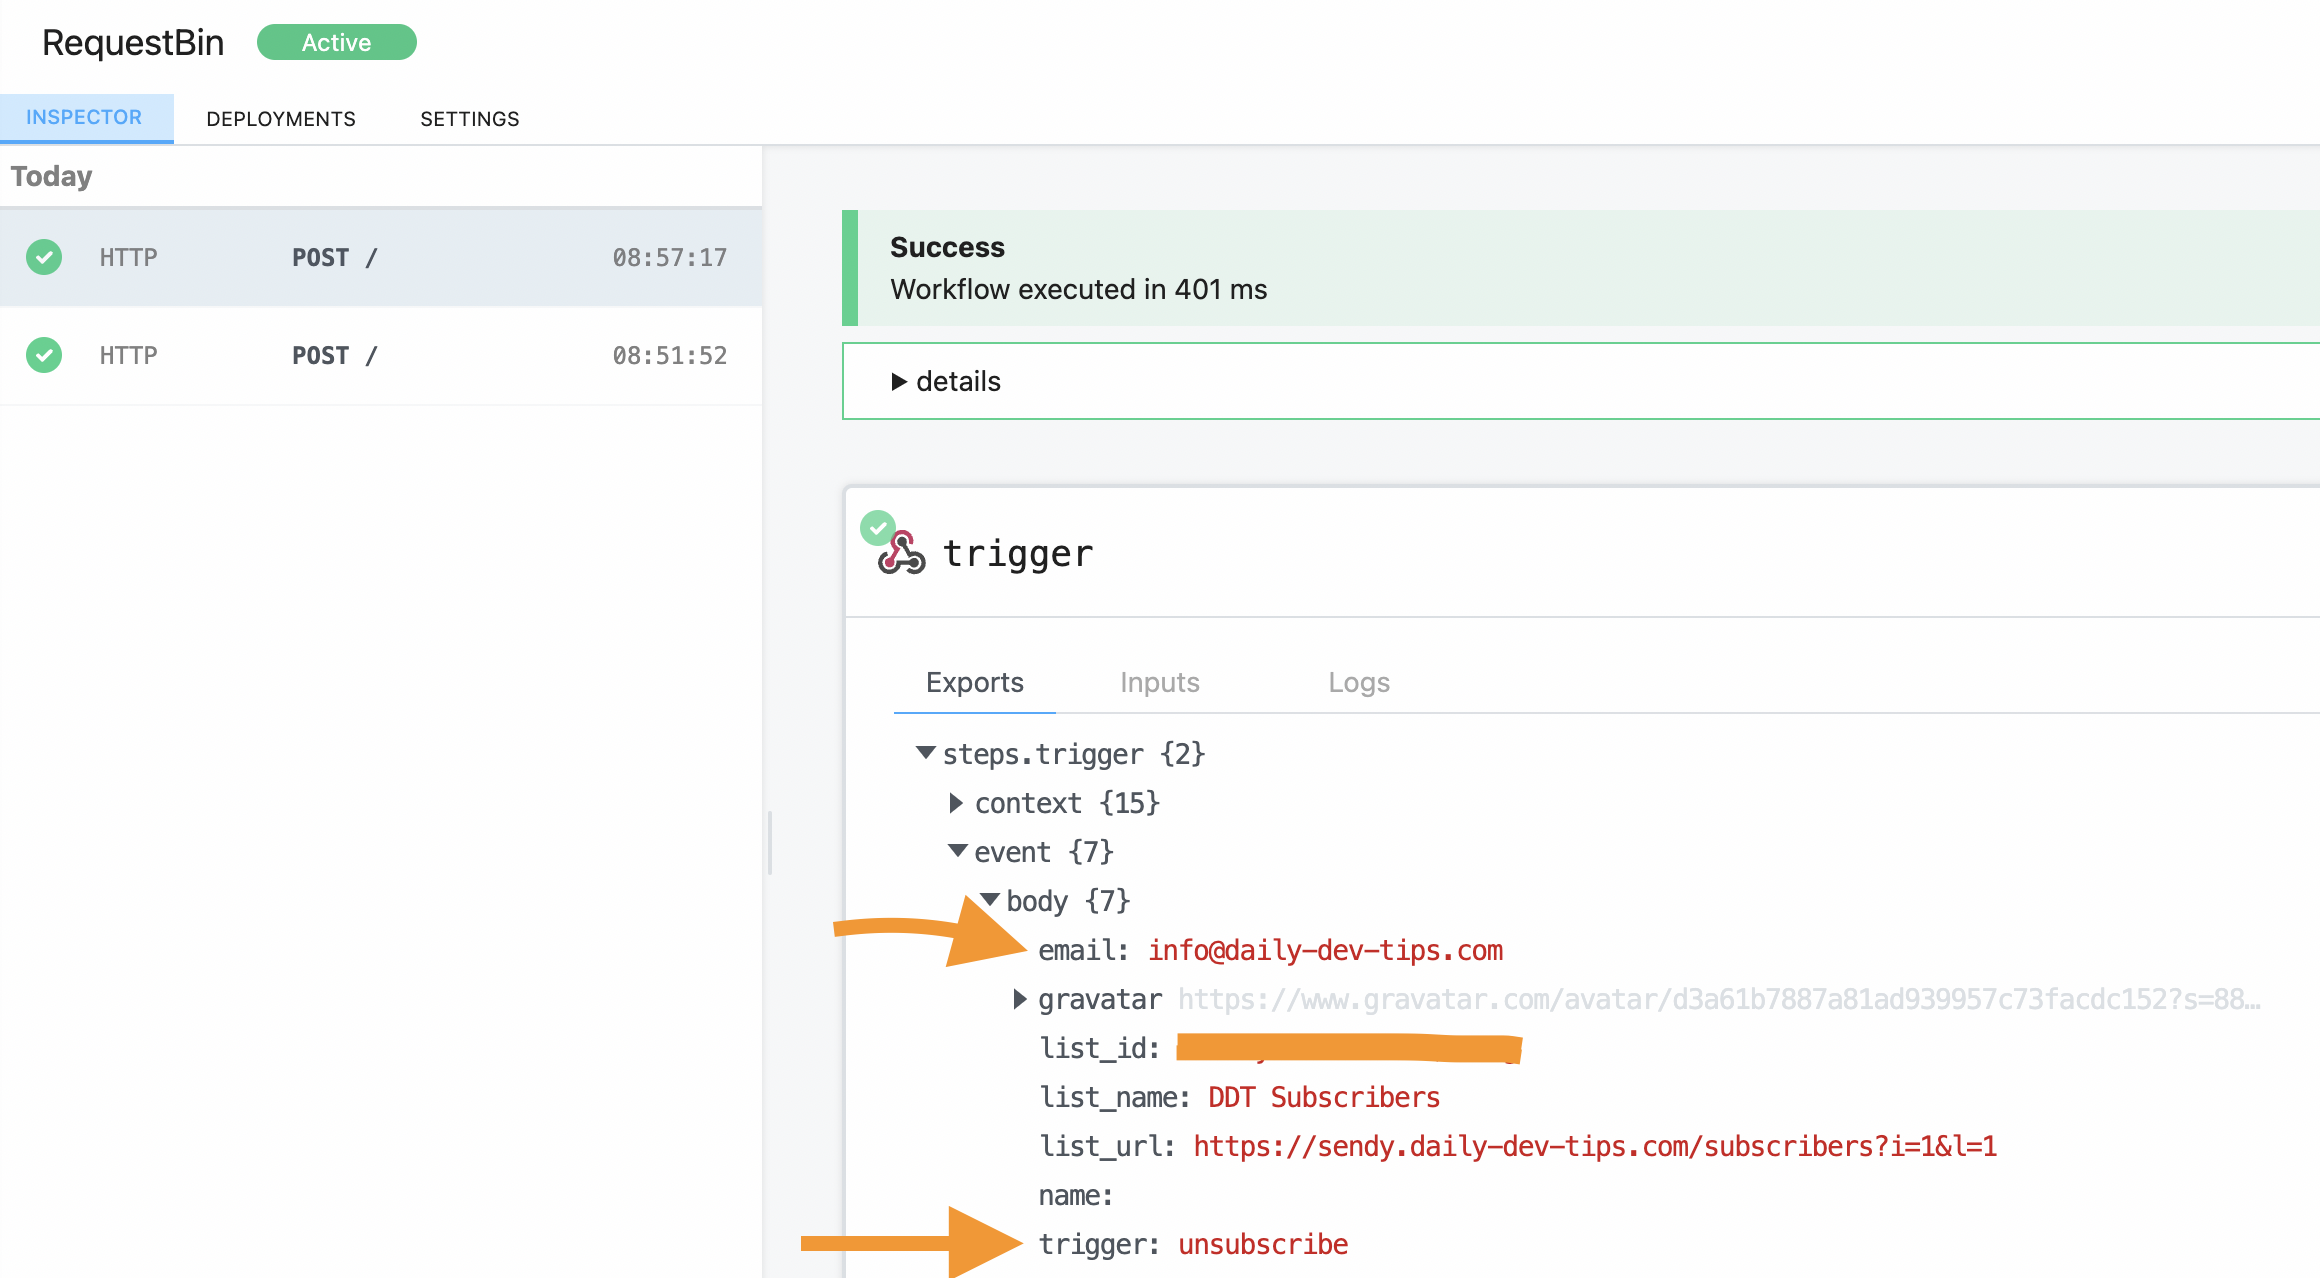
And that also works perfectly!
Conclusion
Now that we have all the parts we need to create this complete app, we can start putting it together.
It’s important to evaluate everything you need to make things work when working on these apps/MVPs.
Use API testing tools like Postman/Insomnia to try out your API calls. Use request bin tools to try out webhooks and such. This will help you understand what you got and how it works.
Thank you for reading, and let’s connect!
Thank you for reading my blog. Feel free to subscribe to my email newsletter and connect on Facebook or Twitter