When it comes to static websites, they are blazing fast because they use no backends. In its simplest form, it’s just an HTML file with some styling.
And that’s great in 99% of the cases until we hit the subject of forms.
Many websites these days could be static ones. They provide visitors with information about that website and showcase some of their services.
But then they also come with this contact form. And contact forms either need to save the information stored in them or perform an action like sending an email.
Note: These websites, including the forms, must run on Netlify hosting!
Introducing Netlify forms
For me, that’s where Netlify forms come in. By far, the easiest way to add logic to any static hosted form.
And you won’t believe how easy it is.
Creating the form is no different than what you are used to in HTML. We want a form with a name, email, and message.
<form method="POST">
  <input type="text" placeholder="Name" name="name" />
  <input type="email" placeholder="Email" name="email" required />
  <textarea placeholder="Message" name="message" required></textarea>
  <input type="submit" value="Submit" />
</form>
That will be our basic markup, and we usually need to add an action to this form.
In the case of turning it into a Netlify form, all we need to do is add the netlify attribute to the form.
<form method="POST" netlify></form>
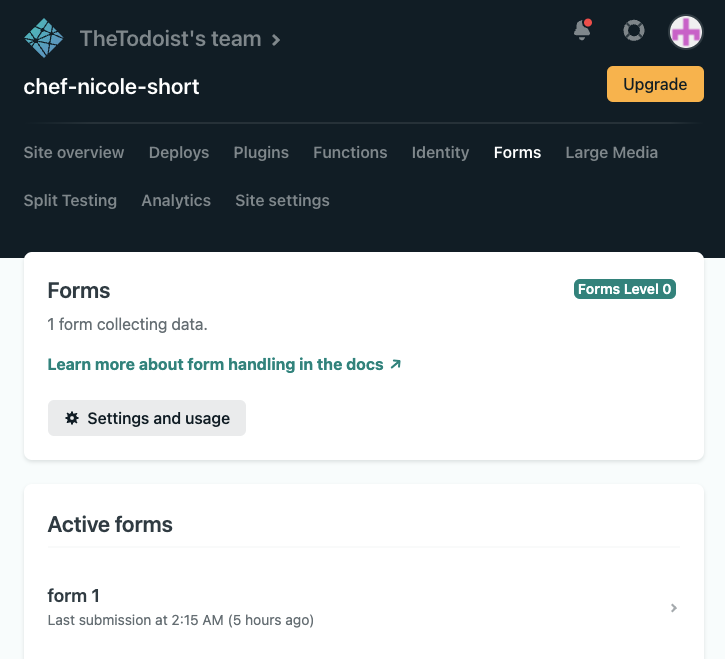
When you now publish your website to Netlify and fill out the form, you should see these popups in the forms sections on Netlify.
Netlify will handle these forms automatically, and inside Netlify, you can even add mail notifications.
Adding names to the forms
You might have spotted in the example above that the form is called “form 1” you can add your name to this by adding the following HTML to your form element.
<form name="contact" method="POST" netlify="true"></form>
Now your form will be named “contact” in Netlify.
Each submission will be captured inside this form. You click to open the details.

Sending out notifications
As mentioned, you can add notifications to your forms. This can be any of the following:
- Outgoing webhook
- Slack
Between these three, you can set up anything you want.

Limitations
By default, your free account on Netlify will come with these forms. The main limitation is the number of submissions you can receive, which is capped at 100 submissions per month.
You can, however, clear out the forms to get more space again. Or upgrade your account for more submissions.
The next level is at 19$ a month and includes 1000 submissions each month.
Conclusion
Netlify forms are easy to introduce form capabilities to a static hosted website.
For most websites, the free plan is even enough to get by.
Thank you for reading, and let’s connect!
Thank you for reading my blog. Feel free to subscribe to my email newsletter and connect on Facebook or Twitter