Now that we have a basic introduction into what Git is and how GitHub works, let’s make our first ever git repo and push it to GitHub!
Yes, we’ll be doing all of that today.
The result is a repository on GitHub that you or someone else can use to keep track of your software.
Initialise a git repository
A repository is a folder on your system. But that folder isn’t aware it should be a git repository yet.
Let’s change that. First, make a testing folder on your local machine. I’ll name my git-test.
mkdir git-test && cd git-test
The above commands will create a folder and navigate to that folder. You can run these commands in your terminal.
To initialize a new git repo, run the following command in that folder.
git init
We should see a response as follows.
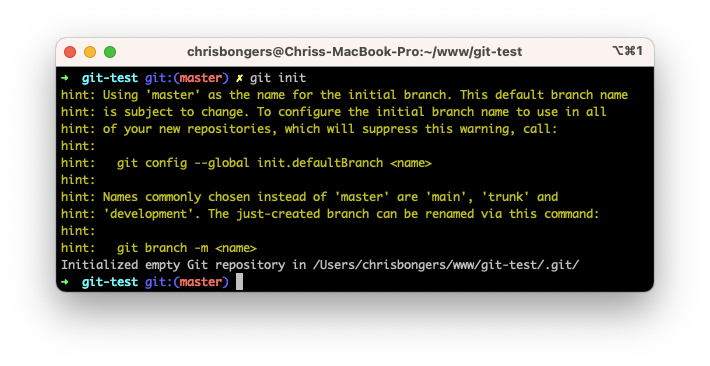
From now on, Git will keep track of the changes and files we add, which is fantastic!
Adding files to the repository
Let’s add a simple README.md file to our repository. You can use an editor for it.
Inside this file, I placed the following markdown for testing.
# Hello GitHub
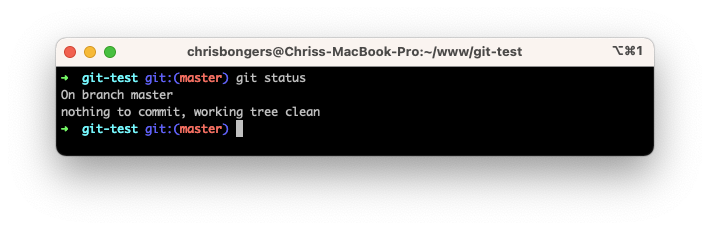
We can now check if Git tracked this change by using the status command.
git status
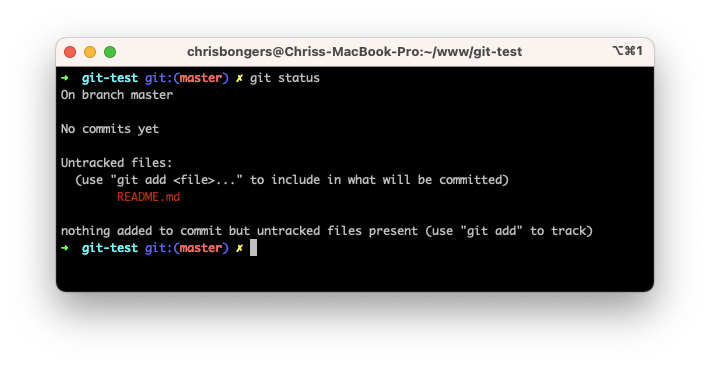
As you can see, the status mentions that the readme file is new or changed but isn’t tracked yet.
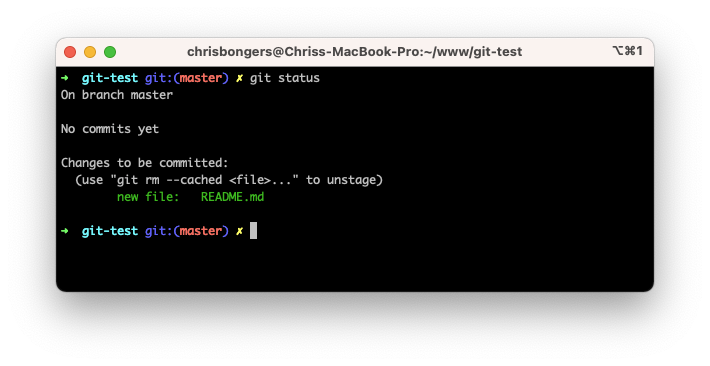
To add a single file to Git, we can use the add command like so:
git add README.md
You can also add all open files by using a ..
git add .
If we run the status command again, we should see that the readme file is now tracked.
Commit changes
This change is now tracked but not committed as a specific commit. A commit is like a moment in time for your code, so let’s say this is now the truth. We can commit this to Git to make it captured.
Committing can involve multiple files at once. It’s not limited to every single file.
Run the commit command.
git commit -am "Describe your commit"
Let me explain some of the parameters here:
-a: Means to commit all changes in the working directory-m: Pass a message as the commit message"MSG": The text there is your commit message and should describe what you have done
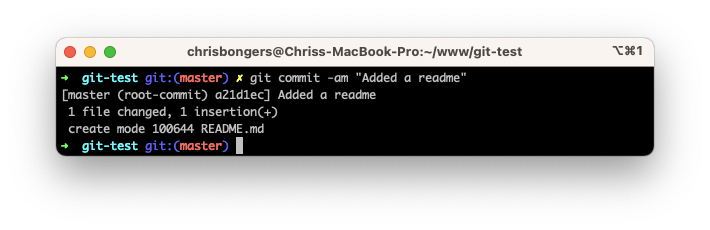
If we would now rerun the status, we would see nothing is outstanding.
By now, we can keep track of any changes locally, which is a great start. But the real thing we want to achieve is to keep track of it in a distributed system like GitHub.
Add GitHub as a remote
Head to GitHub and create a new repository. Give this repository a descriptive name for your project.

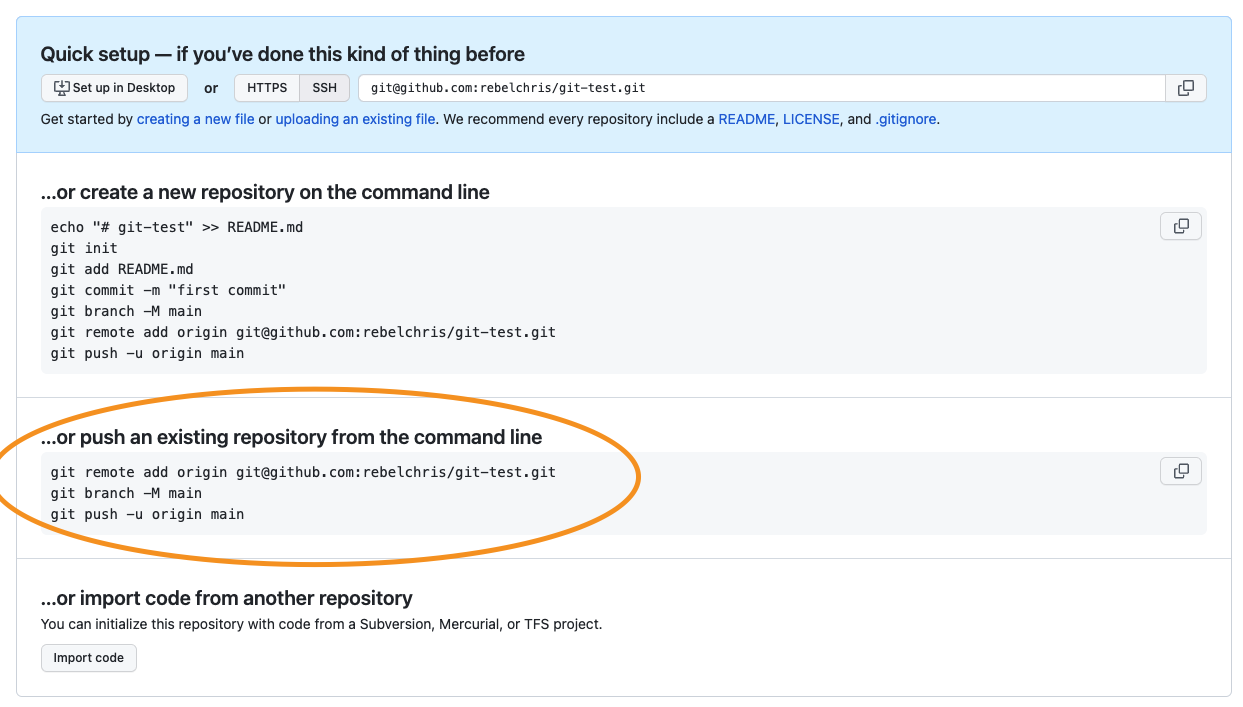
Once that’s done, you enter the empty repo on GitHub. It has all the information we need, as we will be following the second paragraph of the example code.
Head back to your terminal in the project folder we are working on.
Execute the following command you just got from GitHub. (Make sure this is your repo URL)
git remote add origin [email protected]:rebelchris/git-test.git
There is no real feedback for this step.
We add a remote with the name origin in the above step. You can name this differently, but the origin is the default and most common.
Push git changes to GitHub
The last step we want to do is to push our code to GitHub.
Doing this will keep track of our changes and all the files we added.
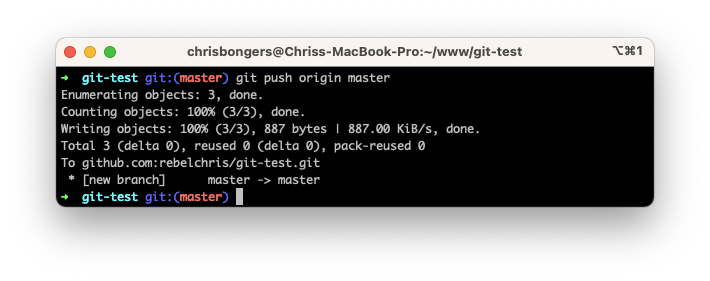
We need to run the following command to push to GitHub as we just set up.
git push origin master
Here we tell git to push to our origin remote on the master branch.
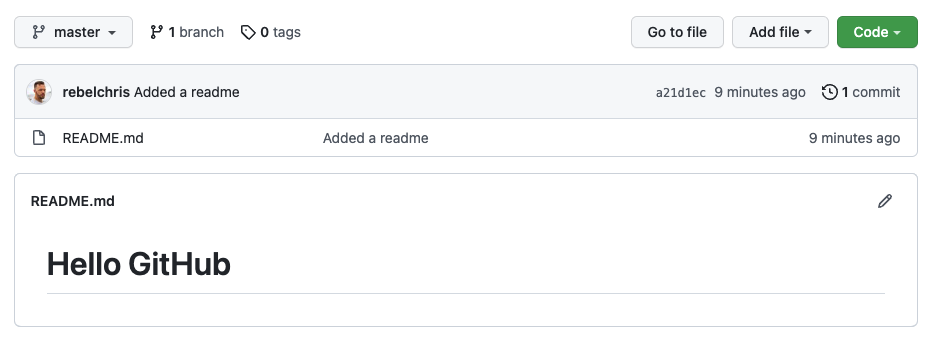
And if you now head over to GitHub, you should see your code and commit.
Making changes and committing them
Let’s take some time to explore further how this works.
Modify the readme file and include some more content.
# Hello GitHub

Hi GitHub, I'm Chris, and I just pushed code to you.
In the same breath, add another file to see how it works with multiple files.
I created a simple test.txt file and added some words.
Now let’s follow the above steps again.
- Add the files:
git add . - Make a new commit:
git commit -am "Changed readme, added test file" - Push the changes:
git push origin master

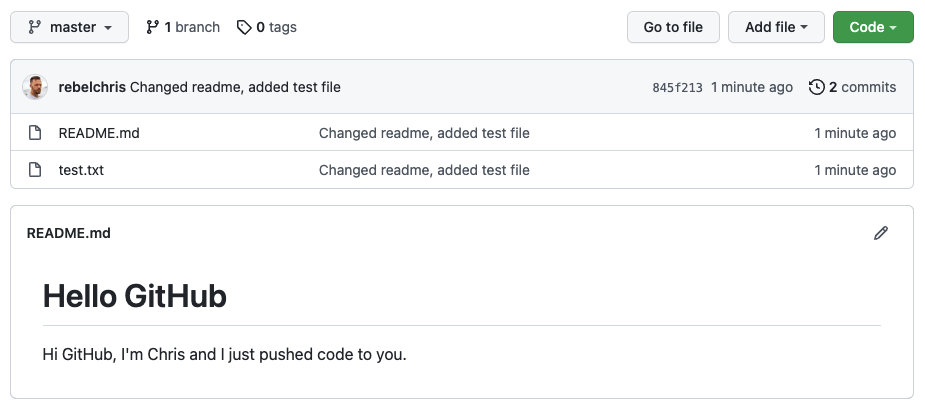
And now we see our new file and second commit show up in GitHub.
I hope you enjoyed this article and made your first ever Git to GitHub experience!
You can find my demo project on GitHub if you want it as a reference.
Thank you for reading, and let’s connect!
Thank you for reading my blog. Feel free to subscribe to my email newsletter and connect on Facebook or Twitter