Branches are an essential part of using Git. You can view a branch as a separate version of your project.
Generally speaking, it’s a good thing always to have these two branches in place:
- master: (main) This is the production version of your project
- development: The testing version of your app
Besides these branches that are always there, you might encounter some other branches. These other branches depending on the type of issue they solve.
Branches for critical hotfixes
Your project is live, but you realized a typo or a minor styling issue. It’s always something that needs to be solved right away.
These hotfix branches can be merged directly into the master branch; however, don’t forget to merge them into development to keep up to date.
New features
More often, you’ll be making new features. This could be a small feature or a bigger feature that might take a while to create.
In either way, you’ll be using multiple feature branches. Each feature should be as small as possible, so it narrows down what that branch does.
Once you finish a feature, it should be merged into the development branch for testing purposes.
The testing should always be done on the individual/development branches. Once the tests are good, and you are happy with the results, you can merge development into master.
If you want to be super fancy, you can introduce release branches. (For me, that’s not a super high need)
GitFlow
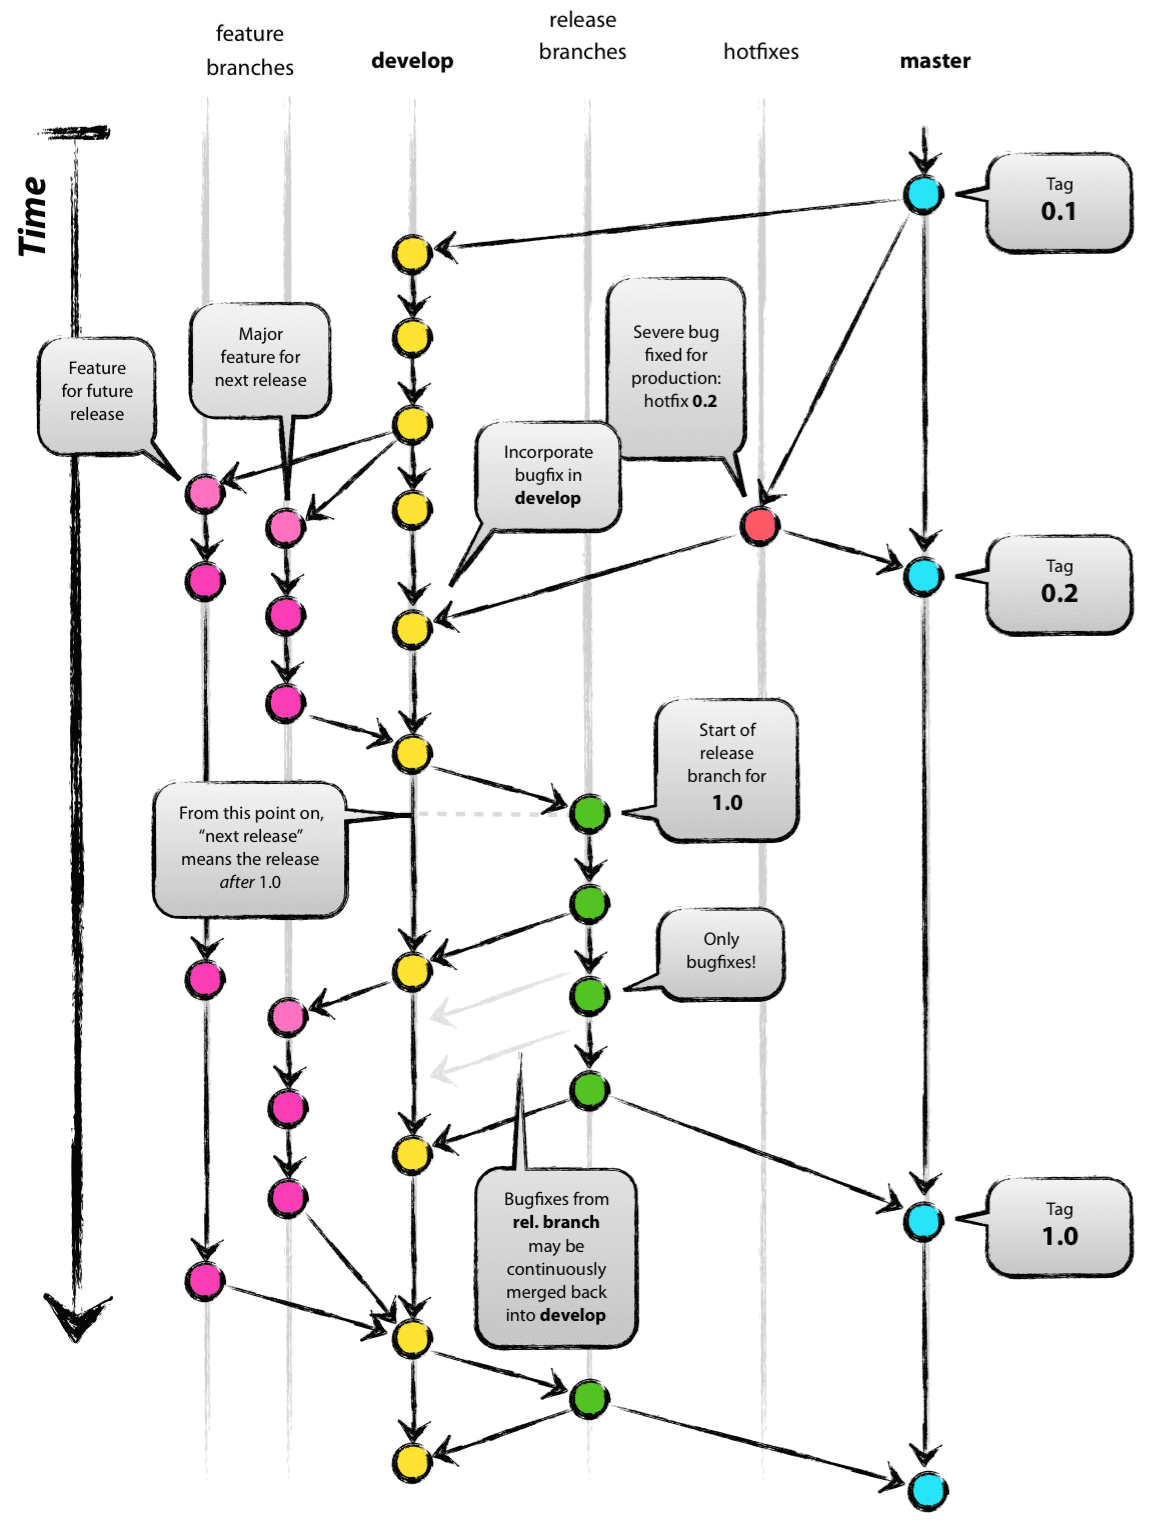
With this, we have something called GitFlow.
This workflow created by Vincent Driessen describes the flow that should be taken when developing using Git.
This is an opinionated flow, but I’ve seen this success in many companies. Hence it’s always the flow I choose for my projects.
See below for a visual representation of the model.
How to create branches
This might sound cool to you, and you have a good understanding of committing code to Git. But we haven’t used branches other than the master branch until now.
Let’s open up our project and create a development branch from whatever we have now.
git checkout -b development
This will create a new branch called development.
We can, however, also create a new branch of specific other branches.
git checkout -b feature_1 development
These branches will still be local and not pushed to GitHub.
To push a different branch, you can use the following command:
git push origin development

git push origin feature_1
And if we then go over to GitHub, we should see two new branches show up.
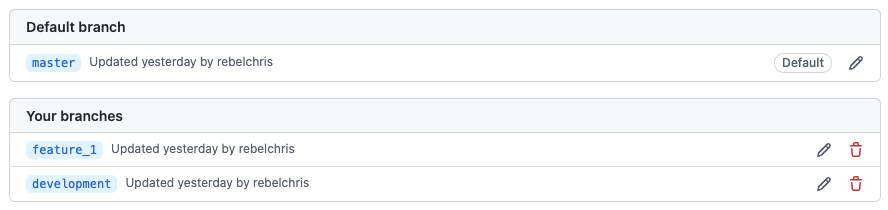
Just be aware of which branch you are working on. You can always switch to another branch using the checkout command.
git checkout master
This command will reset you to the master branch. You can use any branch name instead of master.
And that wraps up branches in Git. I hope you learned about Gitflow and how to make your first branch.
You can view my branches on GitHub.
Thank you for reading, and let’s connect!
Thank you for reading my blog. Feel free to subscribe to my email newsletter and connect on Facebook or Twitter