In this article, we will authenticate a user with the Spotify API and retrieve their playlists!
This is an excellent example of using NextAuth.js in Next.js and talking to the Spotify API.
Don’t worry if you don’t have any experience yet. I’ll guide you through the whole process step by step.
Setting up a new Next.js project
We’ll start by creating a new Next.js project. All we need to do for this is run the following command.
npx create-next-app
Give your app a cool name, and you’re ready to roll.
Then we need to install some dependencies for NextAuth to work.
npm install next-auth@beta
And that’s it, all the dependencies we need. You can run the app by navigating to the folder and running the following command.
npm run dev
Creating a Spotify app
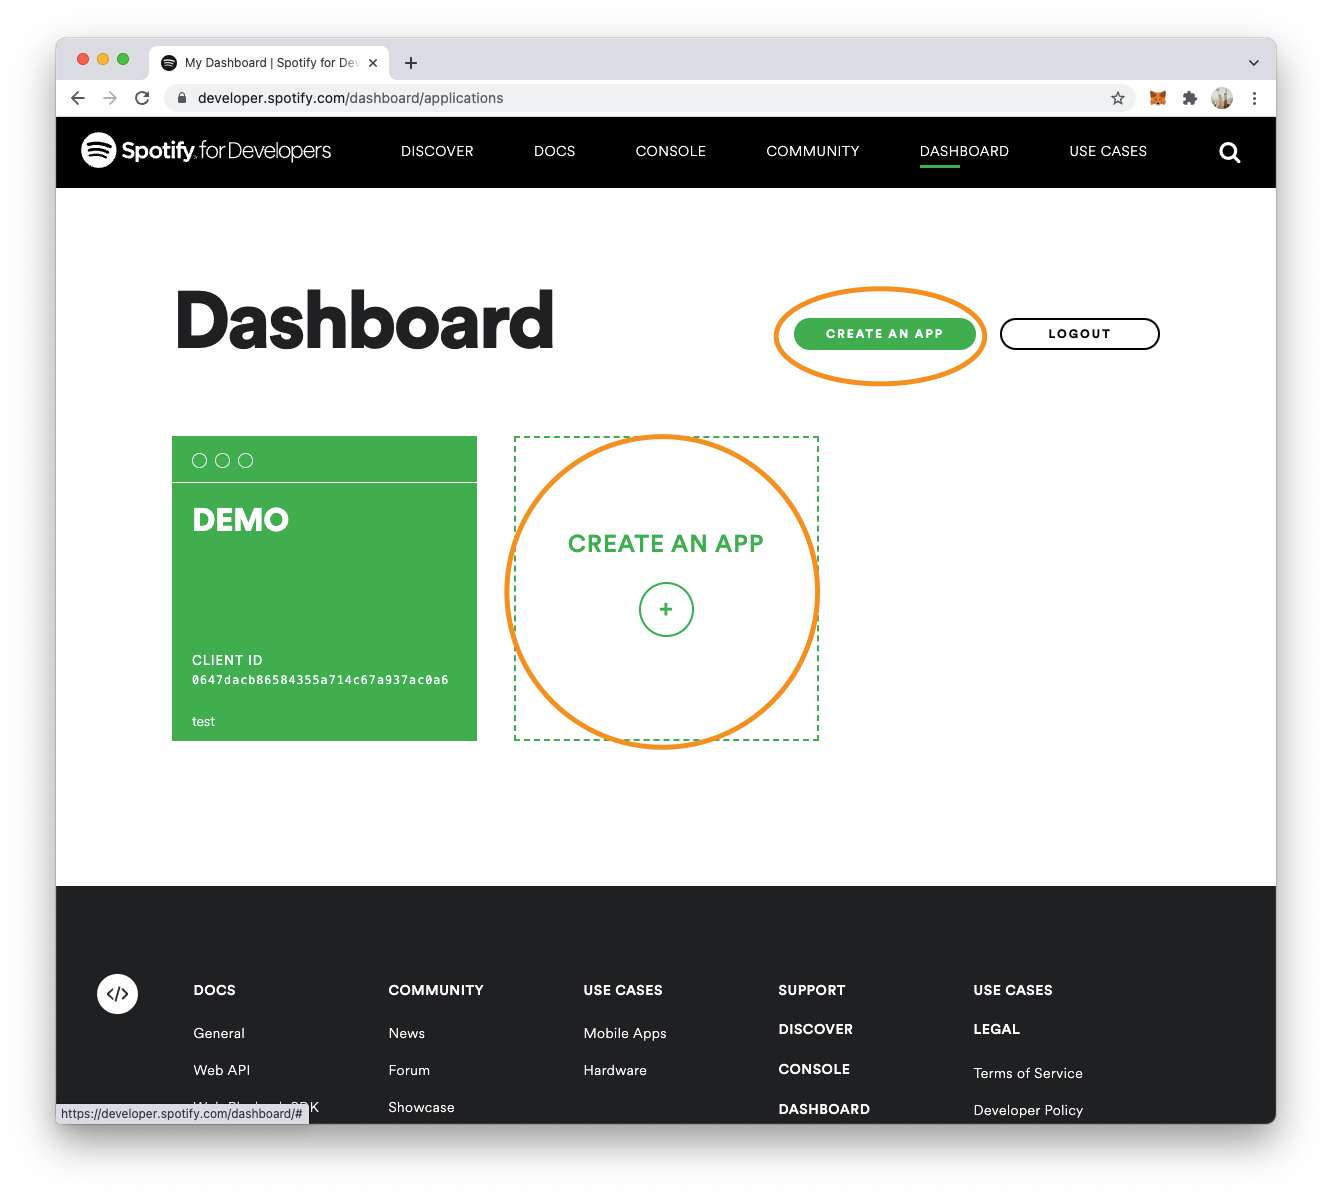
Head over to the Spotify dashboard for developers and log in with your Spotify account.
You need a Spotify account for this
You can then go ahead a create a new app.
Give this app a name and description and accept the terms.
Once you are done, you need to retrieve the Client ID and Client Secret from the app detail page.
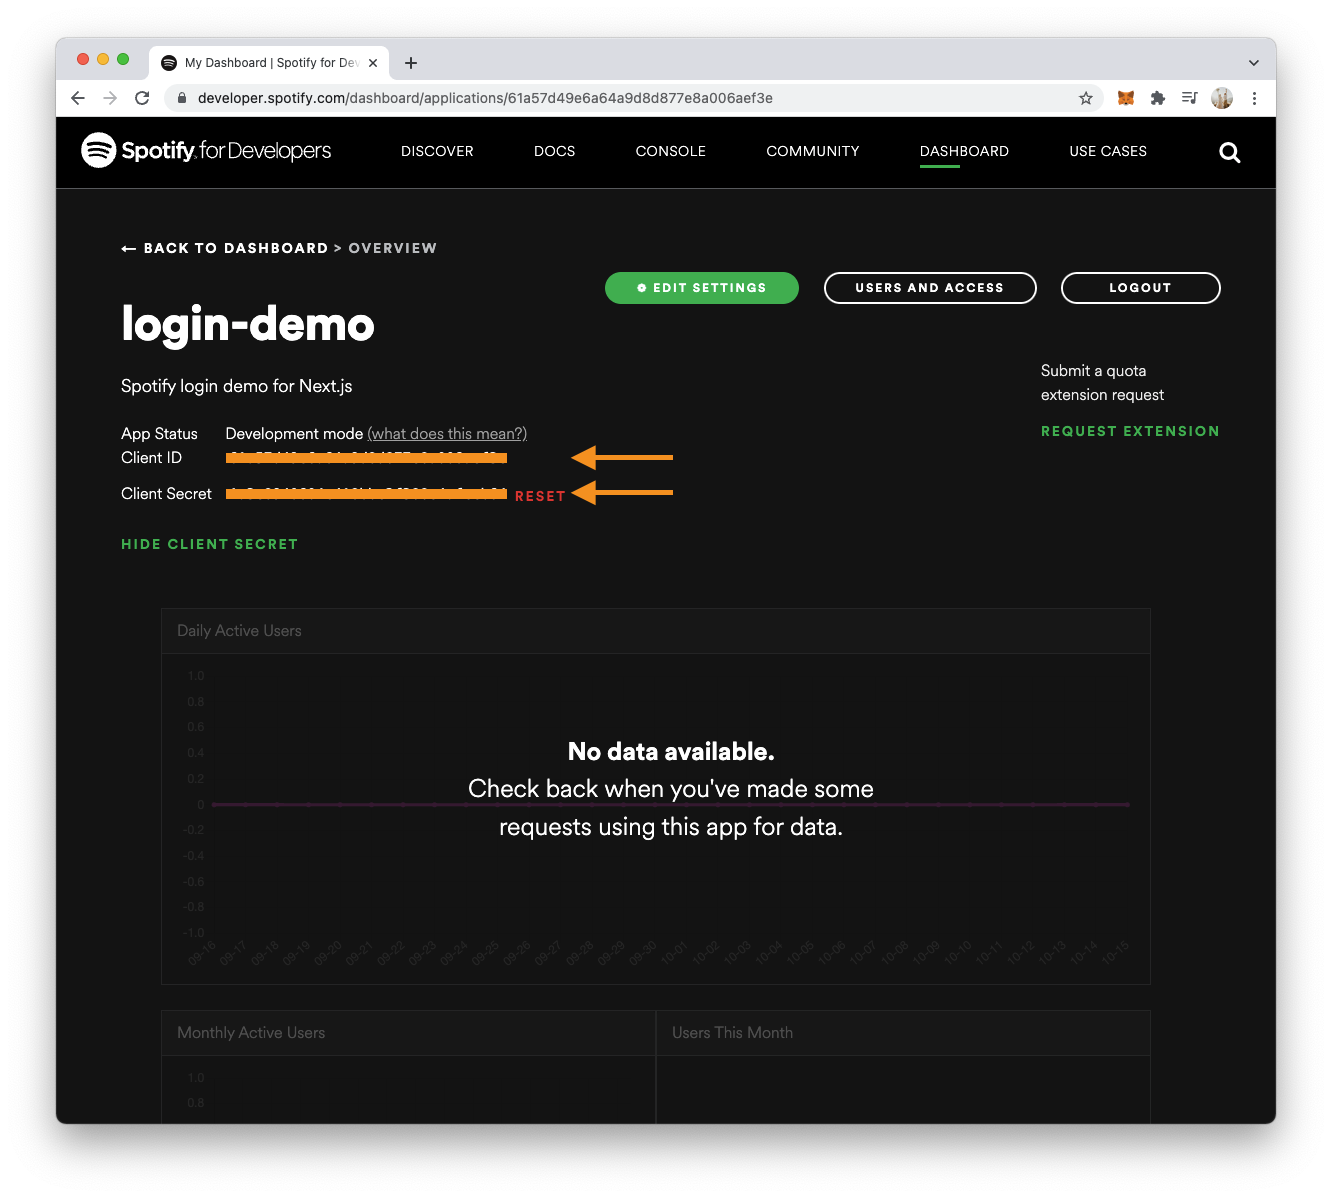
While we are here, we need to edit the applications settings. Click the “Edit settings” button and fill out the redirect URL to include this one:
http://localhost:3000/api/auth/callback/spotify
Now head back to your app and create a .env file, inside create the following two variables and set them to the credentials you just retrieved.
SPOTIFY_CLIENT_ID={ID}
SPOTIFY_CLIENT_SECRET={SECRET}
Setting up the authentication
We’ll need to introduce the authentication layer so the user can authenticate with Spotify.
We already added AuthNext as a dependency, so that’s settled. Let’s create the API layer for NextAuth.js.
We need to create an auth folder inside our pages/api folder to get this to work.
Inside this folder create a file called [...nextauth].js.
import NextAuth from 'next-auth';
import SpotifyProvider from 'next-auth/providers/spotify';

export default NextAuth({
  providers: [
    SpotifyProvider({
      authorization:
        'https://accounts.spotify.com/authorize?scope=user-read-email,playlist-read-private',
      clientId: process.env.SPOTIFY_CLIENT_ID,
      clientSecret: process.env.SPOTIFY_CLIENT_SECRET,
    }),
  ],
  callbacks: {
    async jwt({token, account}) {
      if (account) {
        token.accessToken = account.refresh_token;
      }
      return token;
    },
    async session(session, user) {
      session.user = user;
      return session;
    },
  },
});
Here we load the Spotify provider for NextAuth.js. The thing we do differently here is to add our callback.
We do this custom callback because we want to use the access token for the user.
This will set the refresh token for the user as the access token we can then use by attaching it to the session.
The next thing we need to do is wrap our app with the NextAuth.js context provider.
Open your pages/_app.js/ file and change it, so it looks like this.
import {SessionProvider} from 'next-auth/react';
import '../styles/globals.css';

export default function App({Component, pageProps: {session, ...pageProps}}) {
  return (
    <SessionProvider session={session}>
      <Component {...pageProps} />
    </SessionProvider>
  );
}
This will wrap our app with a session provider so that we can access the session quickly.
Now let’s add a login button to our app.
We do this in the pages/index.js file.
import {useSession, signIn, signOut} from 'next-auth/react';

export default function Home() {
  const {data: session} = useSession();

  if (session) {
    return (
      <>
        Signed in as {session?.token?.email} <br />
        <button onClick={() => signOut()}>Sign out</button>
      </>
    );
  }
  return (
    <>
      Not signed in <br />
      <button onClick={() => signIn()}>Sign in</button>
    </>
  );
}
If the user is signed in, we show his email address from the token. Else we offer the signup button.
The flow will look like this:
Retrieving the playlists for this user
Now let’s see how we can query the Spotify API to retrieve the playlists for this user.
Create a lib folder in your project, and inside, create a spotify.js file.
The first thing we need to do here is add the variables we need.
const client_id = process.env.SPOTIFY_CLIENT_ID;
const client_secret = process.env.SPOTIFY_CLIENT_SECRET;
const basic = Buffer.from(`${client_id}:${client_secret}`).toString('base64');
const TOKEN_ENDPOINT = `https://accounts.spotify.com/api/token`;
const PLAYLISTS_ENDPOINT = 'https://api.spotify.com/v1/me/playlists';
This will load our client id and secret and create a basic authentication. Then we also add the token endpoint and the playlist endpoint.
Then we need a function that will turn our refresh token into an access token for a specific request.
const getAccessToken = async (refresh_token) => {
  const response = await fetch(TOKEN_ENDPOINT, {
    method: 'POST',
    headers: {
      Authorization: `Basic ${basic}`,
      'Content-Type': 'application/x-www-form-urlencoded',
    },
    body: new URLSearchParams({
      grant_type: 'refresh_token',
      refresh_token,
    }),
  });

  return response.json();
};
This function will call the token endpoint and pass our refresh token in. We get an access token we can use to query the API. However, this token is not valid forever.
Then we, of course, need a function that will call the playlist endpoint for a user.
export const getUsersPlaylists = async (refresh_token) => {
  const {access_token} = await getAccessToken(refresh_token);
  return fetch(PLAYLISTS_ENDPOINT, {
    headers: {
      Authorization: `Bearer ${access_token}`,
    },
  });
};
Here we first retrieve an access token for a specific request token. Then we return a fetch request to the playlists endpoint.
However, this is now a private function, so we don’t have a way to call it yet.
I’ll create an API endpoint as this is the safest way to call this function.
Inside your pages/api folder, create a new file called playlists.js.
import {getUsersPlaylists} from '../../lib/spotify';
import {getSession} from 'next-auth/react';

const handler = async (req, res) => {
  const {
    token: {accessToken},
  } = await getSession({req});
  const response = await getUsersPlaylists(accessToken);
  const {items} = await response.json();

  return res.status(200).json({items});
};

export default handler;
Now, if we call http://localhost:3000/api/playlists with our logged-in user, we should see some results!
Creating a frontend action to retrieve playlists
This is pretty cool, but let’s add a simple frontend. What we want is a button, that on click, will retrieve all playlists for this user.
Open your index.js file and make the following changes:
import {useSession, signIn, signOut} from 'next-auth/react';
import {useState} from 'react';

export default function Home() {
  const {data: session} = useSession();
  const [list, setList] = useState([]);

  const getMyPlaylists = async () => {
    const res = await fetch('/api/playlists');
    const {items} = await res.json();
    setList(items);
  };

  if (session) {
    return (
      <>
        Signed in as {session?.token?.email} <br />
        <button onClick={() => signOut()}>Sign out</button>
        <hr />
        <button onClick={() => getMyPlaylists()}>Get all my playlists</button>
        {list.map((item) => (
          <div key={item.id}>
            <h1>{item.name}</h1>
            <img src={item.images[0]?.url} width="100" />
          </div>
        ))}
      </>
    );
  }
  return (
    <>
      Not signed in <br />
      <button onClick={() => signIn()}>Sign in</button>
    </>
  );
}
Here we used the useState hook to create a new variable.
Then we introduce a simple function that will call our API endpoint and set this variable.
And then we add a button which on click calls this function and loops over all the results!
It is resulting in our playlists being fetched!

Now it’s up to you to add some cool styling to this 😎. You can find the complete code on GitHub.
Thank you for reading, and let’s connect!
Thank you for reading my blog. Feel free to subscribe to my email newsletter and connect on Facebook or Twitter