We started looking at how to load all WordPress posts in our Next.js website. However, we can also have pages in WordPress that we most likely want to load.
We’ll create a unique page for each of our WordPress pages in Next.js in this article.
If you want to follow along, use this branch as your starting point.
Creating unique pages in Next.js
We want to achieve that our pages are accessible on the top-level domain.
So we want to be able to visit: https://ourwebsite.com/our-page.
We need to work in the pages folder directly for this to work.
Small note: Make sure you don’t have hardcoded Next.js pages with the same slug
Create a file called [slug].js in your pages folder.
You might recall this [] means it’s a variable page from my article on Next.js page options.
This will create pages dynamically and provide a slug variable for each.
Since this is a single page but can have multiple versions (page-1, page-2, etc.), we need to use getStaticPaths and getStaticProps.
getStaticPaths: Will be used to create all unique pages for each of our WordPress slugged pages.getStaticProps: This will be the page we are loading and load more details for that specific slug
Let’s set up our basic structure:
import { TODO } from '../lib/api';
import Head from 'next/head';

function Page(page) {
  return (
    // HTML
  );
}

export async function getStaticPaths() {
  // TODO
}

export async function getStaticProps({ params }) {
  // TODO
}

export default Page;
This will be the basic outline for our pages.
We’ll get started on the static paths, which will render a unique page for every slug it finds.
But for this to happen, we need to query our GraphQL API and retrieve all unique slugs for our pages.
Open up the lib/api.js file and create the following function.
export async function getAllPagesWithSlugs() {
  const data = await fetchAPI(`
  {
    pages(first: 10000) {
      edges {
        node {
          slug
        }
      }
    }
  }
  `);
  return data?.pages;
}
This function gets all our pages (10000 limit) with a slug and returns those slugs.
Now let’s see how we can use this function in our [slug].js file.
First, import this function.
import { getAllPagesWithSlugs } from '../lib/api';
Then we can use this in our getStaticPaths to render pages for each of the results.
export async function getStaticPaths() {
  const pagesWithSlugs = await getAllPagesWithSlugs();
  return {
    paths: pagesWithSlugs.edges.map(({ node }) => `/${node.slug}`) || [],
    fallback: true,
  };
}
And voila, we now have at least a unique page for each WordPress page.
However, they don’t have any content yet. To work, we need to create a function that can retrieve details for a specific slug.
Head back to your lib/api.js file and add the following function.
export async function getPageBySlug(slug) {
  const data = await fetchAPI(`
  {
    page(id: "${slug}", idType: URI) {
      title
      content
    }
  }
  `);
  return data?.page;
}
This function queries for a single page with a specific slug. As you can see, the slug is passed as a variable.
We use URI for the type, which is set in the GraphQL options of WordPress GraphQL.
And for each page, we want to return the title and the content field. (You can extend this with more data if needed).
Now back in our [slug].js file, we can start by importing this function.
import { getAllPagesWithSlugs, getPageBySlug } from '../lib/api';
And then leverage it in the getStaticProps function.
export async function getStaticProps({ params }) {
  const page = await getPageBySlug(params.slug);
  return { props: page };
}
The last thing we need to do is add some HTML to our main Page function.
This function can now return the page variable we just set in the getStaticProps.
function Page(page) {
  return (
    <div className='flex flex-col p-10'>
      <Head>
        <title>{page.title}</title>
        <link rel='icon' href='/favicon.ico' />
      </Head>
      <div className='mb-5 text-4xl font-bold'>{page.title}</div>
      <div
        className='text-base text-grey-darker'
        dangerouslySetInnerHTML={{ __html: page.content }}
      ></div>
    </div>
  );
}
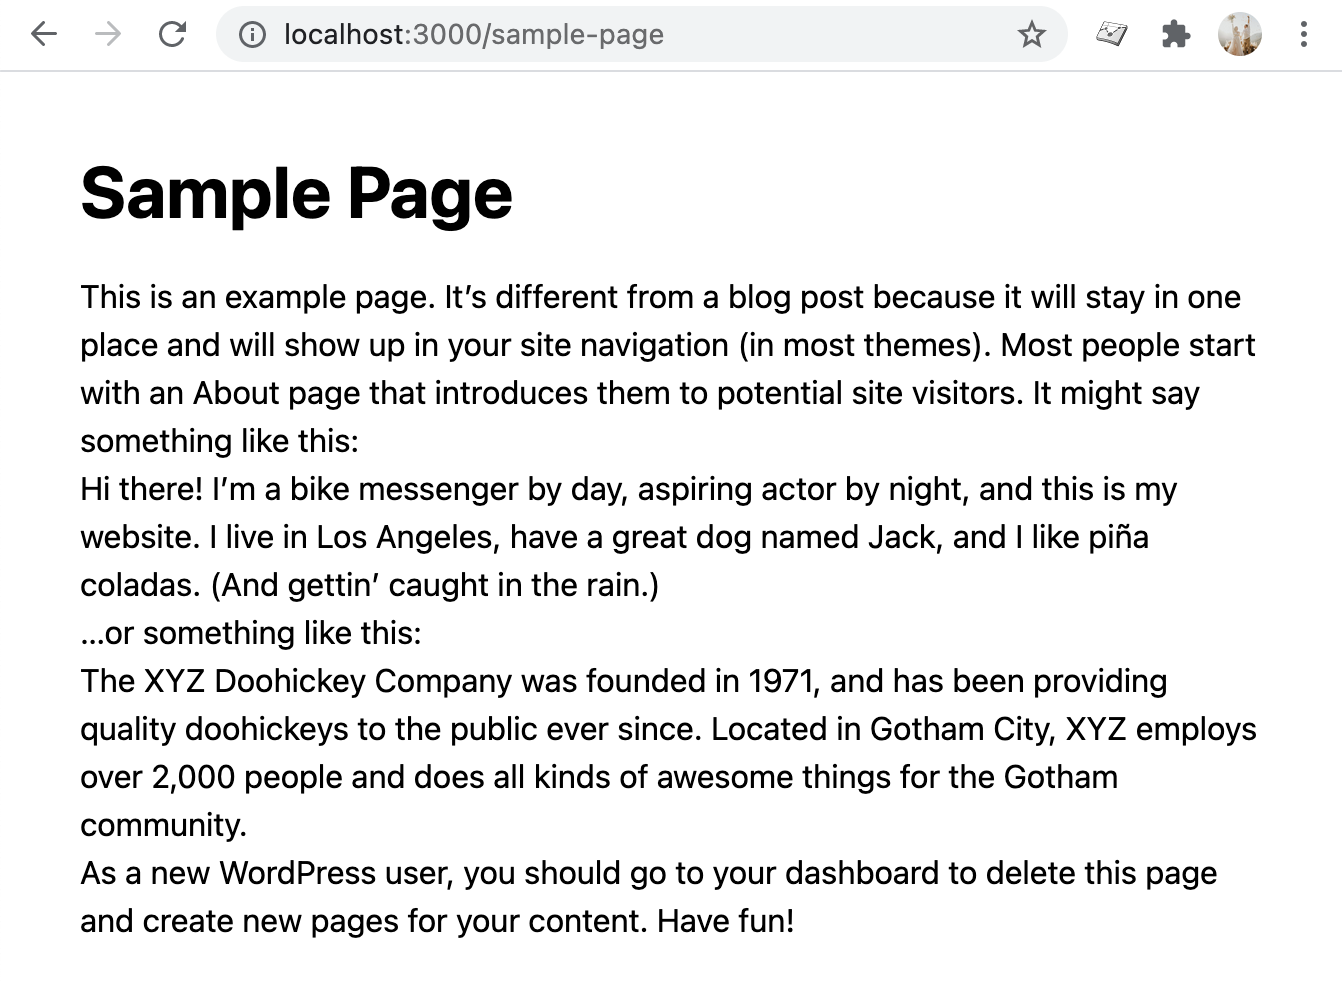
And there you go. You can now visit any of your slugs and view the page on our Next.js website.
If you want to see the complete code, it’s hosted here on GitHub.
Thank you for reading, and let’s connect!
Thank you for reading my blog. Feel free to subscribe to my email newsletter and connect on Facebook or Twitter