Let me paint the picture for you. You just finished your app and are eager to start uploading it to Apple. Only to receive an automated message saying something in the lines of:
We noticed your app includes App Tracking Transparency permissions requests, but it encourages or directs users to accept tracking.
Apple mainly declines your app if you are using some tracking (e.g., Firebase Analytics) and have your own prompt for this.
What is this App Tracking Transparency
Apple introduced App Tracking Transparency in iOS 14.5. It required applications to ask permission if they want to do any tracking across other companies.
This does only validate if you only track to outside of your company, but it’s hard to argue with Apple on the case if you send it to do a third-party analytics platform.
In general, it means Facebook doesn’t have to ask permission if they keep tracking between Whatsapp, Facebook, and Instagram since they are the same company!
My advice if you are tracking to an external system is best to implement this way of tracking. Since it was already GDPR compliant to ask people if they allowed tracking, it mostly means moving from your own custom popup asking for permission to Apple’s build in one.
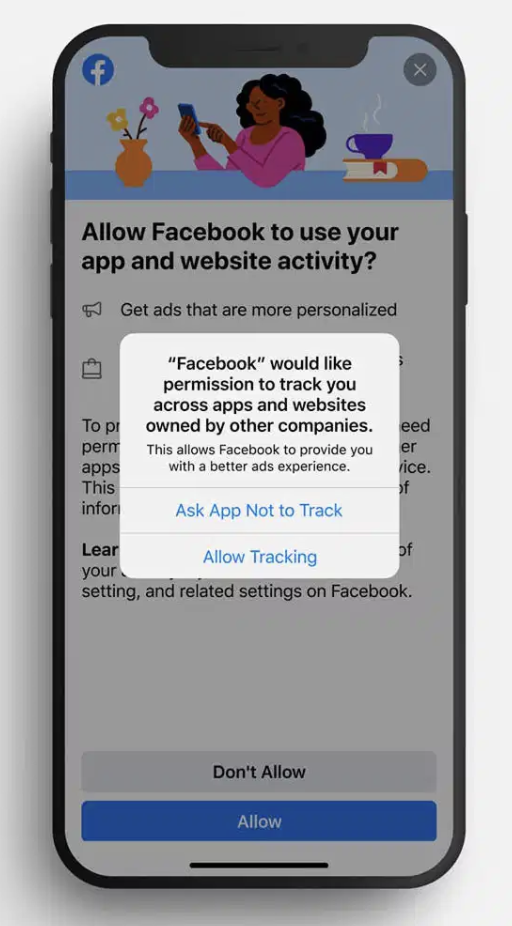
This tracking request looks like this:

Implement App Tracking Transparency in Ionic apps
This article will look at how you can implement the app tracking transparency for an Ionic application.
- Step 1: Install the plugin
We need to install the Cordova plugin. I’m using the idfa plugin.
cordova plugin add Cordova-plugin-idfa
Find the IDFA plugin here
- Step 2: Add the tracking message
Next up, we need to define a tracking description and explain what you are tracking and why. Else apple will reject you based on the content of this string.
Open up your config.xml file and modify the part under the platform for iOS.
<platform name="ios">
	<edit-config file="*-Info.plist" mode="merge" target="NSUserTrackingUsageDescription">
	    <string>To make your app experience better</string>
	</edit-config>
</platform>
- Step 3: Initialise the plugin
To show the modal, we need to invoke it first, and if you are already using a custom prompt to ask people for tracking, you can modify that.
In our case, we do have this, and we only want to show this App Tracking Policy message to people on apple devices that have iOS 14.5 or higher.
if (this.platform.is('ios') && this.device.version >= '14.5') {
  this.showAppTrackingTransparency();
} else {
  // Show custom message
}
So if we are on iOS and the version is 14.5 or greater, we invoke this new function.
Let’s go ahead and create this function:
private showAppTrackingTransparency() {
	const idfaPlugin = window.cordova.plugins.idfa;
	idfaPlugin.getInfo().then((info) => {
	  if (!info.trackingLimited) {
	    return info.idfa || info.aaid;
	  } else if (
	    info.trackingPermission ===
	    idfaPlugin.TRACKING_PERMISSION_NOT_DETERMINED
	  ) {
	    return idfaPlugin.requestPermission().then((result) => {
	      if (result === idfaPlugin.TRACKING_PERMISSION_AUTHORIZED) {

	        // Start your tracking plugin here!

	        return idfaPlugin.getInfo().then((info) => {
	          return info.idfa || info.aaid;
	        });
	      }
	    });
	  }
	});
}
Alright, we start by grabbing the plugin from the window object. At the point of writing, this is the way to retrieve the plugin.
Then we request the info for the plugin, which can result in multiple responses.
- Tracking id: Already accepted, returns the advertisement id
- Tracking not determined: No action started yet
- Request permission: Prompt the permission popup
- Result authorized: You can now start your tracking script and even save the advertisement ID if you need it.
And that’s it. Your app will now prompt for tracking permissions and only start tracking if the user opts in for this.
Thank you for reading, and let’s connect!
Thank you for reading my blog. Feel free to subscribe to my email newsletter and connect on Facebook or Twitter

