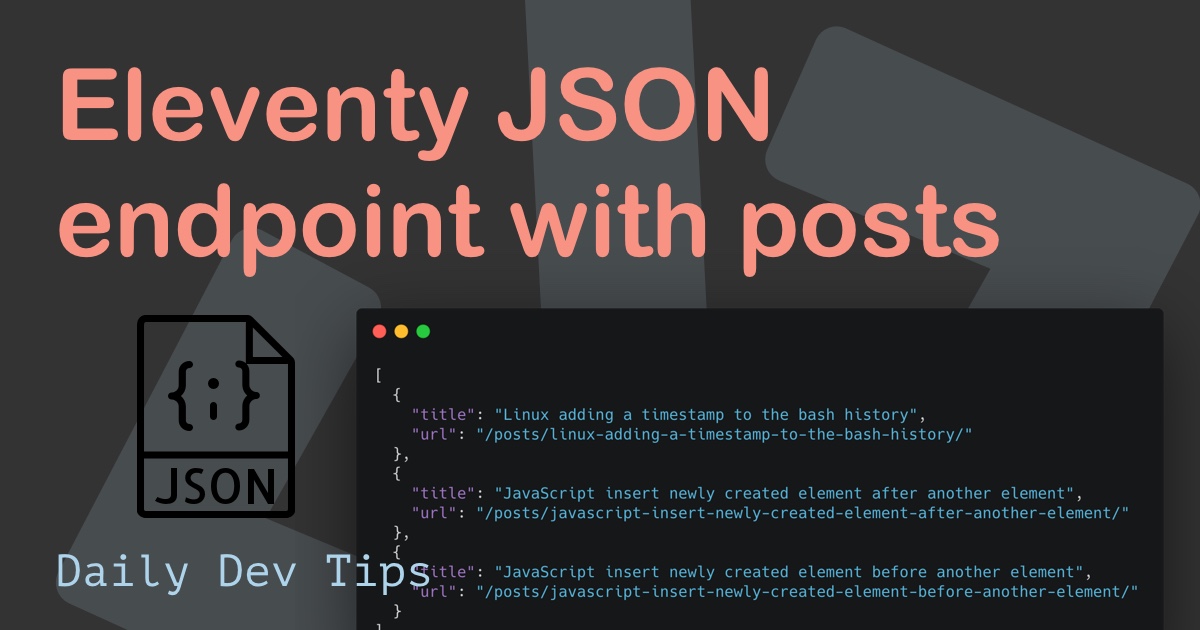
This article will explore an option to create a two-column layout in Eleventy.
This is quite the challenge since markdown doesn’t allow us to have any styling.
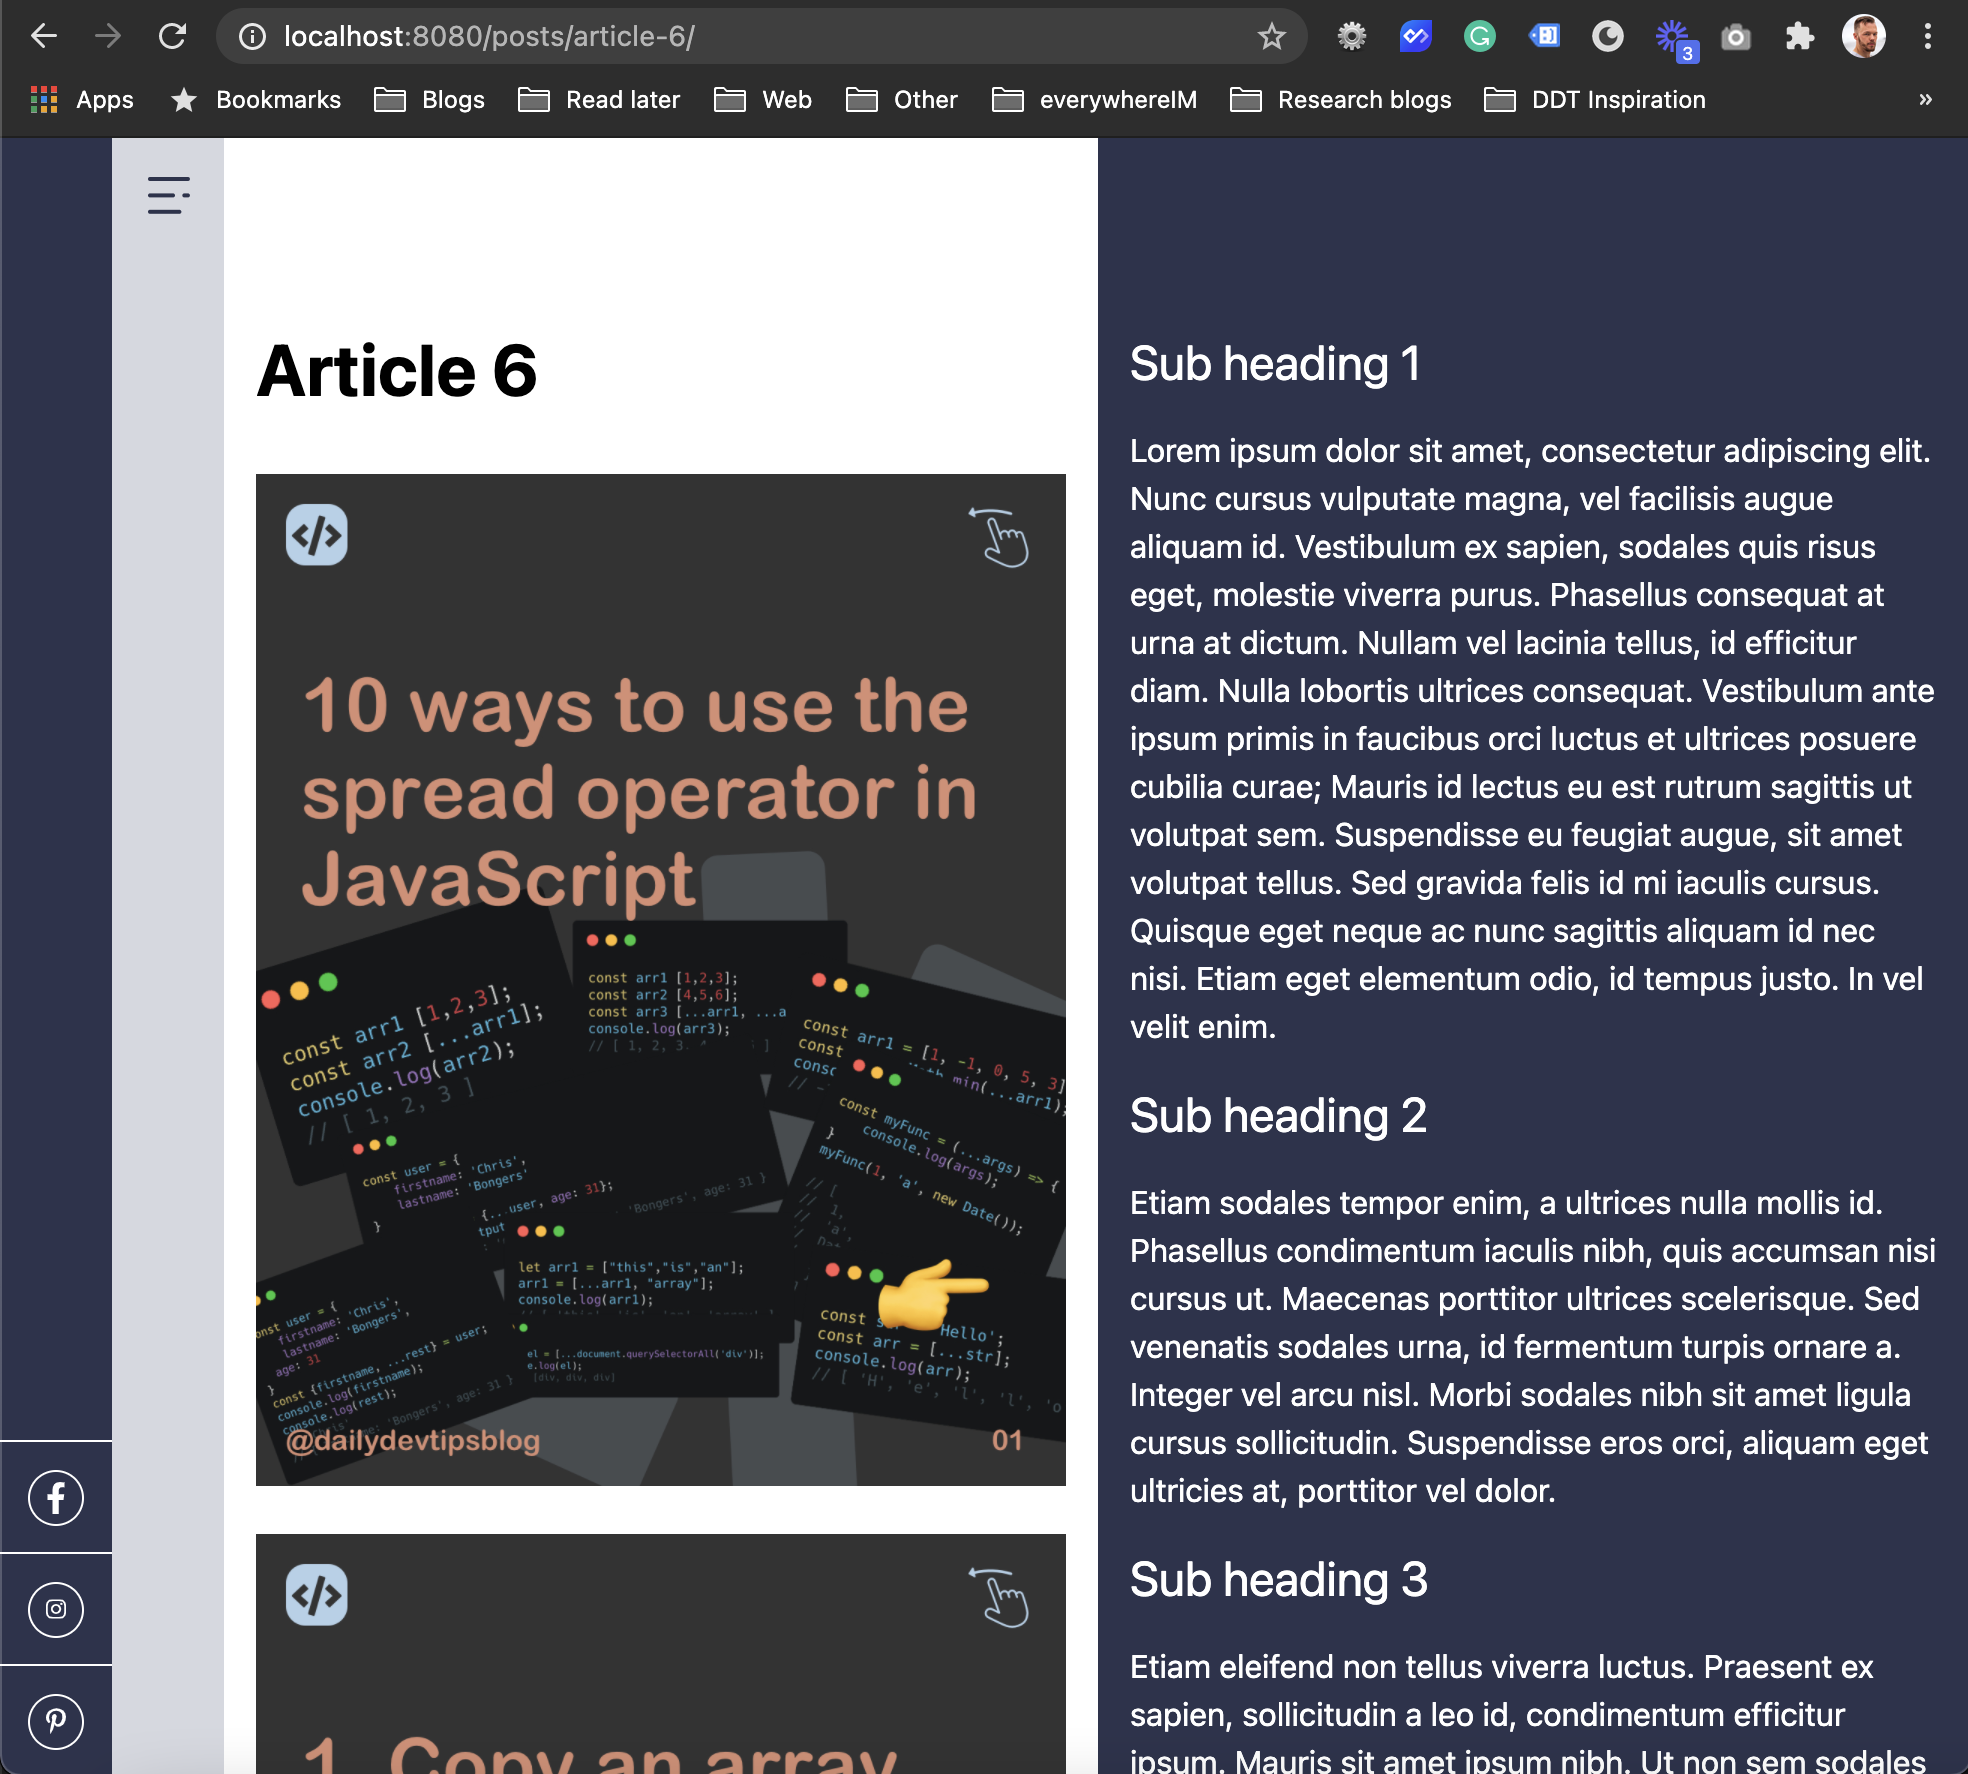
Looking at my design, you can see the images are on one side and the other side’s content.
I will use a custom JavaScript method to parse images based on the markdown file’s name for this case.
Create our image repository
As mentioned, we will be hosting our images in a separate file structure.
Start by creating an’ images’ folder inside the src folder.
You need to create a subfolder inside this folder with your post file’s exact name.
In our example, the post is called article-6.md, so we will create a subfolder called article-6.
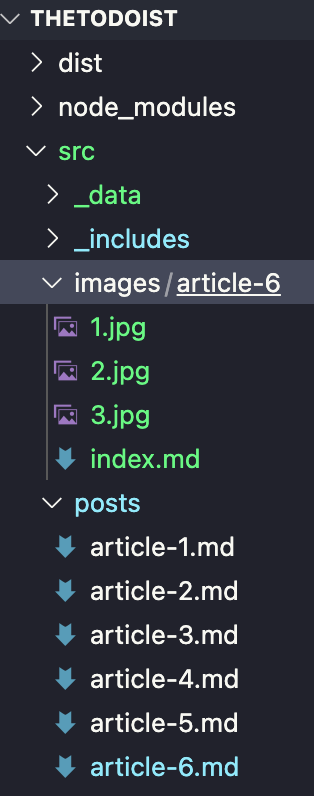
Once we have this, we can add all the image folders we need.
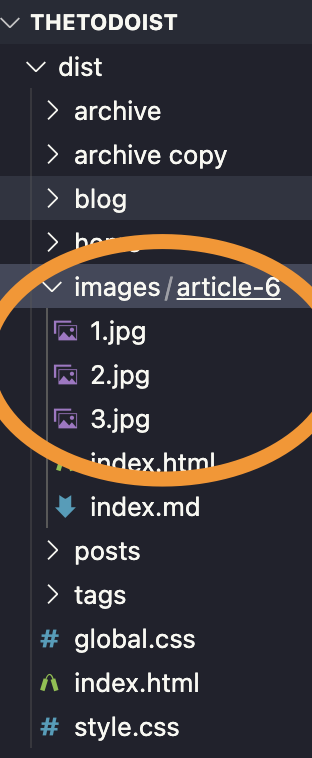
We then need to tell Eleventy to pass this folder to our output website.
Open the .eleventy.js file and add the following line to your export.
module.exports = function (config) {
  config.addPassthroughCopy("src/images");

  // All your other config stuff
});
With this, we tell eleventy to output our image folder to our dist once we build.
Create the Eleventy image filter
Once we have our image setup, we can start building a script that can read these images to use them in our posts.
Eleventy has a cool feature where it can read data from the _data folder.
So let’s create this _data folder inside the src directory.
Inside there create a file called postImages.js.
This file will be a function, reading our file system and finding our images, and adding them to an object to use them.
This function is a node script that can return an object. It will turn into a variable called postImages with whatever we return inside.
Note: This function was adapted from Chris his journal project.
First, we’ll start by using the filesystem and defining our structure.
const fs = require('fs'),
  path = require('path');

const walkSync = (dir, filelist) => {
  const files = fs.readdirSync(dir);
  filelist = filelist || {};

  // Do our magic here

  return filelist;
};

module.exports = walkSync(process.env.PWD + '/src/images/');
Here, we created a function called walkSync. This will read a specific directory, do some magic, and return a filelist object.
Then we export it to return the filelist as our variable.
In this walkSync function, we need to loop over our directory and find subdirectories.
files.forEach(function (file) {
  if (fs.statSync(dir + file).isDirectory()) {
    filelist = walkSync(dir + file + '/', filelist);
  } else {
    // Create our output
  }
});
We looped each file in our directory, and if that specific file is a directory itself, we call the function with the current filelist as an input.
Now that we looped all our directories, we need to do something with the images we found.
That will happen in the else statement.
const imageURL = dir + file;
const ext = path.extname(imageURL).toUpperCase();
if (['.JPG', '.JPEG', '.PNG'].includes(ext)) {
  const usePath = imageURL.replace(process.env.PWD + '/src/images/', '');
  const fullPath = usePath.split('/');
  const directory = fullPath[0],
    file = fullPath[1];
  if (!filelist[directory]) filelist[directory] = [];
  filelist[directory].push(file);
}
We start by defining the imageUrl with the entire dir. Then we get the extension for this file.
In the next step, we check if the file has an extension of .JPG, .JPEG, .PNG.
If that is the case, we can safely say it’s an image, and we should add it to our output.
We then replace our local path using the string.replace method.
This gives us a result that looks like this:
// article-6/1.jpg
// article-6/2.jpg
// article-6/3.jpg
We now want to explode these strings on the slash to get the post name and all the images.
const fullPath = usePath.split('/');
That gives us an array:
// [ 'article-6', '1.jpg' ]
// [ 'article-6', '2.jpg' ]
// [ 'article-6', '3.jpg' ]
So key 0 is article-6, representing the article name, and the second key is the image name.
Now we need to add these images as an array to our object.
const directory = fullPath[0],
  file = fullPath[1];
if (!filelist[directory]) filelist[directory] = [];
filelist[directory].push(file);
This gives us the following output.
{ 'article-6': [ '1.jpg', '2.jpg', '3.jpg' ] }
So now our postImages variable contains this object.
Link the images to our post
Now we need to get these images in our post.
As mentioned, we created a variable called postImages containing all our object data.
We can access this variable by calling it in our post.
Modify the src/_includes/layouts/post.njk file and add the following code:
{% for image in postImages[page.fileSlug] %}
<img src="/images/{{page.fileSlug}}/{{ image }}" />
{% endfor %}
We access the postImages object and pass the page.fileSlug (article-6).
That returns the array of images for this article. We can then return an image object for each image result.
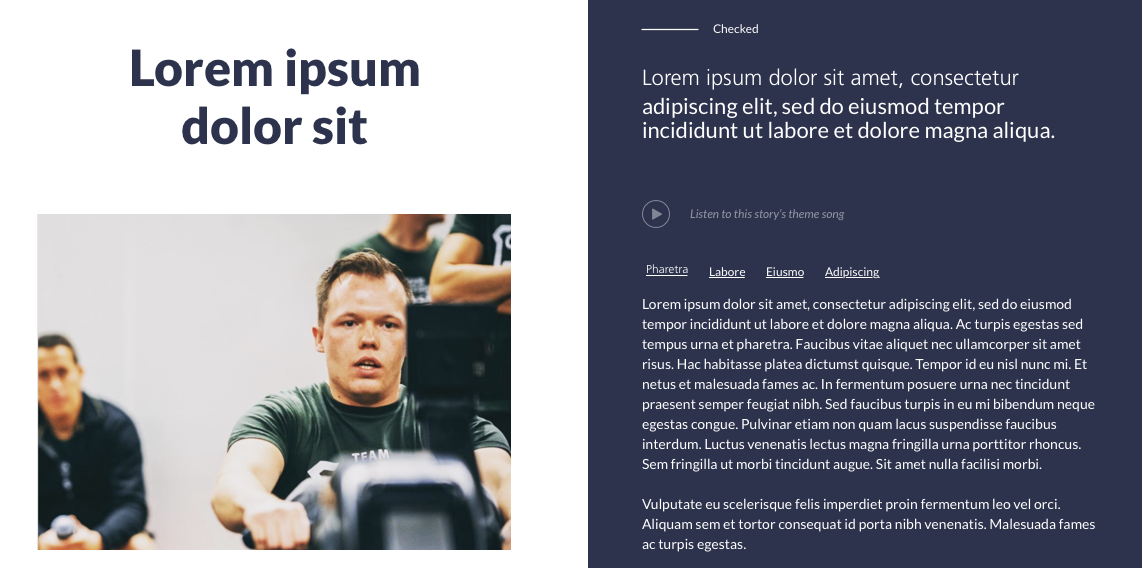
Two-column post layout in Eleventy
Since we converted to Tailwind, here is my version of the two-column layout using Tailwind classes.
{% extends 'layouts/base.njk' %} {% block content %}
<main class="flex flex-col-reverse md:flex-row">
  <div class="w-full p-4 py-24 md:w-1/2">
    <h1 class="mb-8 text-4xl font-bold">{{ title }}</h1>
    {% for image in postImages[page.fileSlug] %}
    <img
      src="/images/{{page.fileSlug}}/{{ image }}"
      class="w-full mb-6 shadow-xs"
    />
    {% endfor %}
  </div>
  <div class="w-full min-h-screen p-4 py-24 text-white md:w-1/2 bg-purple">
    {{ content | safe }}
  </div>
</main>
{% endblock %}
This gives us a two-column desktop layout, with the title and images on the left side and the right side’s content.
We then use flex-col-reverse to switch these on mobile, so the content is on top.
There you go. We just created a two-column layout using Eleventy and markdown files.
Pretty cool solution. I’m you can even think of other ways to use this method.
You can find today’s code on GitHub.
Thank you for reading, and let’s connect!
Thank you for reading my blog. Feel free to subscribe to my email newsletter and connect on Facebook or Twitter