I looked back at some of my articles and realized I hadn’t done much of these complete start-to-finish series.
So in the upcoming series, I will teach you how to create a Next.js portfolio from nothing to hosting it online!
Are you looking to start building your portfolio? Subscribe to my newsletter to stay up to date and follow this series.
What’s we’ll learn
We will start by picking a design that we’ll be building. After that, we will set up the project and create a rough outline.
Then we will make things more dynamic and load data from different sources. (These will become some optional steps depending on what method you like most).
And eventually, we will host our website on the world wide web so people can appreciate our designs.
This series guides how I would tackle it for those planning to follow along. You can use different elements and adjust the flow as we go to make it more your own.
Ready, set, go
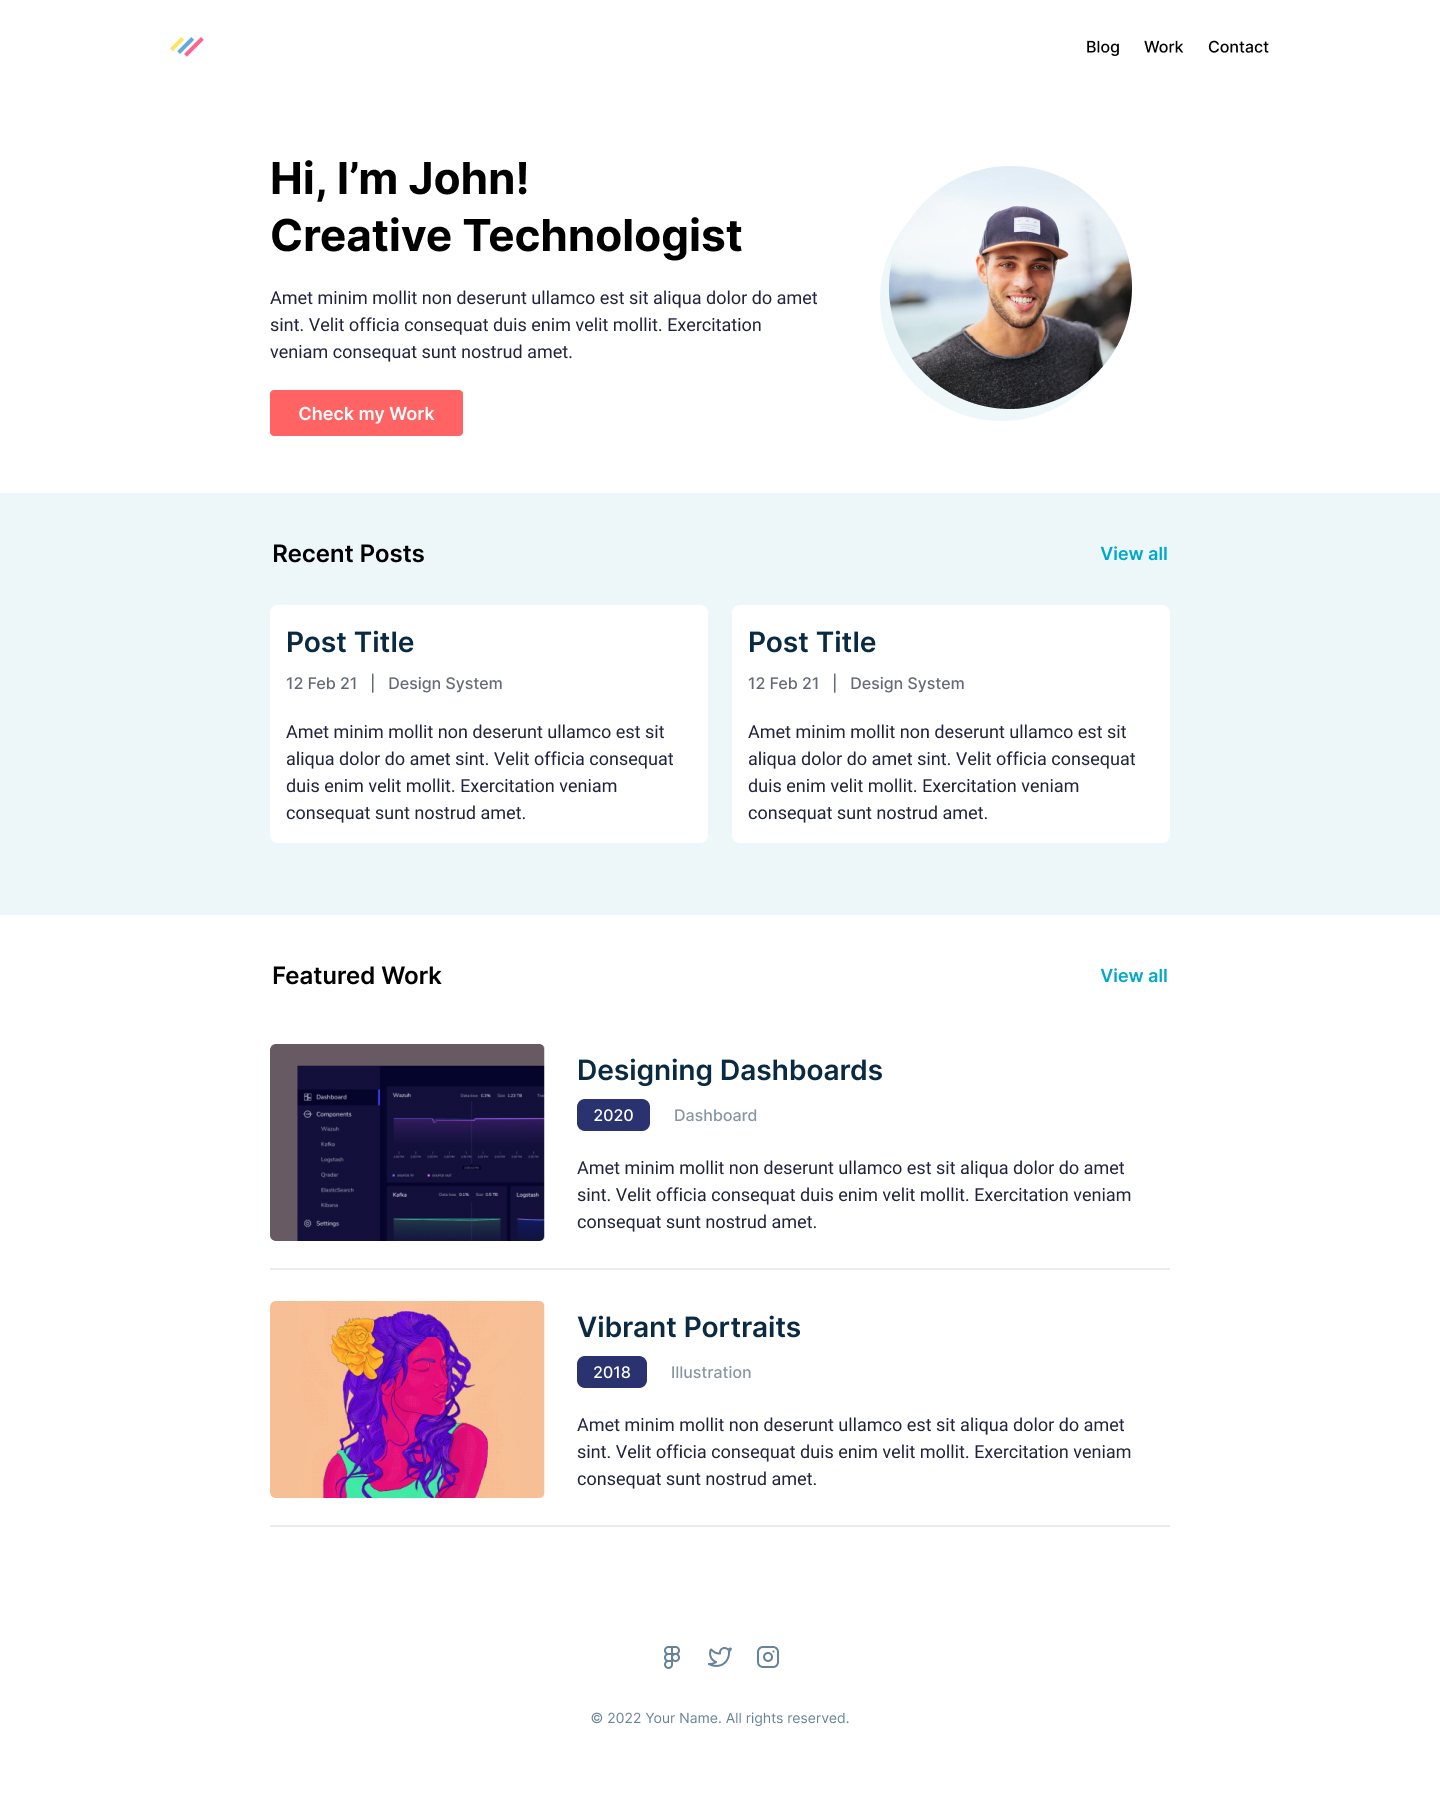
Alright, I’m excited, and the first thing I did was think about a design.
As I recently did a YouTube episode on this, I already found this fantastic design we can use.
However, you might want to pick some other designs or, even better, use one of your own. If you are anything like me, coming up with your design is hard, and thus I always opt to use design inspiration from people who have a knack for it.
You can find some fantastic designs on these various websites. (Be sure to check if it’s allowed to use it)
And many more, you can spend a reasonable amount of time finding the perfect portfolio. Pick something that speaks to you and fits your vibe.
But remember, we can constantly adjust our code, so don’t worry if there are elements that seem impossible to create.
Analysing the design
For the design I picked, we get three pages out of the box:
- Homepage
- Blog
- Work
And looking a bit further, we can see some recurring elements for each page:
- Header
- Main element
- Footer
Knowing this will help us to see what we will need to create.
Tip: Analyse the building blocks
If you analyze the building blocks needed, you might see some odd ends, like, for example, this homepage. You might have started coding everything in a specific width. However, did you note the recent posts block?

It’s slightly different because it’s in the middle of the page and goes full-width.
This means we can’t use one big wrapper div and center everything. It’s elements like this that determine how you will continue your project.
Homework
Alright, for those following along, you have some homework to do for today.
- Pick a design: Pick a design that fits your style, and this will be what you will be creating (or follow with the one I picked)
- Analyse: Start analyzing the design and see how you can split it into building blocks. (It might help to draw it out)
Once you are done, come back for part 2, where we will start setting the coding foundations for this project.
Thank you for reading, and let’s connect!
Thank you for reading my blog. Feel free to subscribe to my email newsletter and connect on Facebook or Twitter