Hashnode started a great challenge to build a product before the end of 2020 called the #christmashackaton.
And I’m not one to back away from a challenge.
I had this idea for a while but didn’t get to it.
My idea is to create a Codepen/JsFiddle/CSSPlayground but for no-div CSS art.
Why? Because I want to get into CSS art, and I like the strict option one can have by not being able to add other elements.
Also, I wanted to see how one can build a playground from scratch. When I look at Codepen, I think it must be hard to make, but it’s not that bad when you start to think about it.
The result.
And the live website can be found here.
Create your own no-div CSS art on nodivs.com
Note: don’t forget to share it on Twitter with #nodivs
Structure planning
Before starting a project like this, it’s good to write down how it should work and look. This will help you work faster and more efficiently.
I first drew a super high-level scheme for this project to see what kind of data I needed.
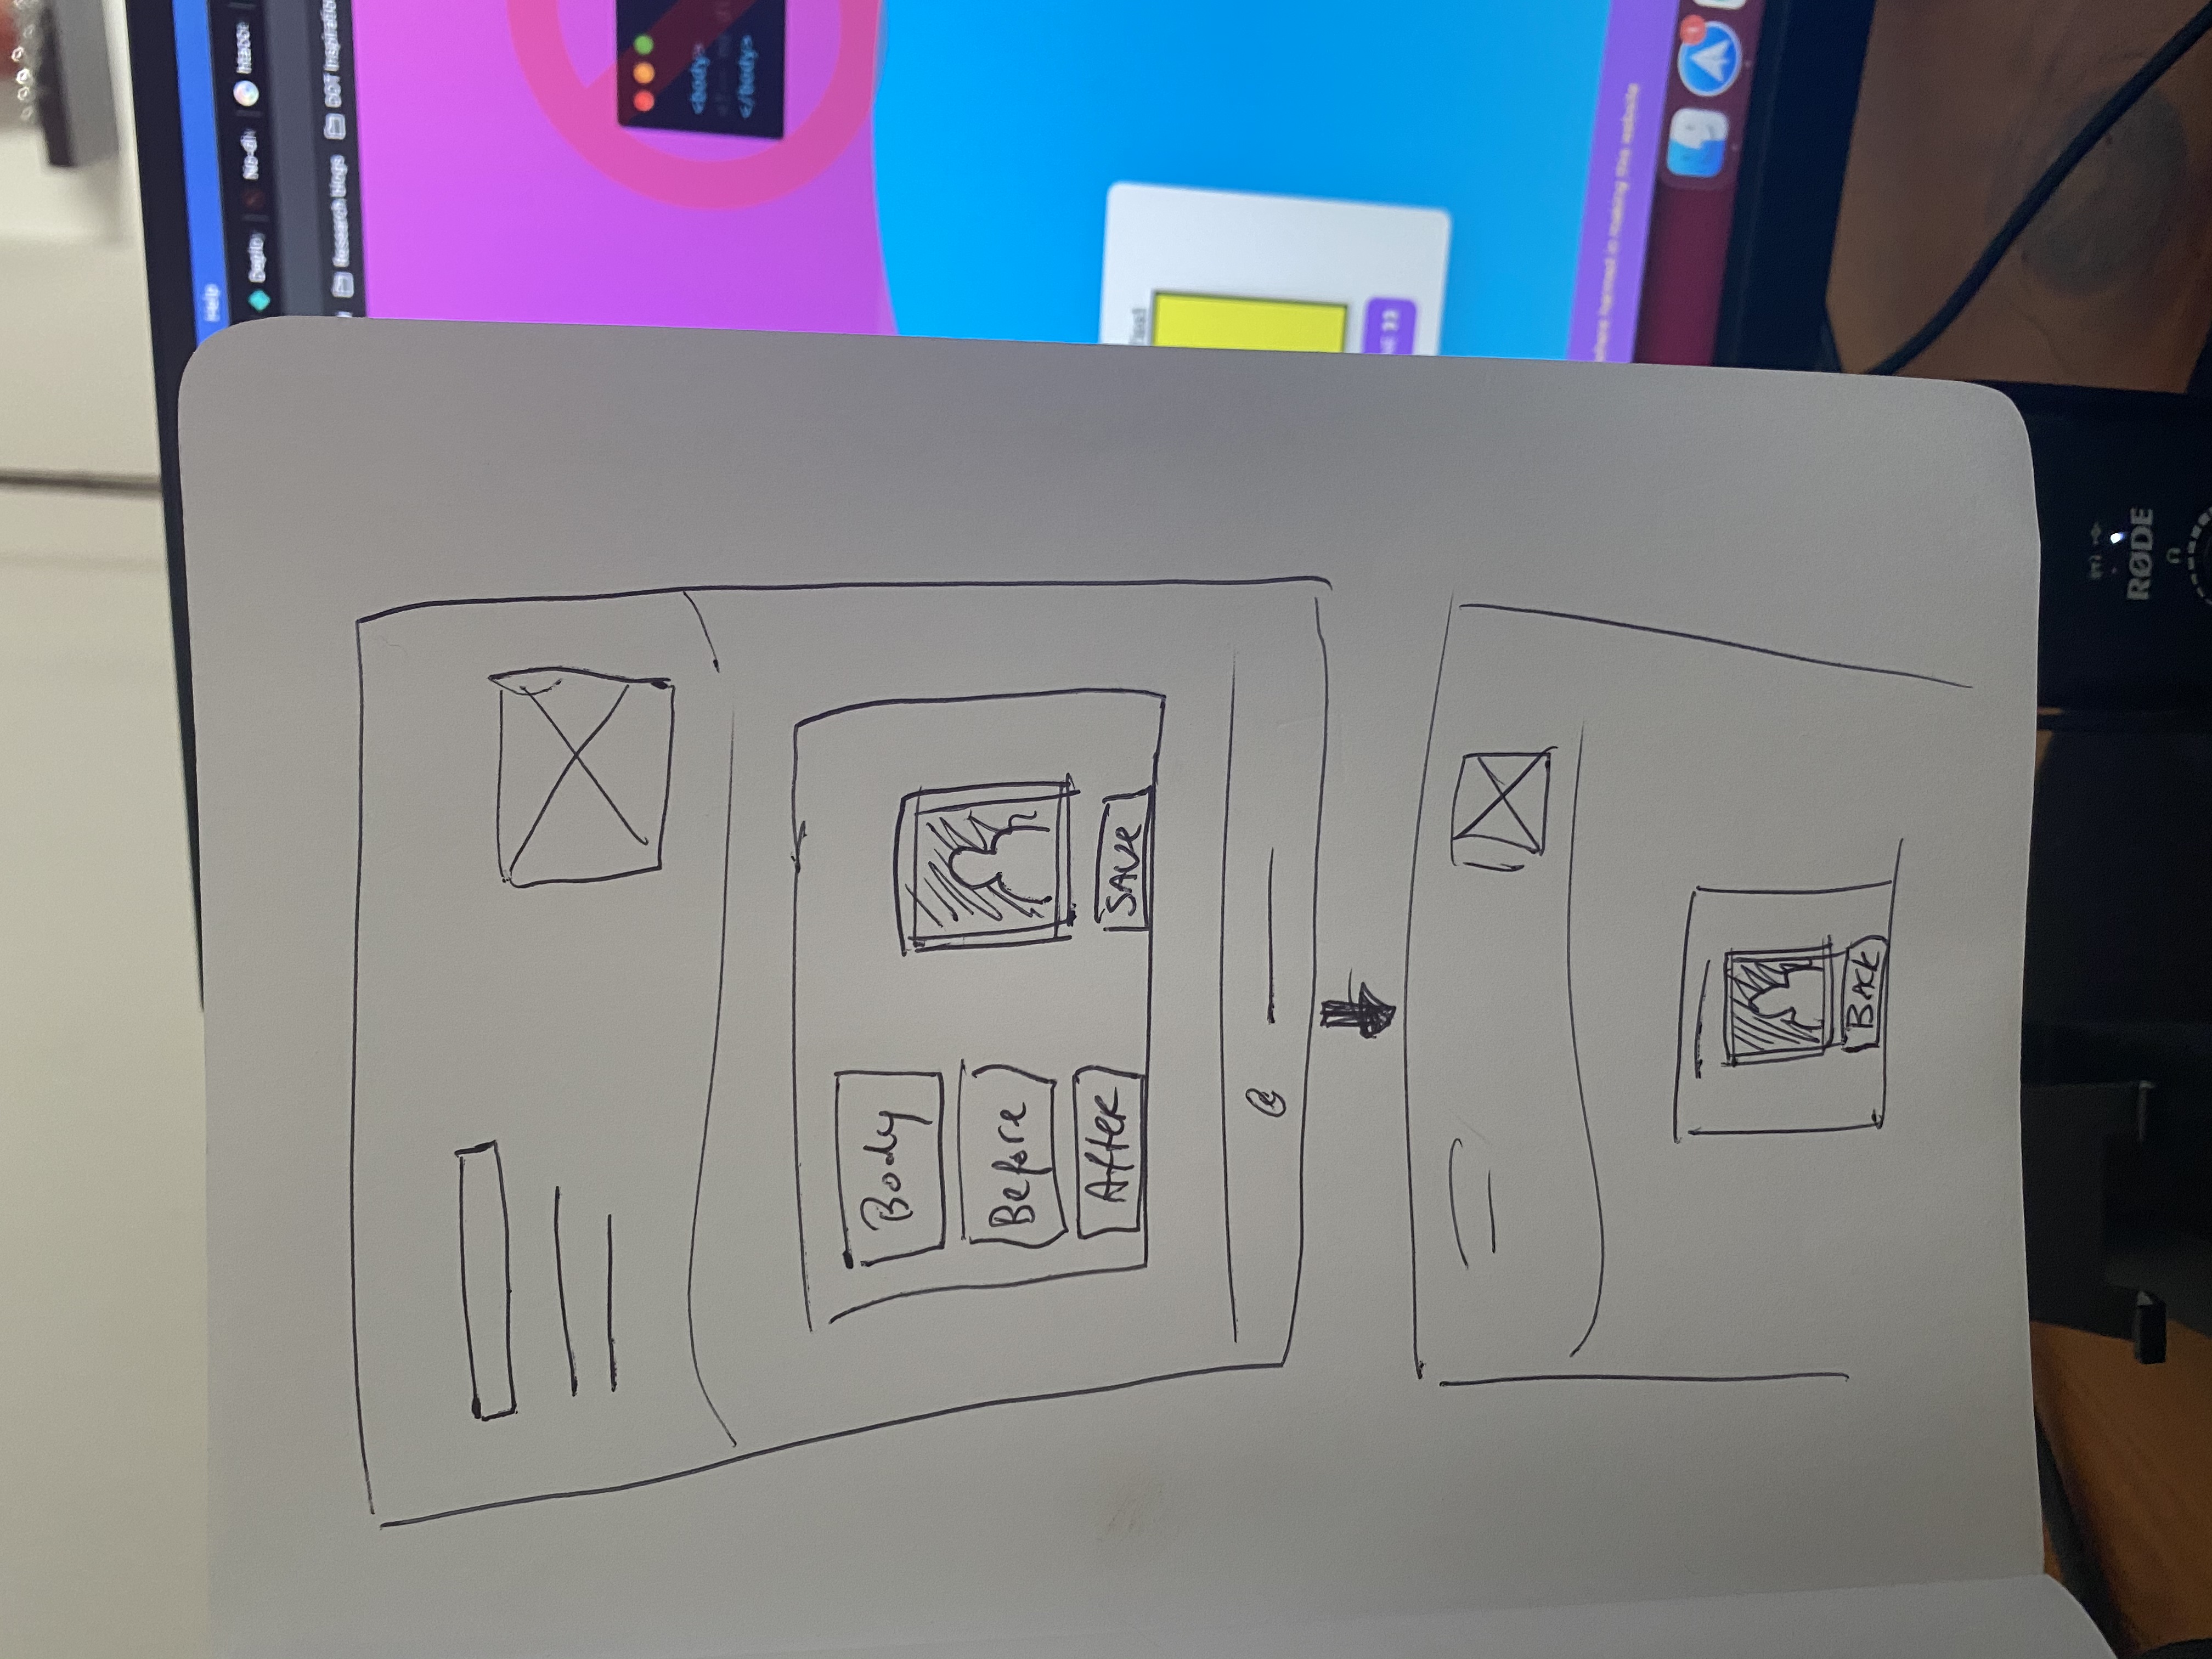
I’ve decided to narrow the art down to using the body, body:before, and body:after elements.
This will be rendered on the left-hand side of the screen, then on the right is an output div with a fixed size of 200x200. This is another limit to the tool, but more on that in the plans.
People should then be able to save whatever they made and share their div URL.
Creating the textarea capture
So with this in mind, we can start building this no-div playground for our CSS art.
I will share a slimmed-down version of this article, so you’re not getting stuck on the layout issues.
As for our HTML we can use the following.
<div class="container">
<div>
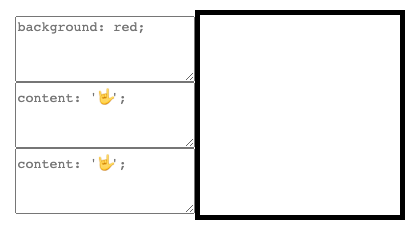
<textarea id="cssBody" placeholder="background: red;"></textarea>
<br />
<textarea id="cssBefore" placeholder="content: '🤟';"></textarea>
<br />
<textarea id="cssAfter" placeholder="content: '🤟';"></textarea>
</div>
<iframe id="iFrame"></iframe>
</div>Let’s add some basic CSS to render it more like our design.
.container {
  display: flex;
  align-items: center;
  justify-content: center;
  min-height: 100%;
}
textarea {
  height: 66px;
}
iframe {
  width: 200px;
  height: 200px;
  border: 5px solid #000;
}
This will give us the following output.
But we are interested in getting the values from the textarea’s.
Let’s add some JavaScript to this mix.
We first need to get all our elements.
const cssBody = document.getElementById('cssBody');
const cssBefore = document.getElementById('cssBefore');
const cssAfter = document.getElementById('cssAfter');
We retrieve all three of our textarea’s based on their id.
Then we need to add an event listener to retrieve every time the input is changed.
In our case, we will leverage a global keyup listener and use event bubbling to stop if it’s not one of our textareas.
document.addEventListener('keyup', (event) => {
  if (
    event.target !== cssBody &&
    event.target !== cssBefore &&
    event.target !== cssAfter
  ) {
    return;
  }
  console.log(cssBody.value);
  console.log(cssBefore.value);
  console.log(cssAfter.value);
});
Every time the key-up event fires inside one of our textareas we get the values.
Rendering the output
Of course, getting these values is cool, but what do we do with them?
You may have noted our playground HTML uses an iframe. Although I’m usually not a big fan, it serves its purpose for this example.
We can modify stuff inside the iframe without affecting our main page.
First, let’s add our output to our variables.
const iFrame = document.getElementById('iFrame').contentWindow.document;We get the document part of our iframe since we will use that to inject our CSS.
Now the iframe comes with some handy stuff we can leverage, as in we can open this document, write lines and close it again.
That looks like this.
iFrame.open();
iFrame.writeln(`
<style>
body { ${cssBody.value} }
body:before { ${cssBefore.value} }
body:after { ${cssAfter.value} }
</style>`);
iFrame.close();
We create a stylesheet inside our iframe and define what the rules are.
In our example for the no-div playground, this is very limited.
But you can even write JavaScript, CSS, and HTML if you want to.
Now, if we type it will modify the iframe directly like this.
Perhaps that’s all you want for your project. In that case, you can find this file here:
Download the css playground index.html
Saving the art
I already stopped at this point and wanted to do the saving later, but then people would be so annoyed if they spent too much time on this CSS art and it got lost.
So decided to push and get this in V1.
I looked at several options, including google sheets, air table, but decided to go with Firebase.
Firebase is a fantastic real-time database. I didn’t really need the real-time part in this example, but it works well.
So first, head over to Firebase, sign up, and create your first project.
Once you create your project, you’ll see the vast amount of features Firebase offers.
We will only be focussing on the Realtime Database.
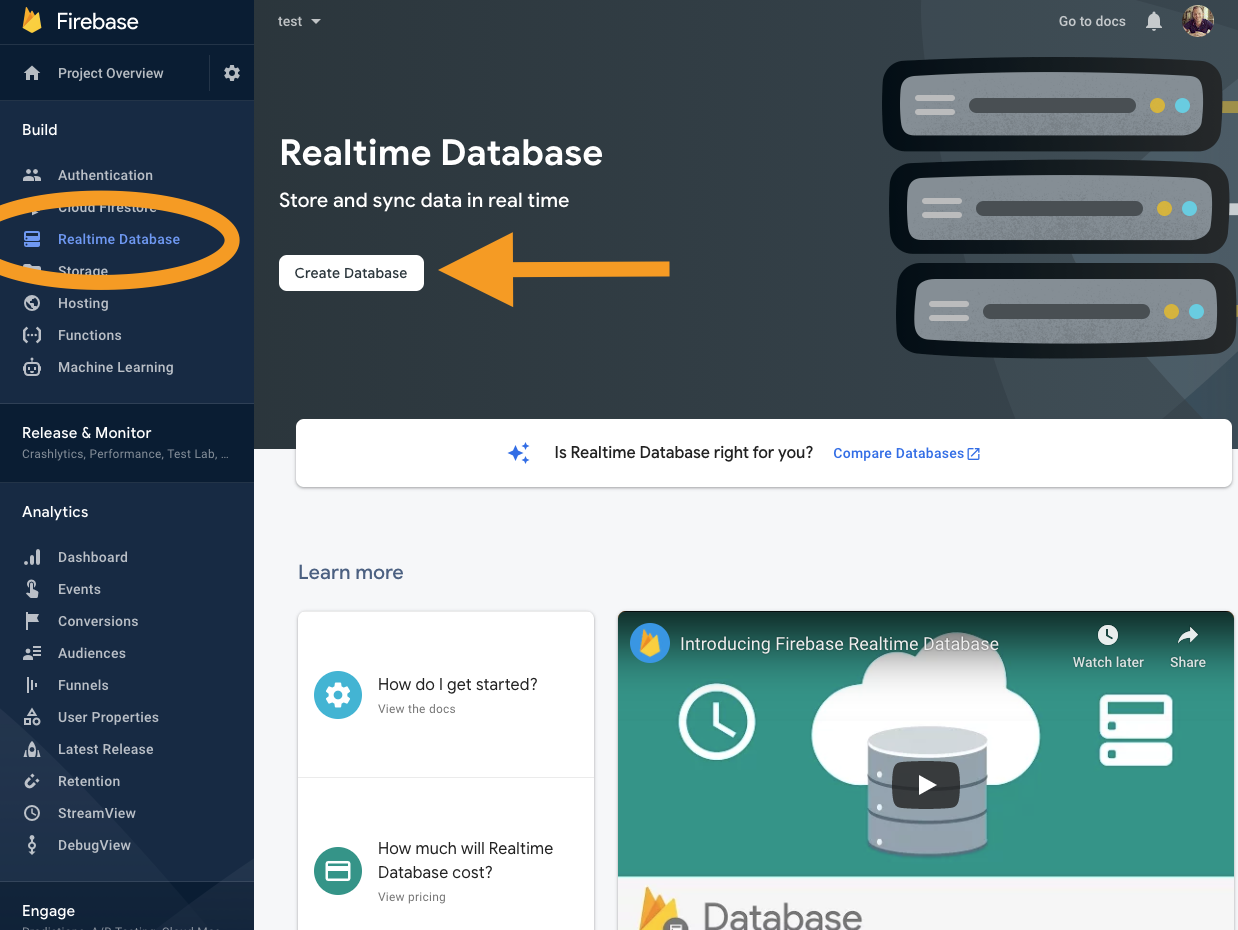
Click the button to add a new database.
Pick any locations that work for you, then choose test mode so we can write data to our database.
Once it’s created, you should see a view like this.
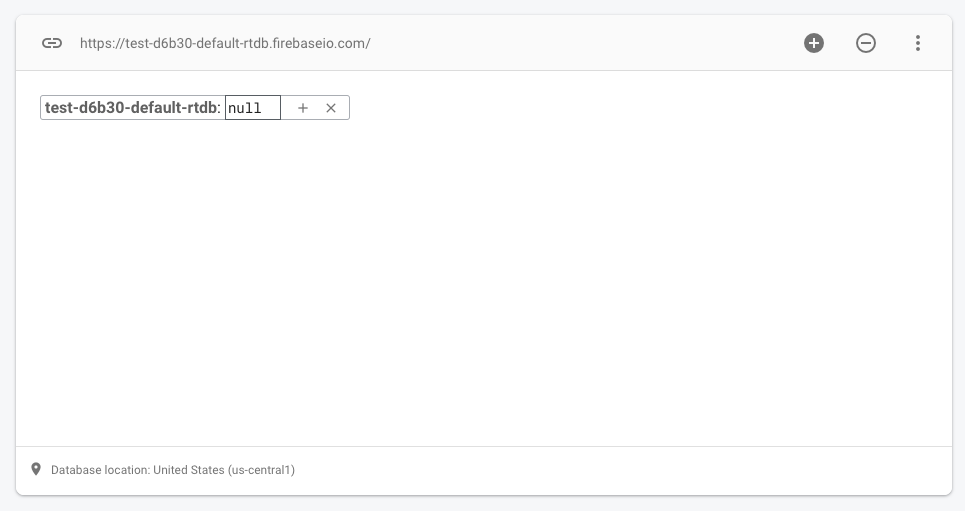
That’s it. We are done with setting up our database. Yeah, not kidding; we don’t need to define tables or structures.
We need to enhance our HTML file to read and write to Firebase.
First, let’s start by adding the Firebase JavaScript we need. In our instance, we will load them from a CDN.
Add the following lines before closing the </body> tag, but above our custom script.
That will load all the needed scripts.
Now we need to modify our existing script to be able to initialize the Firebase instance.
Head back over to Firebase and click the settings gear in the menu.
Then add a new web-app
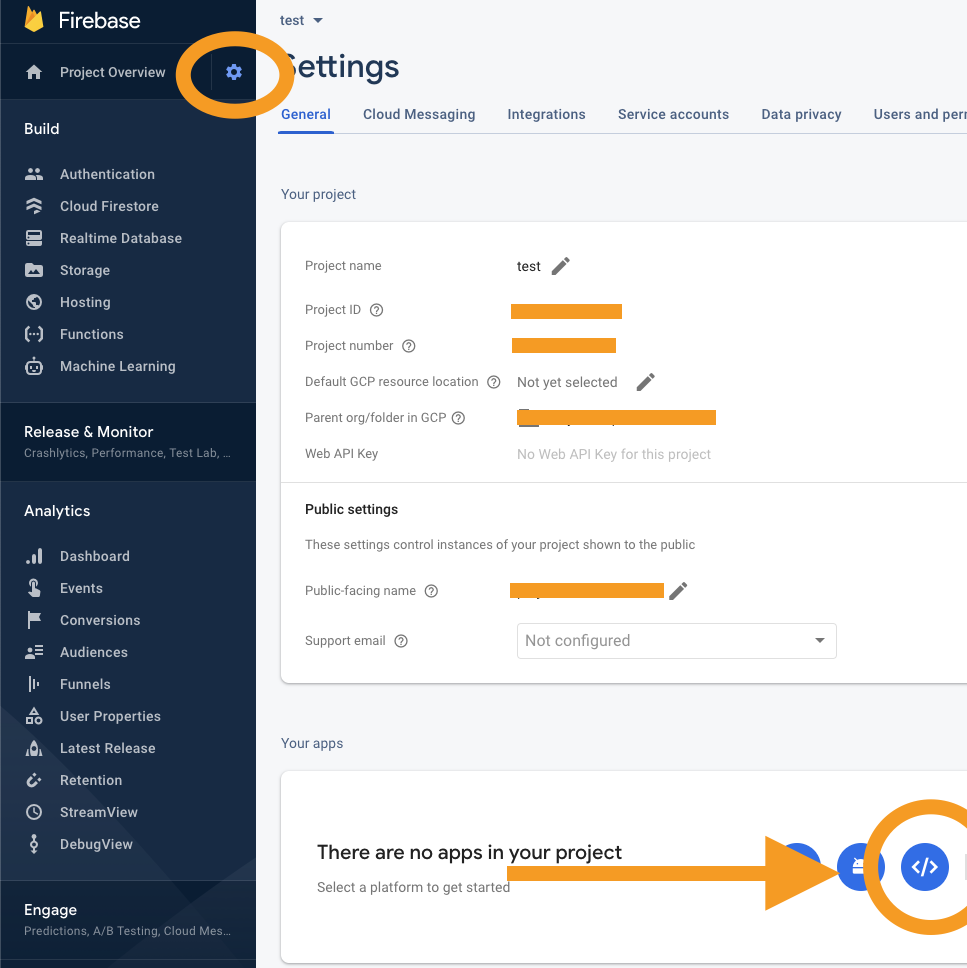
Enter a new one on the next screen, and you are done.
Now grab the bottom part where it states firebaseConfig.
Something like this:
// Your web app's Firebase configuration
const firebaseConfig = {
  apiKey: 'DailyDevTipsIsAmazing',
  authDomain: 'test-BLAAT.firebaseapp.com',
  databaseURL: 'https://test-BLAAT-default-rtdb.firebaseio.com',
  projectId: 'test-BLAAT',
  storageBucket: 'test-BLAAT.appspot.com',
  messagingSenderId: 'BLAATBLAAT',
  appId: '1:BLAATBLAAT:web:BLAATBLAATBLAAT',
};
// Initialize Firebase
firebase.initializeApp(firebaseConfig);
Enter your version of this on top of your custom script.
We also need to initialize our database.
const database = firebase.database();Then we will make a save function to create a new database entry.
The function looks like this.
const save = () => {
  const uuid = Date.now().toString(36) + Math.random().toString(36).substr(2);
  firebase.database().ref(uuid).set({
    body: cssBody.value,
    before: cssBefore.value,
    after: cssAfter.value,
  });
};
This function uses ES6 Arrow function and creates a unique id based on the date and a random string.
Then we call the Firebase database and create a new ref (entry) on our unique ID.
We then set the three elements that make our CSS art.
Let’s add this function to a button.
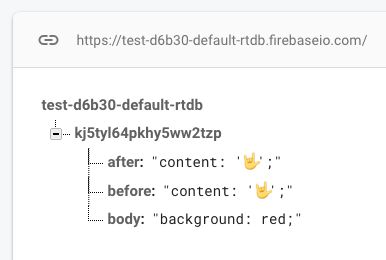
<button onclick="save()">I'm done ✨</button>If we now make some art and click the button, we push stuff to Firebase, which looks like this in the database.
Perhaps this is enough for you. Then you can download the following code.
Retrieving the art
Since we saved our CSS art in the Firebase database, we can also retrieve it.
In the example we created above, we can retrieve this CSS code using the ref (the unique id): kj5tyl64pkhy5ww2tzp.
Let our app read this from the URL based on a query string parameter.
Our URL will look like this.
http://oursite.com/view.html?id=kj5tyl64pkhy5ww2tzp
Note: It would be even cooler if we could have view/id, but in our case, Netlify doesn’t support that fully.
So what we want to get is the id parameter.
We can use the JavaScript URLSearchParams for that.
const currentURL = window.location.search;
const search = new URLSearchParams(currentURL);
const searchId = search.get('id');
This code gets the current URL from the location bar. It then converts that into something called URLSearchParams, which has its properties.
These we can get by using the get method.
Now our searchId variable contains kj5tyl64pkhy5ww2tzp.
With this, we can query Firebase for the values.
if (searchId.length >= 1) {
  const noDivRef = firebase.database().ref(searchId);
  noDivRef.once('value', function (data) {
    const divData = data.val();
    iFrame.open();
    iFrame.writeln(`
      <style>
      body { ${divData.body} }
      body:before { ${divData.before} }
      body:after { ${divData.after} }
      </style>`);
    iFrame.close();
  });
}
We check if the searchId is set and if so, we query the database on this ref.
We get the actual value by using the once function if we get it. We use this one because it doesn’t change for now.
Then we use the same way to write the stylesheet for this iframe.
This will give us the following result.

What we made so far you can download here, download the no-div css art playground.
Hosting the tool online on Netlify
What we have made so far.
- Retrieving values from text areas
- Write these values to an iframe
- Save the CSS Art into Firebase
- Retrieve the CSS Art from Firebase
Now, all we need to do is host it somewhere. In my case, I choose to host it on Netlify because I love how easy the git deployments are.
Because this is a plain HTML script using only vanilla JavaScript, we don’t need any fancy deployment settings and can deploy from a git repo.
In this article, you can find more information on deploying to Netlify.
Future ideas
This first version of nodivs.com is already pretty cool, but I got some ideas to make it even more awesome.
- Having a :root settings menu
- Allowing animations
- Edit your CSS Art
- CSS Formatter/Linter
- Social Share images based on the art
What would you add to this?
Thank you for reading, and let’s connect!
Thank you for reading my blog. Feel free to subscribe to my email newsletter and connect on Facebook or Twitter